
This guide walks you through how to build a SUV storage drawer from scratch, using simple tools and materials. You’ll create a sturdy, slide-out storage system that keeps gear organized, secure, and easily accessible during road trips, camping, or daily use.
Key Takeaways
- Custom Fit: Building your own SUV storage drawer ensures a perfect fit for your vehicle’s cargo area, maximizing space and usability.
- Cost-Effective: DIY drawers are often cheaper than commercial options, especially when using affordable materials like plywood and basic hardware.
- Durability Matters: Use high-quality plywood (½” or ¾”) and reinforced corners to ensure your drawer can handle heavy loads without warping.
- Smooth Operation: Install heavy-duty drawer slides rated for at least 100 lbs to allow easy sliding, even when fully loaded.
- Secure Mounting: Anchor the drawer to your SUV’s tie-down points or floor using bolts and brackets to prevent movement during driving.
- Weather Protection: Seal wood with polyurethane or use moisture-resistant materials if you plan to store wet or dirty gear.
- Personalization: Add dividers, foam lining, or a lockable lid to tailor the drawer to your specific needs—camping, tools, or emergency kits.
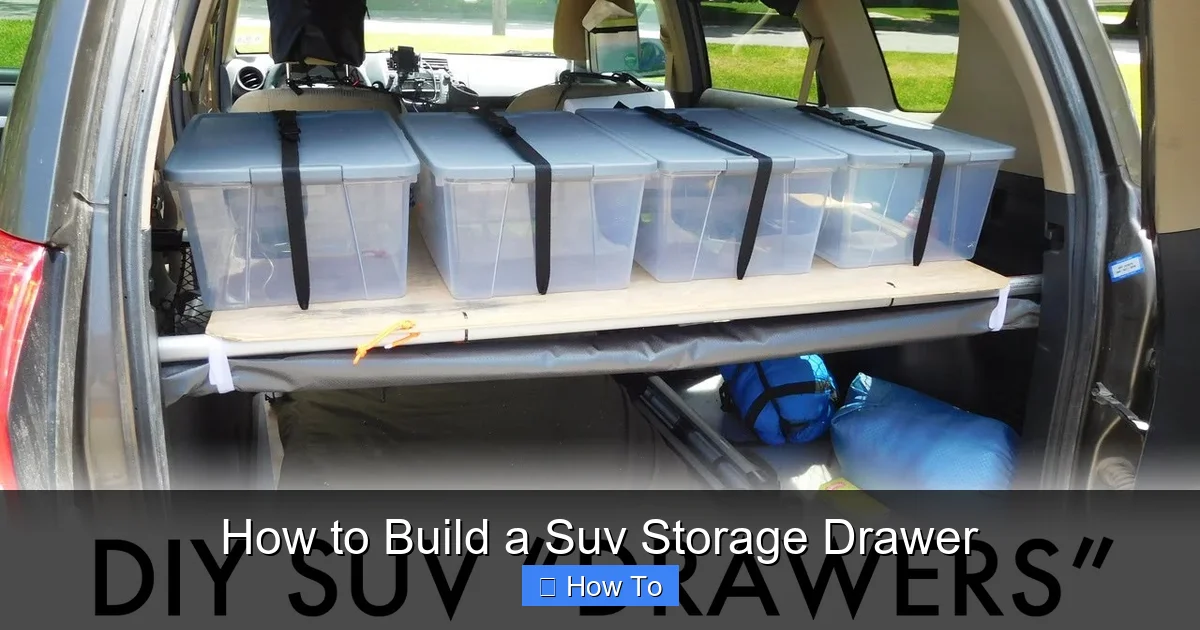
How to Build a SUV Storage Drawer
If you’ve ever rummaged through your SUV’s cargo area looking for a flashlight, jumper cables, or camping gear, you know how quickly things can get messy. A cluttered trunk isn’t just inconvenient—it’s unsafe. Loose items can become projectiles in sudden stops or accidents. That’s where a custom SUV storage drawer comes in.
Building your own storage drawer is a practical, rewarding project that gives you full control over size, materials, and features. Whether you’re a weekend adventurer, a tradesperson, or just someone who likes a tidy car, this guide will show you exactly how to build a SUV storage drawer that’s strong, functional, and tailored to your needs.
In this comprehensive how-to, you’ll learn how to measure your vehicle, choose the right materials, assemble the drawer box, install heavy-duty slides, and securely mount it in your SUV. We’ll also cover tips for weatherproofing, adding dividers, and troubleshooting common issues. By the end, you’ll have a professional-looking storage solution that makes every trip more organized and stress-free.
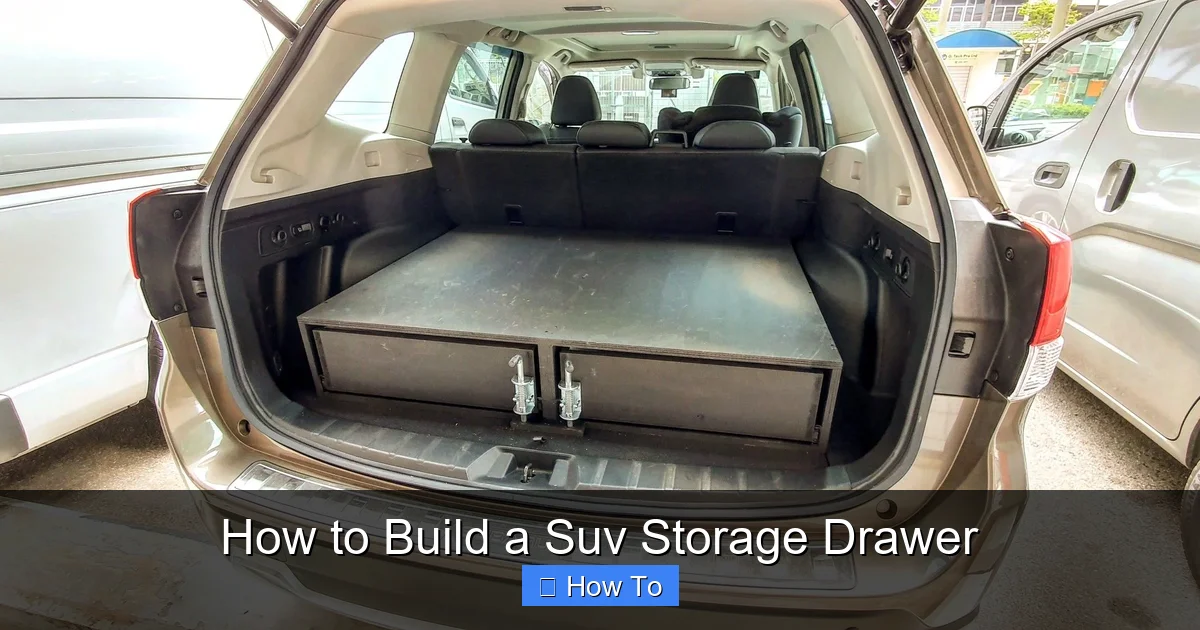
Why Build Your Own SUV Storage Drawer?
Visual guide about How to Build a Suv Storage Drawer
Image source: i.pinimg.com
Before diving into the build, let’s talk about why a DIY approach makes sense. Commercial storage drawers can cost $300 to $800 or more, depending on size and features. While they’re convenient, they often come in standard sizes that don’t perfectly fit every SUV model. Plus, they may lack the customization you want—like specific compartments or a lockable lid.
Building your own drawer lets you:
– Save money (you can build one for under $150)
– Customize the size and layout
– Choose materials that match your needs (lightweight vs. heavy-duty)
– Add personal touches like foam padding or labeling
It’s also a great weekend project that builds useful skills in woodworking, measuring, and problem-solving. Even if you’re not experienced, this guide breaks everything down into simple, manageable steps.
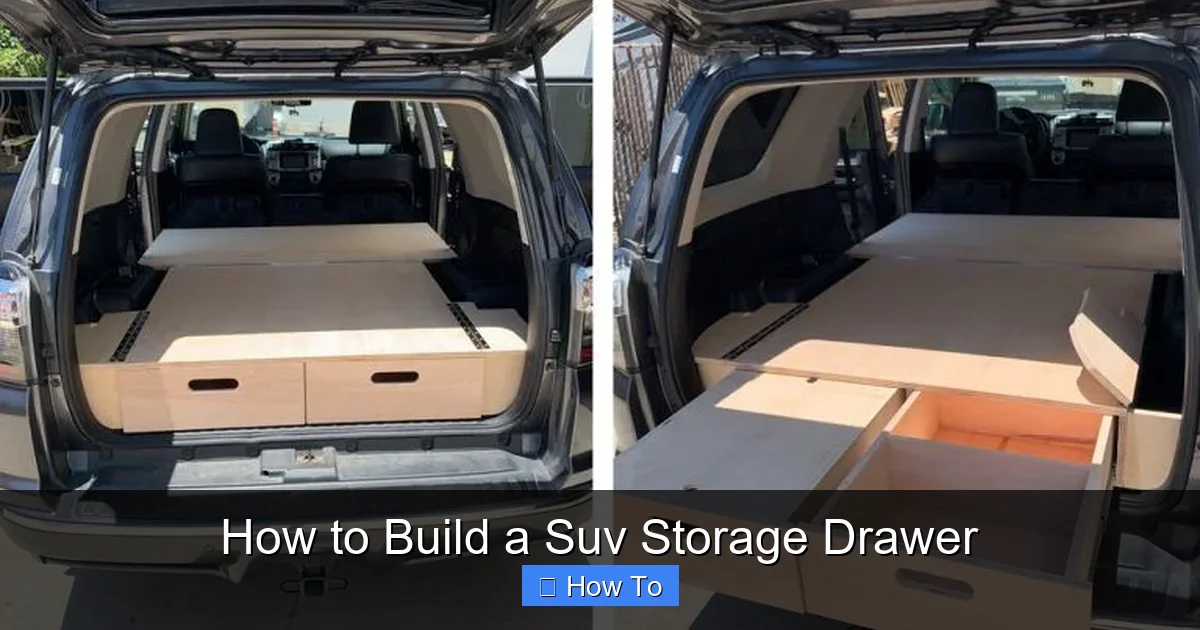
Tools and Materials You’ll Need
Visual guide about How to Build a Suv Storage Drawer
Image source: i.ytimg.com
Before starting, gather all your tools and materials. Having everything ready will keep the project smooth and efficient.
Tools
- Tape measure
- Pencil
- Circular saw or table saw (or ask the hardware store to cut your wood)
- Drill with drill bits
- Screwdriver or impact driver
- Clamps (at least two)
- Sandpaper (120 and 220 grit)
- Level
- Safety goggles and gloves
Materials
- ½” or ¾” plywood (birch or AC-grade recommended) – enough for the base, sides, front, and back
- Heavy-duty drawer slides (100–150 lb capacity, full extension) – 2 pieces
- Wood screws (1¼” and 2”)
- Wood glue
- Polyurethane sealant or paint (optional, for weather resistance)
- Foam liner or carpet (optional, for interior)
- Hinges and latch (if adding a lid)
- Bolts, washers, and nuts (for mounting to SUV floor)
- Mounting brackets (optional, for extra support)
Optional Upgrades
- Drawer dividers (made from thin plywood or plastic)
- Locking mechanism
- LED light strip (battery-powered)
- Non-slip matting for the base
Step 1: Measure Your SUV’s Cargo Area
The key to a perfect fit is accurate measurements. Start by clearing out your SUV’s cargo space completely. Remove any mats, seats, or accessories.
Measure the Floor Space
Use your tape measure to record:
– Length (front to back)
– Width (side to side)
– Height (from floor to the lowest point of the ceiling or seat backs)
Take measurements at multiple points, especially if your cargo area tapers or has wheel wells. Note any obstacles like spare tire compartments, seat anchors, or trim pieces.
Account for Clearance
Leave at least 1–2 inches of clearance on all sides for easy installation and ventilation. If you plan to add a lid, allow extra height (about 2–3 inches) so it opens fully without hitting the ceiling.
Plan the Drawer Dimensions
For most SUVs, a drawer that’s 30–36 inches long, 18–24 inches wide, and 6–8 inches deep works well. Adjust based on your needs:
– Shallow drawer (4–6”): ideal for tools, first aid kits, or small gear
– Deep drawer (8–10”): better for camping equipment, coolers, or bulky items
Write down your final dimensions. For example: 34” L x 20” W x 7” H.
Step 2: Cut the Plywood Pieces
Now it’s time to cut your plywood. If you don’t have a saw, most hardware stores will cut it for you for a small fee—just bring your measurements.
List of Pieces
Based on a 34” x 20” x 7” drawer:
– Base: 34” x 20”
– Front and back: 20” x 7” (2 pieces)
– Sides: 34” x 7” (2 pieces)
Double-check your cuts for accuracy. Even small errors can affect how the pieces fit together.
Tips for Clean Cuts
– Use a straightedge or guide to keep the saw on track
– Score the cut line with a utility knife first to reduce splintering
– Sand all edges with 120-grit sandpaper to remove rough spots
Step 3: Assemble the Drawer Box
With all pieces cut, it’s time to build the box. This is the core of your SUV storage drawer.
Apply Wood Glue
Run a thin bead of wood glue along the edges where the sides will attach to the base. Glue helps strengthen the joints and prevents squeaking.
Attach the Sides to the Base
Place the base flat on your work surface. Position one side piece along the long edge, aligning the bottom and ends. Use clamps to hold it in place.
Drill pilot holes (slightly smaller than your screws) to prevent the wood from splitting. Then drive 1¼” wood screws through the side into the base—about 3–4 screws per side.
Repeat for the other side.
Attach the Front and Back
Now attach the front and back pieces between the sides. These should fit snugly into the ends.
Apply glue to the edges, clamp, drill pilot holes, and screw in place. Use 2” screws here for extra strength.
Reinforce the Corners
For added durability, add small wooden corner braces or extra screws at the inside corners. This helps the drawer handle heavy loads without flexing.
Let the Glue Dry
Allow the wood glue to dry for at least 2–4 hours (or as directed on the label) before moving to the next step.
Step 4: Install the Drawer Slides
The slides are what make your drawer slide in and out smoothly. Heavy-duty, full-extension slides are essential—they let you access the entire drawer without reaching blindly.
Choose the Right Slides
Look for slides rated for at least 100 lbs (150 lbs is better if you plan to store heavy items). Full-extension means the drawer pulls out completely, so you can see everything inside.
Common brands include Accuride, Knipex, and Hafele. Buy two matching slides—one for each side.
Mount the Slides to the Drawer
Most slides come with two parts: one that attaches to the drawer (the “drawer member”) and one that attaches to the SUV floor (the “cabinet member”).
Start by attaching the drawer member to the sides of your drawer box. Position it about 1 inch from the bottom edge and flush with the front.
Use the screws provided with the slides. Drill pilot holes first to avoid splitting the wood.
Test the Fit
Before mounting the other half, test the drawer in your SUV. Slide it in and out to make sure it moves freely and doesn’t bind.
Step 5: Mount the Drawer in Your SUV
Now it’s time to secure the drawer inside your vehicle. This step ensures it won’t shift or tip during driving.
Position the Drawer
Place the drawer in the cargo area where you want it. Make sure it’s level and centered. Use a level to check.
Mark Mounting Points
With the drawer in place, mark where the cabinet member of the slide will attach to the SUV floor. Use a pencil to mark screw holes.
Drill and Secure
Drill pilot holes through the SUV floor (be careful not to drill into fuel lines or wiring—check your vehicle manual). Then attach the cabinet member using bolts, washers, and nuts for a secure hold.
If your SUV has factory tie-down points, use those for anchoring. You can also add L-brackets for extra support.
Final Test
Slide the drawer in and out several times. It should move smoothly without wobbling. Load it with weight (like bags of sand) to test stability.
Step 6: Add Finishing Touches
Your drawer is functional, but a few upgrades make it even better.
Seal the Wood
Apply 2–3 coats of polyurethane to protect the plywood from moisture, dirt, and scratches. Let each coat dry fully before applying the next.
Line the Interior
Cut foam or carpet to fit the bottom and sides. This reduces noise, protects items, and gives a clean look. Use spray adhesive to attach.
Install Dividers
Cut thin plywood or plastic sheets to create compartments. Glue or screw them in place. Label sections for tools, first aid, snacks, etc.
Add a Lid (Optional)
Cut a piece of plywood to fit the top. Attach hinges to the back and a latch to the front. This keeps items secure and dust-free.
Install a Lock (Optional)
Add a small hasp and padlock for security, especially if storing valuables.
Troubleshooting Common Issues
Even with careful planning, you might run into problems. Here’s how to fix them:
Drawer Doesn’t Slide Smoothly
– Check that slides are aligned and not bent
– Ensure the drawer isn’t overloaded
– Lubricate slides with silicone spray
Drawer Wobbles or Shifts
– Tighten all mounting bolts
– Add rubber feet or anti-slip pads to the base
– Use additional brackets for support
Wood Splits or Cracks
– Always drill pilot holes before screwing
– Use shorter screws in thinner wood
– Reinforce weak areas with wood filler or extra braces
Drawer Doesn’t Fit
– Double-check measurements
– Sand edges slightly for a tighter fit
– Consider trimming the drawer if it’s too large
Safety Tips
Building and using your drawer safely is crucial.
– Always wear safety goggles and gloves when cutting or drilling
– Secure the drawer properly to prevent movement during driving
– Don’t overload the drawer—stay within the slide’s weight limit
– Keep heavy items low and centered to maintain vehicle balance
– Check bolts and slides regularly for wear
Conclusion
Building a SUV storage drawer is a smart, cost-effective way to organize your vehicle and protect your gear. With basic tools and a little patience, you can create a custom solution that fits your lifestyle—whether you’re hauling camping gear, tools, or family supplies.
This project not only saves money but also gives you pride in a job well done. Your drawer will keep your SUV tidy, your items secure, and your trips more enjoyable. Plus, it’s a great conversation starter at campsites or job sites.
So grab your tape measure, pick up some plywood, and start building. Your organized, adventure-ready SUV is just a weekend away.