
This guide teaches you how to calculate Suva water analysis accurately and efficiently. You’ll learn the essential parameters, formulas, and practical steps to evaluate water quality using the Suva method, ensuring reliable results for environmental or industrial use.
Key Takeaways
- Understand the Suva method: It’s a standardized approach to assess water quality by measuring key chemical and physical parameters.
- Identify core parameters: Focus on pH, turbidity, dissolved oxygen, conductivity, and total dissolved solids (TDS).
- Use correct formulas: Apply established equations to convert raw data into meaningful analysis results.
- Calibrate instruments properly: Accurate readings depend on well-maintained and calibrated testing equipment.
- Record data systematically: Maintain detailed logs for consistency, comparison, and reporting.
- Interpret results wisely: Compare findings against regulatory standards to determine water safety and suitability.
- Troubleshoot common issues: Learn to spot and fix errors in sampling, testing, or calculation.
Introduction: What Is Suva Water Analysis and Why Does It Matter?
Water is one of our most vital resources, and ensuring its quality is essential for health, agriculture, industry, and the environment. Whether you’re managing a municipal water supply, running an industrial plant, or monitoring a natural water body, understanding water quality is non-negotiable. One effective method used globally is the Suva water analysis—a systematic, science-based approach to evaluating water purity and safety.
The term “Suva” originates from the Swiss Federal Institute of Aquatic Science and Technology (Eawag), which developed rigorous protocols for water testing. Over time, “Suva” has become synonymous with high-standard, reproducible water quality assessment methods. While not a formal brand, the Suva method refers to a set of best practices and calculations used to analyze water samples with precision.
In this guide, you’ll learn how to calculate Suva water analysis from start to finish. We’ll walk you through the essential parameters, the tools you need, the step-by-step calculations, and how to interpret your results. Whether you’re a student, environmental technician, or facility manager, this guide will equip you with the knowledge to perform accurate and reliable water analysis.
By the end, you’ll be able to collect samples correctly, measure key indicators, apply the right formulas, and make informed decisions based on your findings. Let’s dive in.
Step 1: Understand the Core Parameters in Suva Water Analysis
Before you start calculating, you need to know what you’re measuring. The Suva method focuses on a core set of physical and chemical parameters that collectively give a comprehensive picture of water quality. These include:
- pH: Measures how acidic or alkaline the water is. Ideal range is typically 6.5–8.5 for drinking water.
- Turbidity: Indicates cloudiness caused by suspended particles. Measured in NTU (Nephelometric Turbidity Units).
- Dissolved Oxygen (DO): Essential for aquatic life. Measured in mg/L. Healthy water usually has 5–10 mg/L.
- Electrical Conductivity (EC): Reflects the water’s ability to conduct electricity, which correlates with ion concentration. Measured in µS/cm.
- Total Dissolved Solids (TDS): The total amount of inorganic and organic substances dissolved in water. Often estimated from EC.
- Temperature: Affects chemical reaction rates and dissolved oxygen levels.
Each of these parameters plays a role in determining whether water is safe for consumption, irrigation, or industrial use. The Suva method emphasizes consistency and accuracy in measuring these values, as small errors can lead to incorrect conclusions.
Why These Parameters Matter
For example, low pH (acidic water) can corrode pipes and harm aquatic ecosystems. High turbidity may indicate pollution or sediment runoff. Low dissolved oxygen can suffocate fish and other organisms. Conductivity and TDS help identify contamination from salts, fertilizers, or industrial discharge.
By monitoring these factors together, the Suva method provides a holistic view of water health.
Step 2: Gather the Right Tools and Equipment
Accurate calculations start with accurate measurements. To perform a proper Suva water analysis, you’ll need the following equipment:
- pH meter: Digital meters are more reliable than test strips. Ensure it’s calibrated before use.
- Turbidity meter (nephelometer): Measures light scattering in water. Essential for assessing clarity.
- Dissolved oxygen meter or test kit: Electrochemical sensors are preferred for precision.
- Conductivity meter: Measures EC in microsiemens per centimeter (µS/cm).
- Thermometer: To record water temperature during testing.
- Sample containers: Clean, sterile bottles made of glass or high-density polyethylene.
- Calibration solutions: Standard buffers for pH (4.0, 7.0, 10.0), conductivity standards, and DO calibration fluids.
- Data logbook or digital spreadsheet: To record all measurements and calculations.
Tips for Equipment Maintenance
Always clean probes with distilled water after use. Store meters in protective cases. Calibrate instruments regularly—ideally before each use or daily if used frequently. A poorly calibrated pH meter, for instance, can give readings off by a full unit, leading to major errors in analysis.
Investing in quality equipment may cost more upfront, but it saves time and improves accuracy in the long run.
Step 3: Collect Water Samples Properly
Even the best tools can’t save a bad sample. Proper sampling is critical to the integrity of your Suva water analysis.
Choose the Right Sampling Location
Select a spot that represents the water body or system you’re testing. For rivers, avoid stagnant areas. For taps, let the water run for 2–3 minutes before collecting. For wells, use a dedicated sampler to avoid surface contamination.
Use Clean Containers
Rinse sample bottles with the water you’re testing (not tap water) to avoid contamination. Fill bottles to the top to minimize air exposure, especially for DO testing.
Label and Document
Label each sample with:
- Date and time
- Location (GPS coordinates if possible)
- Weather conditions
- Sampler’s name
Store samples in a cool, dark place and analyze within 24 hours for best results. Some parameters, like DO, should be tested on-site immediately.
Step 4: Measure Each Parameter Step-by-Step
Now that your samples are ready, it’s time to take measurements. Follow these steps carefully.
Measuring pH
1. Calibrate your pH meter using buffer solutions (4.0, 7.0, and 10.0).
2. Rinse the probe with distilled water and gently blot dry.
3. Immerse the probe in the water sample.
4. Wait for the reading to stabilize (usually 30–60 seconds).
5. Record the pH value.
Tip: Avoid touching the probe to the container’s sides or bottom.
Measuring Turbidity
1. Turn on the turbidity meter and allow it to warm up.
2. Fill a clean cuvette with the water sample.
3. Wipe the cuvette with a lint-free cloth to remove fingerprints.
4. Insert the cuvette into the meter and close the lid.
5. Read the value in NTU and record it.
Note: Avoid shaking the sample, as bubbles can affect readings.
Measuring Dissolved Oxygen (DO)
1. Calibrate the DO meter using air-saturated water or a zero-oxygen solution.
2. Stir the sample gently with the probe to ensure even distribution.
3. Wait for the reading to stabilize.
4. Record DO in mg/L.
Important: DO decreases over time, so test immediately after sampling.
Measuring Electrical Conductivity (EC)
1. Calibrate the conductivity meter with a standard solution (e.g., 1413 µS/cm).
2. Rinse the probe with distilled water.
3. Immerse it in the sample.
4. Wait for a stable reading.
5. Record EC in µS/cm.
Measuring Temperature
Use a calibrated thermometer or the built-in sensor on your meter. Record temperature in degrees Celsius (°C), as it affects other parameters like DO and conductivity.
Step 5: Calculate Total Dissolved Solids (TDS) from Conductivity
TDS is not always measured directly. Instead, it’s often calculated from EC using a simple formula:
TDS (mg/L) = EC (µS/cm) × Conversion Factor
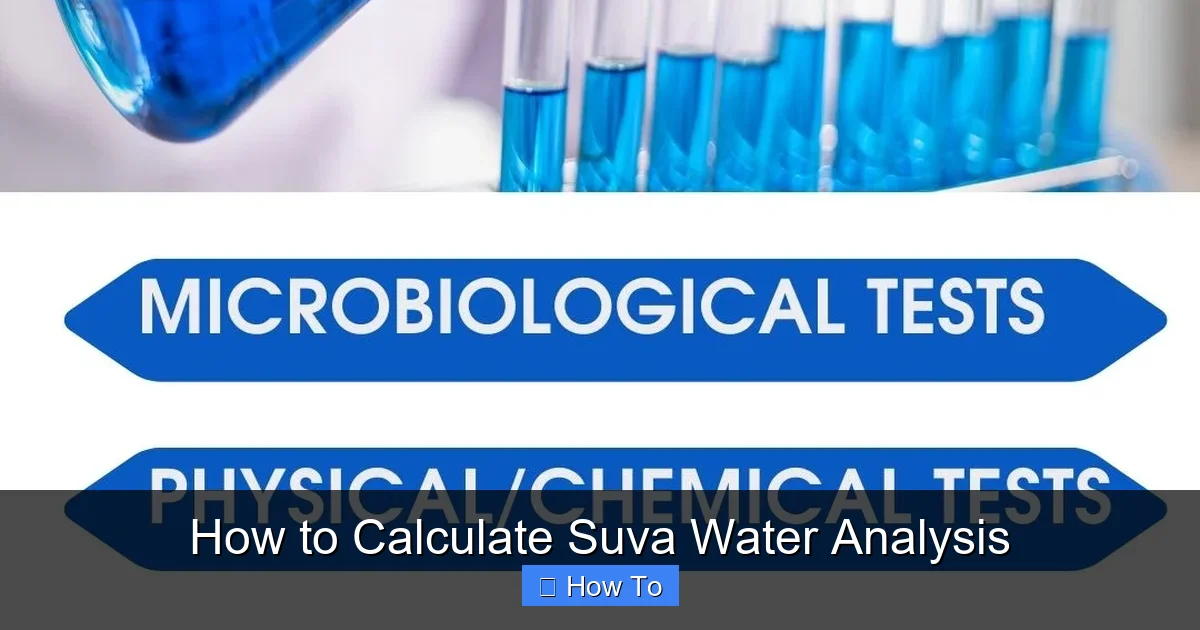
Visual guide about How to Calculate Suva Water Analysis
Image source: aquatreat.co.ke
Visual guide about How to Calculate Suva Water Analysis
Image source: spibo.in
The conversion factor typically ranges from 0.55 to 0.75, depending on the water’s ionic composition. For most freshwater sources, a factor of 0.65 is widely accepted.
Example Calculation
Suppose your conductivity reading is 450 µS/cm.
TDS = 450 × 0.65 = 292.5 mg/L
So, the total dissolved solids in the sample are approximately 292.5 mg/L.
Tip: For seawater or highly mineralized water, use a higher factor (up to 0.8). Always note the factor used in your report.
Step 6: Apply Correction Factors for Temperature (If Needed)
Some parameters are temperature-dependent. For example, conductivity increases with temperature. To standardize results, you may need to apply temperature correction.
The standard reference temperature is 25°C. Use this formula to correct EC:
EC25 = ECt / [1 + α(T – 25)]
Where:
- EC25 = Conductivity at 25°C
- ECt = Measured conductivity at temperature T
- α = Temperature coefficient (typically 0.02 per °C for freshwater)
- T = Measured temperature in °C
Example
If EC = 500 µS/cm at 30°C:
EC25 = 500 / [1 + 0.02(30 – 25)] = 500 / [1 + 0.1] = 500 / 1.1 ≈ 454.5 µS/cm
Now use this corrected value to calculate TDS.
Step 7: Interpret Your Results Using Suva Standards
Once you’ve calculated all values, compare them to established water quality standards. While Suva doesn’t publish a single global standard, it follows guidelines similar to those from the World Health Organization (WHO) and EPA.
Here’s a quick reference table:
| Parameter | Ideal Range (Drinking Water) | Action Level |
|---|---|---|
| pH | 6.5 – 8.5 | < 6.0 or > 9.0 |
| Turbidity | < 1 NTU | > 5 NTU |
| DO | 5 – 10 mg/L | < 3 mg/L (harmful to aquatic life) |
| TDS | < 500 mg/L | > 1000 mg/L (unpleasant taste) |
| Conductivity | < 1000 µS/cm | > 2000 µS/cm (indicates high salinity) |
Example Interpretation
Suppose your analysis shows:
- pH: 7.2 → Good
- Turbidity: 3.5 NTU → Slightly high; may need filtration
- DO: 6.8 mg/L → Healthy
- TDS: 620 mg/L → Slightly elevated; monitor for trends
- Conductivity: 950 µS/cm → Acceptable
Overall, the water is mostly safe but may benefit from turbidity reduction.
Step 8: Document and Report Your Findings
A complete Suva water analysis isn’t just about numbers—it’s about communication. Create a clear, professional report that includes:
- Sample identification (location, date, time)
- List of parameters tested
- Raw measurements and calculated values
- Conversion factors and formulas used
- Comparison to standards
- Conclusions and recommendations
Use charts or graphs to visualize trends, especially if you’re monitoring over time.
Sample Report Snippet
Sample ID: River_X_2024-05-15
Location: 46.2044° N, 6.1432° E
pH: 7.1
Turbidity: 2.1 NTU
DO: 7.3 mg/L
EC: 480 µS/cm
TDS: 312 mg/L (calculated using 0.65 factor)
Conclusion: Water quality is within acceptable limits. No immediate action required.
Troubleshooting Common Issues in Suva Water Analysis
Even experienced technicians run into problems. Here’s how to handle common issues:
Inconsistent pH Readings
Cause: Dirty probe, expired buffers, or poor calibration.
Solution: Clean the probe with a mild cleaning solution. Recalibrate with fresh buffers. Store the probe in storage solution.
High Turbidity Without Visible Particles
Cause: Bubbles, scratched cuvette, or instrument error.
Solution: Let the sample settle. Use a new cuvette. Recalibrate the meter.
Low DO Readings in Freshwater
Cause: Warm water, organic pollution, or delayed testing.
Solution: Test immediately. Check for algal blooms or sewage inflows.
TDS Much Higher Than Expected
Cause: High salinity, industrial discharge, or incorrect conversion factor.
Solution: Verify EC reading. Use a more accurate factor based on water type.
Equipment Drift Over Time
Cause: Aging sensors or lack of maintenance.
Solution: Schedule regular servicing. Keep a maintenance log.
Best Practices for Reliable Suva Water Analysis
To ensure your calculations are trustworthy, follow these best practices:
- Calibrate daily: Don’t skip calibration—it’s the foundation of accuracy.
- Use replicates: Test each sample at least twice to check consistency.
- Control temperature: Measure and record temperature for all parameters.
- Train your team: Ensure everyone follows the same procedures.
- Audit your process: Periodically review your methods and results.
Consistency is key. Small variations in technique can lead to big differences in results.
Conclusion: Mastering Suva Water Analysis for Better Water Management
Learning how to calculate Suva water analysis empowers you to make informed decisions about water quality. By following this guide, you now know how to measure key parameters, apply the right formulas, interpret results, and troubleshoot issues.
The Suva method isn’t just about numbers—it’s about protecting health, preserving ecosystems, and ensuring sustainable water use. Whether you’re testing a village well or a factory outflow, your work contributes to a safer, cleaner world.
Remember: accurate analysis starts with careful sampling, precise measurement, and honest reporting. Keep your tools calibrated, your records detailed, and your curiosity alive. With practice, you’ll become confident in performing and interpreting Suva water analysis like a pro.
Start today—your next sample could reveal something important.