
You absolutely can make cross bars for your SUV—but it takes planning, the right materials, and a focus on safety. With basic tools and some creativity, DIY cross bars can be a cost-effective alternative to store-bought options, letting you customize fit and function for your specific needs.
Key Takeaways
- DIY cross bars are possible: With proper materials and design, you can build functional and safe roof cross bars at home.
- Safety is non-negotiable: Poorly constructed bars can fail at high speeds, risking damage or injury—always test and reinforce your build.
- Know your SUV’s roof type: Flush rails, raised rails, or bare roofs each require different mounting solutions.
- Use weather-resistant materials: Aluminum, stainless steel, and marine-grade wood resist rust and wear from sun, rain, and snow.
- Measure twice, cut once: Precise measurements ensure a snug fit and prevent wind noise or shifting during driving.
- Check local laws and weight limits: Some regions regulate roof modifications, and exceeding your SUV’s dynamic load limit is dangerous.
- Consider professional help if unsure: When in doubt, consult a mechanic or fabricator to avoid costly mistakes.
📑 Table of Contents
- Can You Make Cross Bars for an SUV? The Surprising Truth
- Understanding Your SUV’s Roof: The Foundation of a Good Build
- Choosing the Right Materials: Strength, Durability, and Weather Resistance
- Step-by-Step Guide to Building Your Own Cross Bars
- Safety First: What You Must Know Before Hitting the Road
- DIY vs. Buying: When to Build and When to Buy
- Real-World Examples: DIY Cross Bars in Action
- Conclusion: Yes, You Can—But Do It Right
Can You Make Cross Bars for an SUV? The Surprising Truth
If you’ve ever looked at the sleek, aerodynamic cross bars on someone else’s SUV and thought, “I wish I had those,” you’re not alone. Roof racks and cross bars are incredibly useful—they let you haul bikes, kayaks, cargo boxes, and more without sacrificing interior space. But here’s the thing: you don’t always need to spend hundreds of dollars on a brand-name system. In fact, with a little know-how, the right tools, and a solid plan, you can make cross bars for your SUV yourself.
Now, before you grab your drill and a piece of PVC pipe, let’s be clear: this isn’t a weekend project for beginners. Building functional, safe cross bars requires understanding your vehicle’s roof structure, choosing durable materials, and following precise construction steps. But for the hands-on DIYer, it’s not only possible—it can be deeply satisfying. You’ll gain a custom solution tailored to your SUV’s dimensions and your specific hauling needs, all while saving money and learning something new.
The key is to approach this project with respect for safety and functionality. A poorly made cross bar can loosen at highway speeds, damage your roof, or worse—cause an accident. But when done right, homemade cross bars can be just as effective as commercial ones. Whether you’re prepping for a camping trip, moving furniture, or just want extra storage, this guide will walk you through everything you need to know to build cross bars that work, last, and keep you safe on the road.
Understanding Your SUV’s Roof: The Foundation of a Good Build

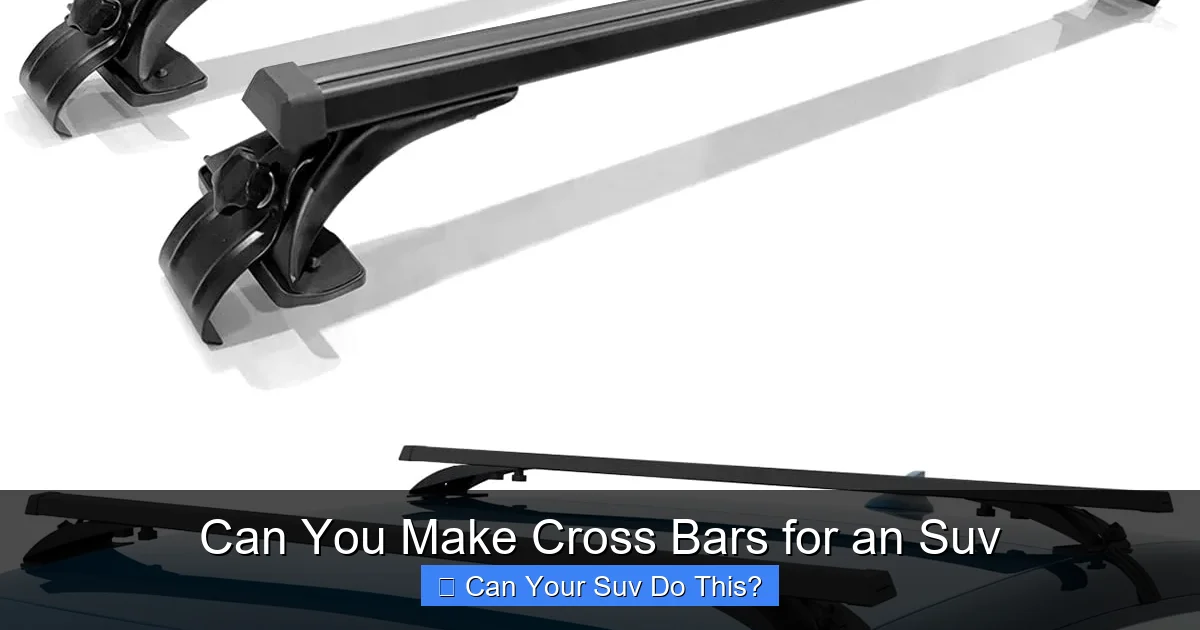
Visual guide about Can You Make Cross Bars for an Suv
Image source: i.ytimg.com
Before you even think about cutting metal or drilling holes, you need to understand what kind of roof your SUV has. Not all roofs are created equal, and the type of roof determines how—and whether—you can install cross bars, factory or DIY.
Most modern SUVs fall into one of three categories: those with flush-mounted roof rails, those with raised roof rails, and those with a completely bare roof (no rails at all). Let’s break them down.
Flush-Mounted Roof Rails
These are the most common. You’ll see them as thin, low-profile metal strips running along the sides of your roof. They’re usually hidden under plastic caps and are designed to accept factory-installed cross bars. If your SUV has these, you’re in luck—they provide anchor points that make DIY cross bars much easier to install. You can often remove the plastic caps to reveal threaded inserts or T-slots where you can bolt or clamp your homemade bars.
For example, many Toyota Highlanders, Honda CR-Vs, and Subaru Foresters use this system. The rails are typically made of aluminum or steel and are securely bonded to the roof. Because they’re factory-installed, they’re engineered to handle significant weight—usually between 100 and 165 pounds dynamic (moving) load, depending on the vehicle.
Raised Roof Rails
These are the more visible, higher-profile rails that sit several inches above the roof surface. They’re common on trucks, full-size SUVs like the Ford Explorer or Chevrolet Tahoe, and off-road vehicles. Raised rails are stronger and often designed for heavy-duty use. They usually have pre-drilled holes or clamp points that make attaching cross bars straightforward.
With raised rails, you can often use U-bolts or clamp-style mounts to secure your DIY cross bars without drilling into the roof itself. This is a major advantage—it reduces the risk of leaks or structural damage. Just make sure your clamps are tight and use rubber padding to protect the rails from scratches.
Bare Roofs (No Rails)
This is the trickiest scenario. If your SUV has a smooth, uninterrupted roof with no rails—like some older models or compact crossovers—you’ll need to get creative. In these cases, you might need to use foot pads that clamp to the door frames or windshield edges, similar to how some aftermarket roof racks work.
However, drilling into a bare roof is risky. It can compromise the structural integrity, lead to water leaks, and void your warranty. If you go this route, use high-quality sealants like butyl tape or silicone, and consider consulting a professional. Alternatively, you might opt for a temporary solution like magnetic or suction-based racks—though these are generally not recommended for heavy loads or high speeds.
Measuring Your Roof: The First Step to a Perfect Fit
No matter your roof type, accurate measurements are crucial. Start by measuring the distance between the front and rear anchor points (rails or door frames). This will determine the length of your cross bars. Then, measure the width of your roof to ensure the bars span properly without overhang.
Use a flexible tape measure and take multiple readings. Even a half-inch error can cause wind noise, vibration, or poor load distribution. Mark your measurements clearly and double-check them before cutting any materials.
Also, note the height of your rails or the curvature of your roof. This affects how you design your mounting brackets. A flat bar might not sit flush on a curved roof, leading to gaps and instability. You may need to add shims or custom-shaped mounts to ensure a tight fit.
Choosing the Right Materials: Strength, Durability, and Weather Resistance
Now that you know your roof type, it’s time to pick materials. The goal is to build cross bars that are strong enough to hold your gear, resistant to the elements, and safe at highway speeds. Let’s look at the best options.
Aluminum: The DIY Favorite
Aluminum is the go-to material for most DIY cross bar projects—and for good reason. It’s lightweight, corrosion-resistant, and relatively easy to work with. Most commercial cross bars are made from extruded aluminum, so you’re mimicking the pros.
Look for square or rectangular aluminum tubing with a wall thickness of at least 1/8 inch. Common sizes include 1.5” x 1.5” or 2” x 1”. You can find this at hardware stores, metal suppliers, or online. Aluminum is also easy to drill, cut with a hacksaw or miter saw, and can be polished or powder-coated for a finished look.
One tip: use marine-grade aluminum (like 6061-T6) if you live in a humid or salty environment. It holds up better against rust and UV exposure.
Stainless Steel: Heavy-Duty Option
If you’re hauling heavy loads—like a rooftop tent or multiple kayaks—stainless steel is a strong choice. It’s incredibly durable and resists bending under pressure. However, it’s heavier than aluminum and harder to cut and shape without power tools.
Stainless steel tubing is more expensive, but it’s worth it if you need maximum strength. Just remember: the added weight means your SUV’s roof must handle the extra load. Check your owner’s manual for the dynamic load limit (usually 100–165 lbs).
Wood: The Rustic Alternative
Yes, you can make cross bars out of wood—especially if you’re going for a rugged, outdoor look. Hardwoods like oak, maple, or marine-grade plywood can work, but they require sealing to prevent rot and warping.
Wood is easy to cut and shape, and it absorbs vibrations well, reducing wind noise. However, it’s not as strong as metal and can degrade over time. If you choose wood, seal it with multiple coats of marine varnish or epoxy resin. Also, use metal brackets for mounting to avoid splitting the wood.
Plastic and PVC: Not Recommended
While PVC pipes are cheap and easy to work with, they’re not suitable for cross bars. They can crack under UV exposure, bend under load, and fail at high speeds. Avoid them unless you’re building a temporary, low-weight solution for slow driving.
Fasteners and Hardware
Use stainless steel bolts, nuts, and washers to prevent rust. For clamping to rails, consider U-bolts with rubber padding or custom CNC-machined clamps. Always use lock washers or thread locker (like Loctite) to prevent loosening from vibration.
Step-by-Step Guide to Building Your Own Cross Bars
Ready to build? Here’s a practical, step-by-step process to make cross bars that are safe, functional, and tailored to your SUV.
Step 1: Design and Planning
Start with a sketch. Draw your cross bars to scale, including length, width, and mounting points. Decide whether you want fixed bars or removable ones. Removable bars are great if you don’t always need them.
Consider adding T-slots or holes along the top of the bars so you can attach accessories like bike racks or cargo baskets. This adds versatility.
Step 2: Cut the Bars
Using a miter saw or hacksaw, cut your aluminum or steel tubing to the measured length. File down any sharp edges to prevent cuts and reduce wind noise.
If you’re using wood, sand the surfaces smooth and round the corners slightly to improve aerodynamics.
Step 3: Create Mounting Brackets
This is the most critical part. Your brackets must securely attach the bars to your roof rails or door frames.
For flush rails: Drill holes in the bottom of the bars and use bolts that thread into the rail inserts. Use rubber washers to protect the roof.
For raised rails: Build clamp-style brackets from flat aluminum or steel. Shape them to fit snugly around the rail, then secure with U-bolts or bolts. Add rubber padding to prevent scratching.
For bare roofs: Use foot pads that clamp to the door frames. These are available online or can be fabricated from angle iron and rubber.
Step 4: Assemble and Test Fit
Attach the brackets to the bars, then place them on your SUV. Check for even spacing, level alignment, and secure fit. Make sure there’s no wobbling or gaps.
Adjust as needed. You may need to add shims or tweak the bracket angles.
Step 5: Secure and Seal
Once everything fits, tighten all bolts and apply thread locker. If you drilled into the roof, seal the holes with butyl tape and silicone to prevent leaks.
For extra protection, wrap the bars with foam pipe insulation or adhesive-backed rubber to reduce wind noise and protect your gear.
Step 6: Load Test
Before hitting the highway, test your bars with a light load—like a few bags of mulch or a bicycle. Drive at moderate speeds and listen for rattling or shifting.
Gradually increase the load and speed. If everything stays secure, you’re good to go.
Safety First: What You Must Know Before Hitting the Road
Building cross bars is exciting, but safety can’t be an afterthought. A failed roof rack can cause serious damage or injury. Here’s how to stay safe.
Know Your SUV’s Load Limits
Every SUV has a dynamic load limit—the maximum weight it can safely carry on the roof while moving. This is usually listed in the owner’s manual and ranges from 100 to 165 pounds. Exceeding this limit can damage your roof, affect handling, and increase the risk of rollover.
Also, consider the static load limit (for parked vehicles), which is often higher. But remember: driving puts more stress on the roof.
Distribute Weight Evenly
Never load all your weight on one side or the front. Distribute it evenly across both bars and center it over the vehicle’s axle. This maintains balance and reduces wind resistance.
Use cargo nets or straps to secure your gear. Loose items can shift and throw off your SUV’s stability.
Check Local Laws
Some states and countries have regulations about roof modifications. For example, protruding loads may require flags or lights. Check your local Department of Motor Vehicles (DMV) or transportation authority for rules.
Also, insurance companies may deny claims if modifications aren’t disclosed or are deemed unsafe.
Inspect Regularly
After every trip, check your cross bars for loose bolts, cracks, or corrosion. Vibration and weather can wear down even the best builds over time.
Replace any damaged parts immediately. Don’t wait until it’s too late.
DIY vs. Buying: When to Build and When to Buy
So, should you make cross bars for your SUV or just buy them? The answer depends on your skills, needs, and budget.
When to DIY
– You enjoy hands-on projects and have basic tools.
– You want a custom fit or unique design.
– You’re on a tight budget (DIY can cost $50–$150 vs. $200–$500 for commercial racks).
– You need a temporary or seasonal solution.
When to Buy
– You’re not confident in your building skills.
– You need a high-capacity system for heavy loads.
– You want a warranty and professional support.
– Your SUV has a complex roof system (like panoramic sunroofs).
Many DIYers start with a homemade set and upgrade later. That’s perfectly fine—just prioritize safety at every step.
Real-World Examples: DIY Cross Bars in Action
Let’s look at a few real scenarios where homemade cross bars made a difference.
Case 1: The Weekend Camper
Sarah, a Subaru Outback owner, needed to carry a rooftop tent and camping gear. She built aluminum cross bars with T-slots using materials from a local metal shop. She mounted them to her flush rails with custom brackets and sealed all connections. The total cost: $85. She’s used them for three seasons with no issues.
Case 2: The Kayak Hauler
Mike, a Ford Explorer driver, wanted to transport two kayaks. He used stainless steel tubing and heavy-duty clamps to secure the bars to his raised rails. He added foam padding to protect the kayaks and tested the setup on a 200-mile trip. The bars held firm, and he saved over $300 compared to a commercial rack.
Case 3: The Budget Builder
Jenna, a college student with a Honda CR-V, needed a cheap solution for moving furniture. She used marine-grade plywood and aluminum brackets, sealing everything with epoxy. The bars worked for the move but weren’t intended for long-term use. She plans to upgrade later.
These stories show that DIY cross bars can work—when done responsibly.
Conclusion: Yes, You Can—But Do It Right
So, can you make cross bars for an SUV? Absolutely. With the right knowledge, materials, and attention to safety, a DIY roof rack is within reach for many SUV owners. It’s a rewarding project that saves money, offers customization, and builds practical skills.
But remember: this isn’t a rush job. Take your time, measure carefully, and never compromise on safety. If you’re unsure about any step—especially drilling into your roof—consult a professional. Your SUV, your gear, and your safety are worth the extra caution.
Whether you’re hauling bikes, kayaks, or just extra luggage, homemade cross bars can open up new adventures. Just make sure they’re built to last, and always drive with confidence.
Frequently Asked Questions
Can I really make cross bars for my SUV at home?
Yes, you can make cross bars for your SUV at home if you have basic tools, the right materials, and follow safety guidelines. It’s a feasible DIY project for those with some mechanical skill.
What materials are best for DIY cross bars?
Aluminum is the most popular choice due to its strength, light weight, and corrosion resistance. Stainless steel is great for heavy loads, while marine-grade wood works for lighter, temporary uses.
Will homemade cross bars damage my SUV’s roof?
If installed properly—using clamps, seals, and avoiding unnecessary drilling—homemade cross bars won’t damage your roof. Always use rubber padding and seal any holes to prevent leaks.
How much weight can DIY cross bars hold?
The weight limit depends on your materials and mounting method, but most homemade bars should not exceed your SUV’s dynamic load limit (usually 100–165 lbs). Always check your owner’s manual.
Are DIY cross bars legal?
In most places, yes—as long as they don’t obstruct visibility, exceed load limits, or violate local transportation laws. Check your state or country’s regulations before installing.
Can I use PVC pipes for cross bars?
No, PVC is not recommended. It can crack, bend, or fail at high speeds. Use metal or properly sealed wood instead for safety and durability.