
Adding a trailer hitch to your SUV is easier than you think—with the right tools and guidance, you can do it yourself in a few hours. This guide walks you through every step, from choosing the right hitch to final safety checks.
Key Takeaways
- Choose the correct hitch class: Match your SUV’s towing capacity and intended use (e.g., Class III for small trailers, Class IV for heavier loads).
- Use the right tools: A socket wrench, torque wrench, jack stands, and safety gear are essential for a safe installation.
- Follow the manufacturer’s instructions: Every hitch and SUV model is different—never skip the manual.
- Check local laws and regulations: Some areas require brake controllers or lighting inspections for towed vehicles.
- Test before you tow: Always perform a pre-tow inspection of the hitch, lights, and connections.
- Consider professional help if unsure: If you’re not confident, a certified mechanic can ensure a safe, code-compliant install.
- Maintain your hitch: Regular cleaning and lubrication prevent rust and ensure long-term reliability.
How to Add a Trailer Hitch to Your SUV
So, you’ve decided to add a trailer hitch to your SUV. Maybe you’re planning a camping trip, hauling a small boat, or just want the flexibility to tow a utility trailer. Whatever your reason, installing a trailer hitch is a practical upgrade that can save you money and boost your vehicle’s versatility.
The good news? You don’t need to be a mechanic to do it. With the right tools, a little patience, and this step-by-step guide, you can install a trailer hitch on your SUV safely and correctly—often in under three hours.
In this guide, we’ll walk you through everything you need to know: how to choose the right hitch, gather your tools, prepare your vehicle, install the hitch, and perform a final safety check. We’ll also cover common mistakes, troubleshooting tips, and when it’s best to call in a pro.
Let’s get started!
Why Install a Trailer Hitch on Your SUV?
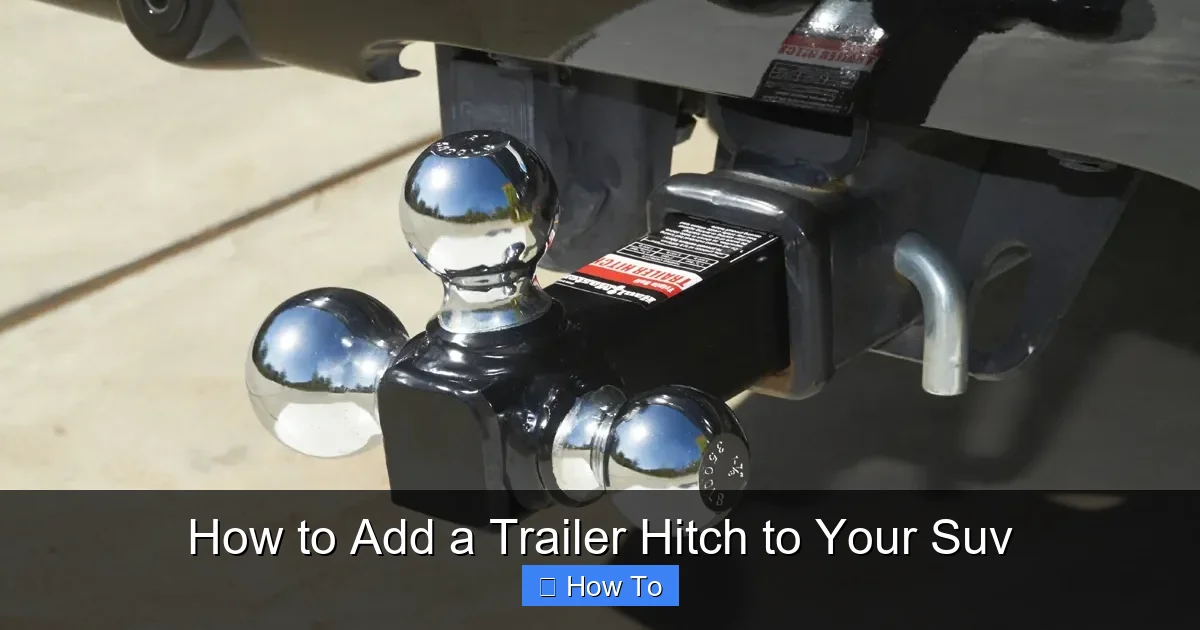
Visual guide about How to Add a Trailer Hitch to Your Suv
Image source: odditymall.com
Before diving into the installation, it’s helpful to understand why adding a trailer hitch is such a smart move.
SUVs are built for adventure. They have the power, ground clearance, and space to handle off-road trips, family road trips, and weekend getaways. But without a hitch, you’re limited in what you can carry.
A trailer hitch allows you to:
– Tow small trailers, campers, or boats
– Haul bikes, kayaks, or cargo carriers
– Transport furniture or landscaping materials
– Expand your vehicle’s utility without buying a truck
Plus, many modern SUVs are designed with hitch mounting points already in place, making installation straightforward.
Step 1: Choose the Right Trailer Hitch
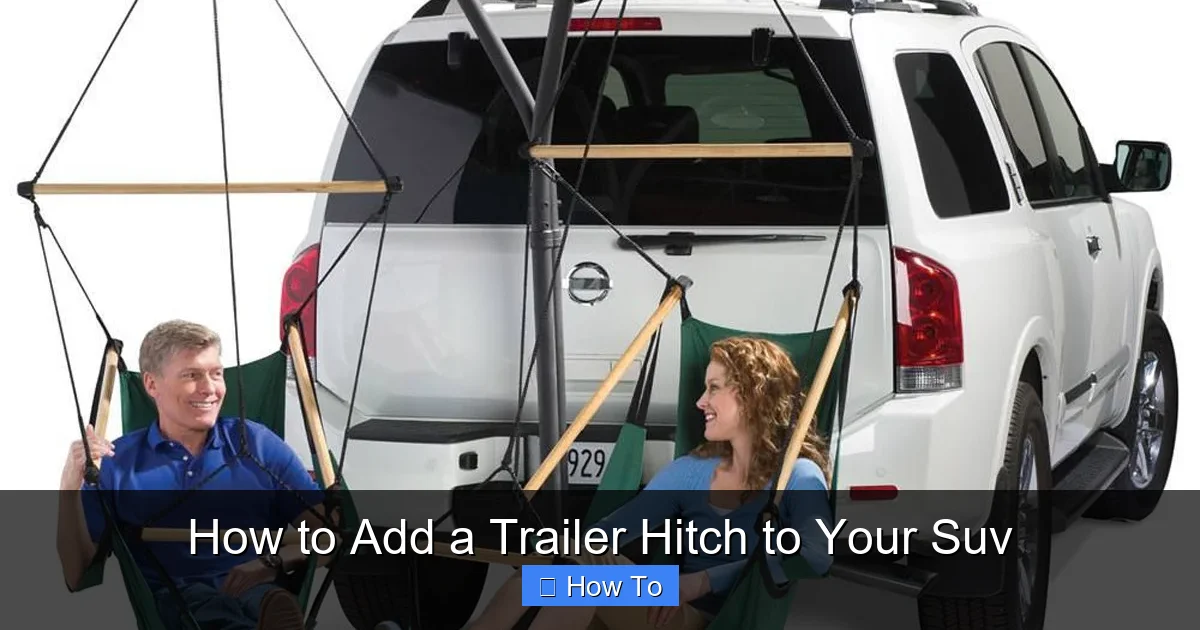
Visual guide about How to Add a Trailer Hitch to Your Suv
Image source: odditymall.com
Not all trailer hitchs are created equal. The first and most important step is selecting the right one for your SUV.
Understand Hitch Classes
Trailer hitches are classified by their weight capacity. Here’s a quick breakdown:
- Class I: Up to 2,000 lbs gross trailer weight, 200 lbs tongue weight. Best for small cargo carriers or bike racks.
- Class II: Up to 3,500 lbs gross, 350 lbs tongue. Good for small trailers and pop-up campers.
- Class III: Up to 6,000 lbs gross, 600 lbs tongue. Ideal for mid-size trailers, small boats, and utility hauling.
- Class IV: Up to 10,000 lbs gross, 1,000 lbs tongue. For heavy-duty towing like large campers or equipment.
- Class V: Over 10,000 lbs. Rare for SUVs—usually for commercial or heavy-duty trucks.
Most SUVs can handle Class III hitches, but always check your owner’s manual for your vehicle’s maximum towing capacity.
Match the Hitch to Your SUV Model
Hitches are vehicle-specific. A hitch made for a Toyota RAV4 won’t fit a Ford Explorer. That’s why it’s crucial to buy a hitch designed for your exact make, model, and year.
Popular brands like Curt, Draw-Tite, and Reese offer custom-fit hitches. Use their online fit guides—just enter your SUV details, and they’ll recommend the right model.
Decide on Hitch Type
There are two main types:
– Receiver hitch: The most common. Features a square tube (usually 2-inch) that accepts various accessories like ball mounts, bike racks, or cargo carriers.
– Fixed tongue hitch: Less common. The ball mount is permanently attached. Less versatile but sometimes cheaper.
For most SUV owners, a 2-inch receiver hitch (Class III or IV) offers the best balance of strength and flexibility.
Check for Additional Features
Some hitches come with:
– Integrated wiring harnesses
– Pre-drilled holes for brake controllers
– Rust-resistant coatings
These extras can save time and improve safety.
Step 2: Gather Your Tools and Materials
Before you start, make sure you have everything you need. Rushing to the hardware store mid-install is frustrating and unsafe.
Essential Tools
- Socket wrench set (metric and standard)
- Torque wrench (critical for proper bolt tightening)
- Jack and jack stands (or a hydraulic floor jack)
- Wheel chocks
- Safety glasses and gloves
- Penetrating oil (like WD-40)
- Wire brush
- Measuring tape
- Marker or chalk
Optional but Helpful Tools
- Impact wrench (speeds up bolt removal)
- Drill and drill bits (if modifications are needed)
- Assistant (some hitches are heavy and awkward)
Materials Included with the Hitch
Most hitches come with:
– Mounting bolts and nuts
– Washers and lock washers
– Instruction manual
– Wiring harness (if applicable)
Double-check the package before starting.
Step 3: Prepare Your SUV
Safety first. You’ll be working under your vehicle, so proper preparation is key.
Park on a Level Surface
Find a flat, solid surface like a garage floor or driveway. Avoid gravel or grass—your jack stands need stability.
Engage the Parking Brake and Chock the Wheels
Put your SUV in “Park” (or first gear for manuals) and set the parking brake. Place wheel chocks behind the rear tires to prevent rolling.
Lift the Vehicle
Use a jack to lift the rear of your SUV. Place jack stands under the frame rails—never rely on the jack alone. Lower the vehicle onto the stands and give it a gentle shake to ensure it’s secure.
Remove Obstacles
Some SUVs have plastic underbody panels, splash shields, or exhaust components that block access to the hitch mounting area.
Use a socket wrench to remove any bolts holding these parts. Keep track of screws and clips—you’ll need to reinstall them later.
Clean the Mounting Area
Use a wire brush and penetrating oil to clean rust, dirt, or debris from the frame where the hitch will attach. This ensures a tight, secure fit.
Step 4: Install the Trailer Hitch
Now for the main event. Follow these steps carefully.
Position the Hitch
With the help of a friend, lift the hitch into place under the vehicle. Align it with the pre-drilled holes in the frame.
Most hitches are designed to bolt directly to the frame rails. Some may require slight adjustments—don’t force it.
Insert the Bolts
Slide the provided bolts through the hitch and into the frame holes. Use washers and lock washers as specified in the manual.
Hand-tighten the nuts first to hold the hitch in place.
Tighten the Bolts to Spec
This is where the torque wrench comes in. Over-tightening can strip threads; under-tightening can lead to failure.
Refer to the hitch manual for the correct torque specification—usually between 60 and 120 ft-lbs, depending on bolt size.
Tighten bolts in a crisscross pattern (like tightening lug nuts) to ensure even pressure.
Double-Check Alignment
Make sure the hitch is centered and level. Measure from the center of the receiver tube to each side of the bumper. The distances should be equal.
Reinstall Removed Components
Put back any splash shields, underbody panels, or exhaust hangers you removed earlier.
Step 5: Install the Wiring Harness (If Applicable)
If your hitch includes a wiring harness for trailer lights, now’s the time to install it.
Locate the Vehicle’s Taillight Wiring
Most SUVs have access panels near the rear lights. Remove the panel to expose the wiring.
Connect the Harness
Plug the harness into the vehicle’s wiring using the provided connectors. These are usually plug-and-play—no cutting or splicing required.
Route the harness along the frame, securing it with zip ties to prevent chafing.
Test the Lights
Have a friend stand behind the vehicle while you test:
– Brake lights
– Turn signals
– Reverse lights (if applicable)
Make sure all functions work correctly.
Secure the Connector
Attach the 4-pin or 7-pin trailer connector to the hitch or bumper using the provided bracket.
Step 6: Perform a Final Safety Check
Before you hit the road, do a thorough inspection.
Inspect All Bolts and Connections
Go over every bolt with your torque wrench to ensure they’re still at spec. Vibration during installation can loosen them.
Check for Clearance
Make sure the hitch doesn’t interfere with:
– Exhaust system
– Suspension components
– Fuel lines
– Rear bumper
There should be at least 2–3 inches of clearance when the suspension is fully compressed.
Test the Receiver Tube
Insert a ball mount or accessory to ensure it fits snugly. There should be minimal play.
Take a Short Test Drive
Drive slowly around the block. Listen for rattling, scraping, or unusual noises. If something feels off, stop and inspect.
Troubleshooting Common Issues
Even with careful installation, problems can arise. Here’s how to fix the most common ones.
Hitch Doesn’t Fit Properly
Double-check that you ordered the correct model for your SUV. If it’s the right one, the frame may have slight variations. Use a rubber mallet to gently adjust alignment—never force it with a hammer.
Bolt Holes Don’t Line Up
Some hitches require drilling. Only do this if the manual explicitly allows it. Use a drill bit slightly smaller than the bolt, and deburr the edges.
Wiring Harness Not Working
Check fuses in the vehicle’s fuse box. Test each wire with a multimeter. Ensure connectors are fully seated and not corroded.
Hitch Rattles or Moves
This usually means bolts are loose. Re-torque all connections. If the problem persists, inspect for worn or missing washers.
Rust or Corrosion After Installation
Clean the hitch regularly and apply a rust-inhibiting spray. Store accessories indoors when not in use.
When to Call a Professional
While many SUV owners can install a hitch themselves, there are times when it’s best to hire a pro.
Consider professional installation if:
– You don’t have the right tools (especially a torque wrench)
– Your SUV has a complex underbody or exhaust system
– You’re installing a weight-distributing or gooseneck hitch
– You’re not comfortable working under a vehicle
– Local laws require certified installation for towing
Most auto shops and trailer specialty stores offer hitch installation for $100–$300, depending on complexity.
Maintaining Your Trailer Hitch
A little maintenance goes a long way.
- Clean regularly: Wash off dirt, salt, and grime, especially after winter driving.
- Lubricate moving parts: Apply grease to the receiver tube and ball mount to prevent seizing.
- Inspect for damage: Look for cracks, bends, or excessive rust. Replace worn parts immediately.
- Store accessories properly: Remove bike racks or cargo carriers when not in use to reduce wear.
Conclusion
Adding a trailer hitch to your SUV is a rewarding DIY project that opens up new possibilities for travel, work, and recreation. With the right hitch, tools, and attention to detail, you can complete the installation safely and confidently.
Remember: always follow the manufacturer’s instructions, use a torque wrench, and perform a thorough safety check before towing. When in doubt, consult a professional.
Now that your SUV is hitch-ready, you’re all set for your next adventure. Whether it’s a weekend camping trip or hauling gear for a home project, your vehicle is ready to handle the load.
Safe towing!