
Adding a hitch to your SUV opens up new possibilities for towing trailers, bikes, or cargo carriers. This guide walks you through the entire process—from choosing the right hitch to secure installation—so you can do it safely and confidently at home.
Key Takeaways
- Choose the right hitch class: Match your SUV’s towing capacity and intended use (e.g., Class III for most SUVs).
- Check vehicle compatibility: Use your SUV’s make, model, and year to find a hitch that fits perfectly.
- Gather essential tools: You’ll need a socket wrench, torque wrench, jack stands, and safety gear.
- Follow step-by-step instructions: Proper alignment and tightening prevent damage and ensure safety.
- Test before towing: Always inspect bolts and connections before hitting the road.
- Consider professional help: If you’re unsure, a certified mechanic can install it safely.
- Maintain your hitch: Regular cleaning and inspections extend its lifespan and performance.
How to Add Hitch to SUV: A Complete DIY Guide
Adding a hitch to your SUV might sound intimidating, but with the right tools, instructions, and a little patience, it’s a project most DIYers can tackle at home. Whether you’re planning to tow a small trailer, haul a boat, or just need a bike rack for weekend adventures, installing a hitch opens up a world of possibilities. In this guide, we’ll walk you through every step—from selecting the right hitch to securing it safely under your vehicle.
You’ll learn how to assess your SUV’s towing needs, choose the correct hitch class, gather the necessary tools, and perform the installation with confidence. We’ll also cover safety tips, common mistakes to avoid, and how to maintain your hitch after installation. By the end, you’ll have a reliable, professionally installed hitch ready for your next adventure—all without paying a mechanic.
Why Install a Hitch on Your SUV?
Visual guide about How to Add Hitch to Suv
Image source: m.media-amazon.com
SUVs are built for versatility, and adding a hitch enhances that capability. A hitch allows you to tow trailers, campers, or even small vehicles. It also supports bike racks, cargo carriers, and other accessories that expand your storage options. Whether you’re a weekend warrior heading to the mountains or a family planning a cross-country trip, a hitch gives you flexibility.
Beyond convenience, a properly installed hitch improves safety. Factory-installed hitches are engineered to work with your SUV’s frame and suspension, reducing strain and improving control. Aftermarket hitches, when installed correctly, offer the same benefits. Plus, installing it yourself saves money—professional installations can cost $200–$500, while DIY kits start around $100.
Step 1: Determine Your Towing Needs
Visual guide about How to Add Hitch to Suv
Image source: image.vevor.com
Before buying a hitch, understand what you plan to tow. This determines the hitch class you need. Hitches are rated by weight capacity, and choosing the wrong one can damage your SUV or create a dangerous situation.
Understand Hitch Classes
Hitches are classified from I to V, based on towing capacity:
- Class I: Up to 2,000 lbs gross trailer weight (GTW), 200 lbs tongue weight. Ideal for small trailers or bike racks.
- Class II: Up to 3,500 lbs GTW, 350 lbs tongue weight. Good for lightweight campers or utility trailers.
- Class III: Up to 6,000 lbs GTW, 600 lbs tongue weight. Most common for SUVs. Handles larger trailers and cargo.
- Class IV: Up to 10,000 lbs GTW, 1,000 lbs tongue weight. For heavy-duty towing like boats or RVs.
- Class V: Over 10,000 lbs GTW. Rare for standard SUVs; usually for trucks.
Most SUVs fall into Class II or III. Check your owner’s manual for your vehicle’s maximum towing capacity. Never exceed this limit—even with a higher-class hitch.
Consider Your SUV’s Make and Model
Not all hitches fit all SUVs. Manufacturers design hitches specifically for certain models. For example, a hitch for a Honda CR-V won’t fit a Toyota Highlander. Use your SUV’s year, make, and model to find a compatible hitch. Online retailers like U-Haul, Curt, or Reese let you filter by vehicle.
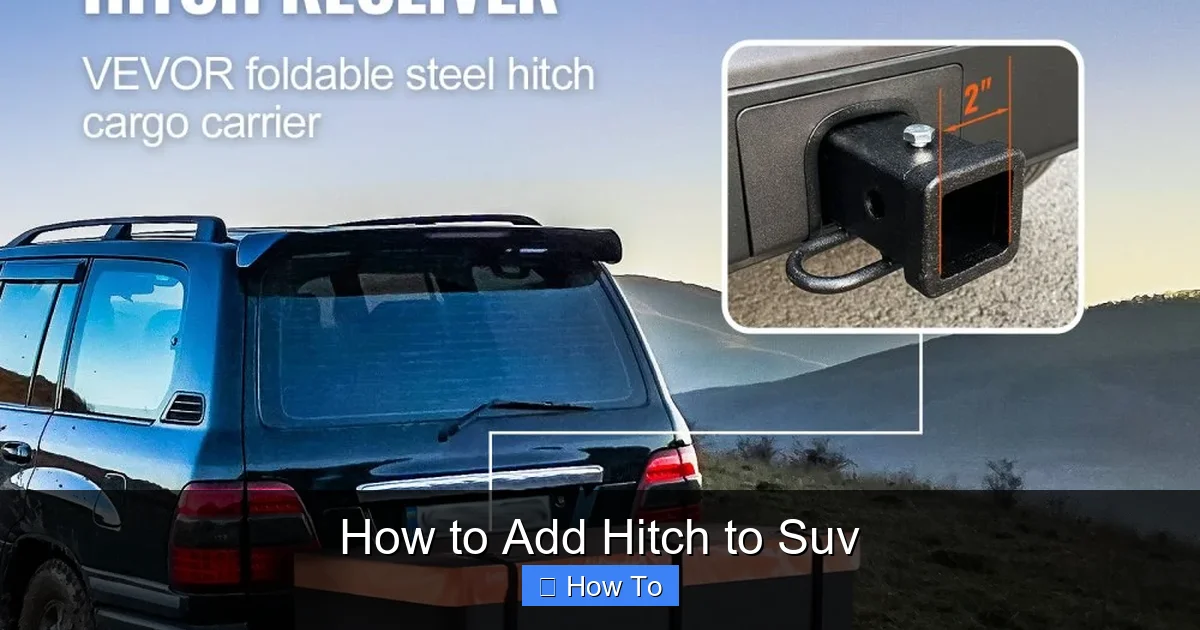
Decide Between Receiver and Gooseneck Hitches
Most SUVs use a receiver hitch, which has a square tube (usually 1.25″ or 2″) for attaching accessories. These are versatile and easy to use.
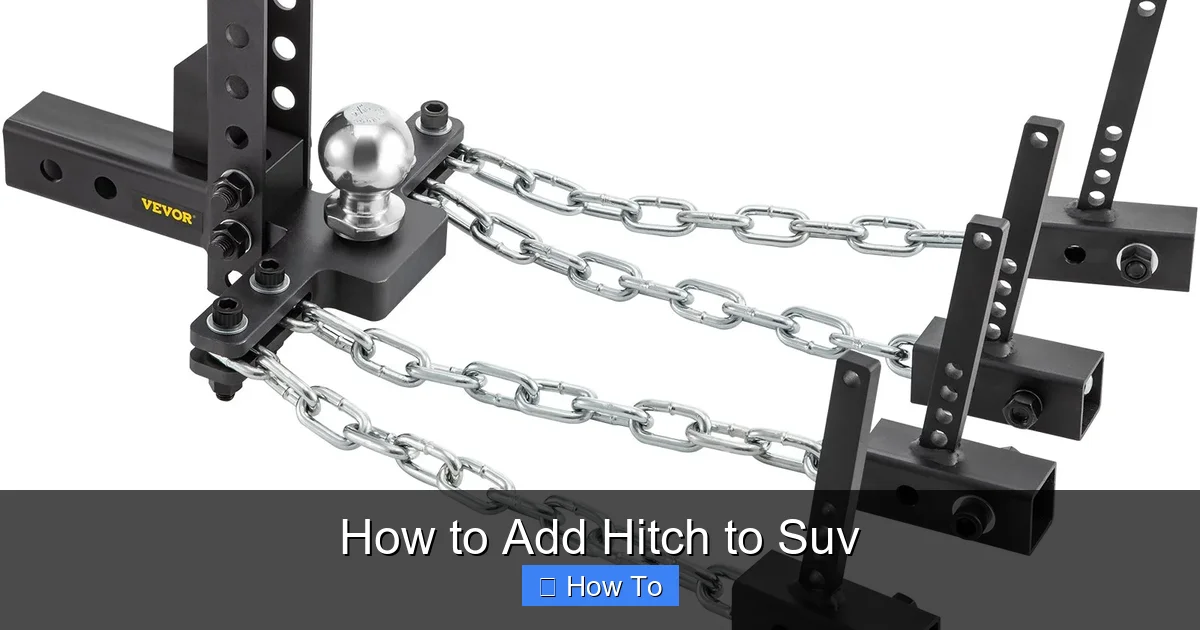
Gooseneck and fifth-wheel hitches are for heavy-duty towing and typically require truck beds. They’re not practical for most SUVs.
Step 2: Choose the Right Hitch
Now that you know your needs, it’s time to pick a hitch. Quality matters—cheap hitches may rust, bend, or fail under load.
Look for a Direct-Fit Hitch
A direct-fit hitch is designed specifically for your SUV. It bolts directly to the frame without welding or major modifications. These are safer and easier to install.
Check Weight Ratings
Ensure the hitch’s GTW and tongue weight ratings meet or exceed your needs. For example, if you plan to tow a 4,000-lb trailer, choose a Class III hitch rated for at least 5,000 lbs.
Consider Additional Features
Some hitches come with:
- Integrated wiring harness mounts
- Rust-resistant coatings (e.g., powder-coated steel)
- Easy-access receiver covers
- Pre-drilled holes for accessories
Popular brands include Curt, Draw-Tite, and Reese. Read reviews and check warranties—most offer lifetime guarantees.
Buy a Complete Kit
Many retailers sell hitch installation kits that include:
- The hitch receiver
- Mounting hardware (bolts, nuts, washers)
- Instructions
- Wiring harness (optional)
Buying a kit ensures compatibility and saves time.
Step 3: Gather Your Tools and Safety Gear
You don’t need a full mechanic’s garage, but having the right tools makes the job easier and safer.
Essential Tools
- Socket wrench set: With metric and standard sockets (usually 10mm–18mm).
- Torque wrench: Critical for tightening bolts to manufacturer specs.
- Jack and jack stands: To lift and support your SUV safely.
- Wheel chocks: Prevent the vehicle from rolling.
- Screwdriver or pry bar: For removing trim or exhaust components.
- Drill (optional): Some installations require drilling holes.
- Penetrating oil (e.g., WD-40): Helps loosen rusted bolts.
- Measuring tape and marker: For alignment.
Safety Gear
- Safety glasses
- Work gloves
- Sturdy shoes
Never work under a vehicle supported only by a jack. Always use jack stands on level ground.
Step 4: Prepare Your SUV
Before lifting your SUV, prepare the workspace and vehicle.
Park on a Level Surface
Choose a flat, hard surface like a driveway or garage floor. Avoid gravel or slopes.
Engage the Parking Brake and Chock the Wheels
Place wheel chocks behind the rear tires to prevent rolling.
Disconnect the Battery (Optional but Recommended)
This prevents accidental electrical shorts, especially if you’re installing a wiring harness.
Remove Obstacles
Some hitches require removing the bumper, exhaust hangers, or heat shields. Check your hitch instructions. Use a screwdriver or pry bar to gently detach plastic clips or bolts.
Spray Rusted Bolts
If your SUV is older, frame bolts may be rusted. Apply penetrating oil and let it sit for 10–15 minutes before attempting to remove them.
Step 5: Lift the SUV Safely
Lifting your SUV correctly is crucial for safety and access.
Locate the Jack Points
Refer to your owner’s manual for the correct jack points. These are reinforced areas on the frame, usually near the front and rear wheels.
Use a Floor Jack
Place the jack under the front or rear jack point. Pump it slowly until the wheels lift off the ground.
Place Jack Stands
Position jack stands under the frame rails or designated support points. Lower the jack until the weight rests on the stands. Never rely on the jack alone.
Double-Check Stability
Gently shake the vehicle. If it wobbles, reposition the stands.
Step 6: Install the Hitch
Now comes the main event—installing the hitch. Follow your kit’s instructions closely, as steps may vary slightly by model.
Position the Hitch
Slide the hitch under the vehicle, aligning it with the frame mounting points. Most hitches sit just behind the rear bumper, below the exhaust.
Insert Mounting Bolts
Thread the bolts through the hitch brackets and into the frame holes. Hand-tighten first to ensure proper alignment.
Tighten Bolts Gradually
Use a socket wrench to tighten bolts in a crisscross pattern. This prevents warping. Don’t fully torque yet—leave them snug.
Check Alignment
Ensure the hitch receiver is centered and level. Use a measuring tape to check distance from the ground and sides of the vehicle.
Torque to Spec
Use a torque wrench to tighten bolts to the manufacturer’s recommended torque (usually 40–80 ft-lbs). Over-tightening can strip threads; under-tightening can cause failure.
Reattach Removed Parts
Reinstall the bumper, exhaust hangers, or heat shields if removed. Secure all clips and bolts.
Step 7: Install Wiring Harness (Optional)
If you plan to tow a trailer with lights, you’ll need a wiring harness.
Choose the Right Harness
Match it to your SUV’s model and trailer plug type (4-pin, 5-pin, or 7-pin).
Locate the Tail Light Wires
Access the wiring behind the rear lights. Use a wiring diagram from the harness instructions.
Splice the Wires
Connect the harness wires to the corresponding tail light wires (brake, turn, running lights). Use T-taps or solder for a secure connection.
Secure the Harness
Route the harness along the frame, away from heat and moving parts. Use zip ties to fasten it.
Test the Lights
Reconnect the battery and test all lights with a helper. Ensure brake, turn, and running lights work.
Step 8: Lower the SUV and Test
Once everything is installed, it’s time to lower your SUV and test the hitch.
Remove Jack Stands
Slowly raise the jack to lift the vehicle off the stands. Remove the stands and lower the SUV to the ground.
Inspect All Connections
Double-check that all bolts are tight and the hitch is secure. Look for any loose wires or parts.
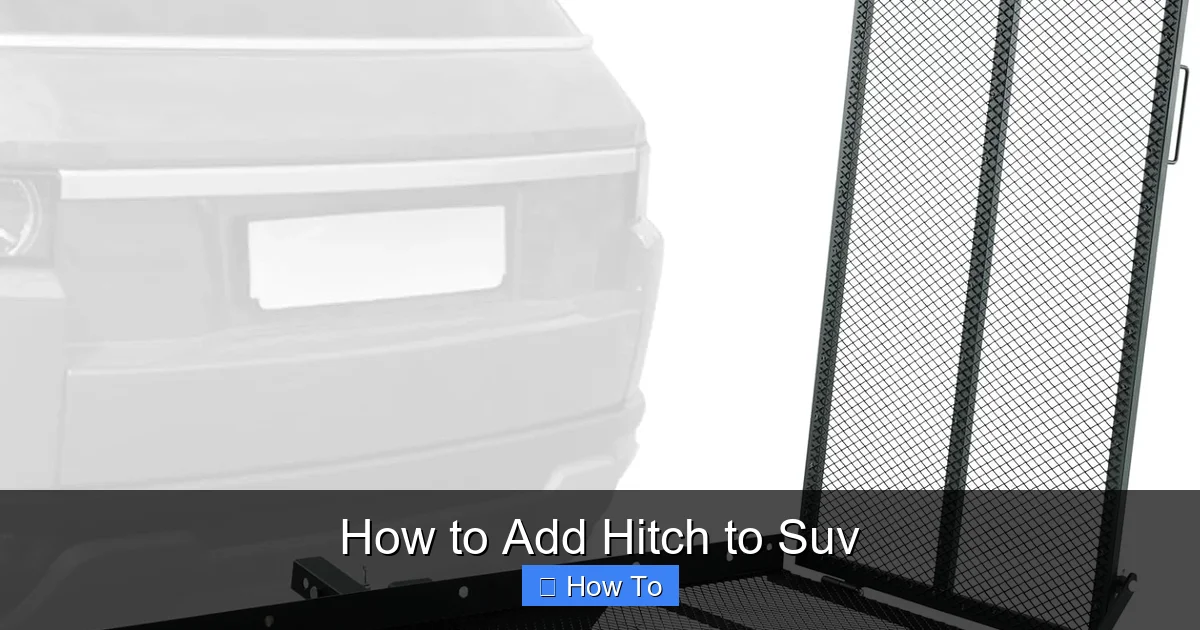
Attach a Ball Mount or Accessory
Insert a ball mount or bike rack into the receiver. Secure it with a hitch pin and clip.
Test for Movement
Try wiggling the accessory. There should be minimal play. If it moves excessively, check the hitch pin or receiver size.
Take a Short Test Drive
Drive slowly around the block. Listen for rattling or unusual noises. Check for clearance issues with the ground or bumper.
Troubleshooting Common Issues
Even with careful installation, problems can arise. Here’s how to fix them.
Hitch Doesn’t Fit Properly
Double-check your SUV’s year, make, and model. Some hitches require minor trimming of the bumper or exhaust. Follow the instructions—don’t force it.
Bolt Holes Don’t Align
Frame holes may be slightly misaligned. Use a pry bar to gently shift the hitch. If needed, drill new holes—but only if specified in the instructions.
Rusted or Stuck Bolts
Apply more penetrating oil and wait. Use a breaker bar for extra leverage. Avoid using heat unless you’re experienced—it can damage nearby components.
Wiring Harness Not Working
Check connections for loose wires or incorrect splicing. Use a multimeter to test continuity. Ensure the trailer plug is clean and dry.
Hitch Sags or Rattles
This could mean loose bolts or the wrong hitch class. Re-torque all bolts. If the hitch is too light for your load, upgrade to a higher class.
Safety Tips and Best Practices
Safety should always come first when working under a vehicle.
- Never work alone—have someone nearby in case of emergency.
- Use jack stands, not just a jack.
- Wear safety glasses and gloves.
- Follow torque specifications exactly.
- Don’t exceed your SUV’s towing capacity.
- Inspect the hitch regularly for rust, cracks, or loose bolts.
Maintenance and Care
A little maintenance keeps your hitch in top shape.
- Clean regularly: Wash off dirt, salt, and grime, especially in winter.
- Inspect for damage: Look for cracks, bends, or rust. Replace if damaged.
- Lubricate moving parts: Apply grease to the receiver and ball mount.
- Store accessories properly: Remove bike racks or cargo carriers when not in use.
- Check bolts annually: Vibration can loosen them over time.
When to Call a Professional
While DIY installation is possible, some situations call for a pro.
- You’re uncomfortable working under a vehicle.
- Your SUV has a complex frame or suspension.
- You need a custom hitch or welding.
- You’re installing a fifth-wheel or gooseneck hitch.
- You lack the right tools or space.
Many auto shops and U-Haul centers offer professional hitch installation with warranties.
Conclusion
Adding a hitch to your SUV is a smart upgrade that boosts functionality and value. With the right hitch, tools, and careful installation, you can do it yourself safely and save hundreds of dollars. Remember to choose the correct class, follow torque specs, and test everything before towing.
Whether you’re hauling gear, towing a trailer, or just want the option, a properly installed hitch gives you peace of mind on the road. Take your time, prioritize safety, and enjoy the freedom that comes with a well-equipped SUV.