
This guide walks you through how to add on a hook for SUV—whether it’s a tow hook, roof rack hook, or cargo carrier attachment. You’ll learn the right tools, safety steps, and common mistakes to avoid for a secure and reliable setup.
Key Takeaways
- Identify the type of hook needed: Determine if you need a tow hook, roof rack hook, or cargo carrier hook based on your SUV’s make and intended use.
- Check your SUV’s mounting points: Always locate factory-installed attachment points or reinforced areas to ensure safe and secure installation.
- Use the right tools and hardware: Invest in quality bolts, washers, and torque wrenches to prevent loosening or damage during use.
- Follow torque specifications: Over-tightening can strip threads; under-tightening can lead to failure—always follow manufacturer guidelines.
- Test before heavy use: After installation, perform a gentle load test to confirm stability before hauling gear or towing.
- Maintain regularly: Inspect hooks and mounting hardware periodically for rust, wear, or looseness, especially after off-road trips.
- Consult your owner’s manual: Your SUV’s manual contains critical info on weight limits, approved accessories, and installation warnings.
How to Add on a Hook for SUV: A Complete Step-by-Step Guide
Adding a hook to your SUV might sound simple, but doing it safely and correctly is essential—especially if you’re planning to tow, carry heavy cargo, or go off-roading. Whether you’re installing a tow hook for emergency recovery, a roof rack hook for extra storage, or a cargo carrier attachment for camping gear, this guide will walk you through the entire process.
In this comprehensive how-to, you’ll learn how to add on a hook for SUV the right way. We’ll cover everything from identifying the correct hook type and locating mounting points to installing, testing, and maintaining your setup. No matter your experience level, this guide ensures you get it done safely and effectively.
Let’s get started.
Understanding the Different Types of Hooks for SUVs
Before you grab your tools, it’s important to know what kind of hook you actually need. Not all hooks are created equal, and using the wrong one can lead to damage or dangerous failures.
Tow Hooks
Tow hooks are metal loops or eyes designed to attach to your SUV’s frame or bumper for towing or recovery. They’re commonly used when your vehicle gets stuck in mud, snow, or sand. Most SUVs come with factory-installed tow hooks, but if yours doesn’t, you can add aftermarket ones.
Visual guide about How to Add on a Hook for Suv
Image source: down-th.img.susercontent.com
These hooks are typically mounted to the front or rear frame and are rated for specific weight limits. Always check the towing capacity of the hook and your SUV to avoid overloading.
Roof Rack Hooks
Roof rack hooks are used to secure crossbars or cargo baskets to your SUV’s roof. They clamp onto the door frames or roof rails and provide anchor points for straps, nets, or carriers. These are ideal for hauling kayaks, bikes, or luggage.
Unlike tow hooks, roof rack hooks don’t bear extreme tension but must still be secure to prevent wind noise, shifting loads, or damage to your roof.
Cargo Carrier Hooks
These hooks attach to the rear hitch or bumper to support cargo carriers, bike racks, or spare tire mounts. They’re usually part of a larger system but may require additional hook-style fasteners for securing straps or nets.
Some cargo carriers use J-hooks or S-hooks to tie down gear, so knowing how to add these properly ensures your load stays put during transit.
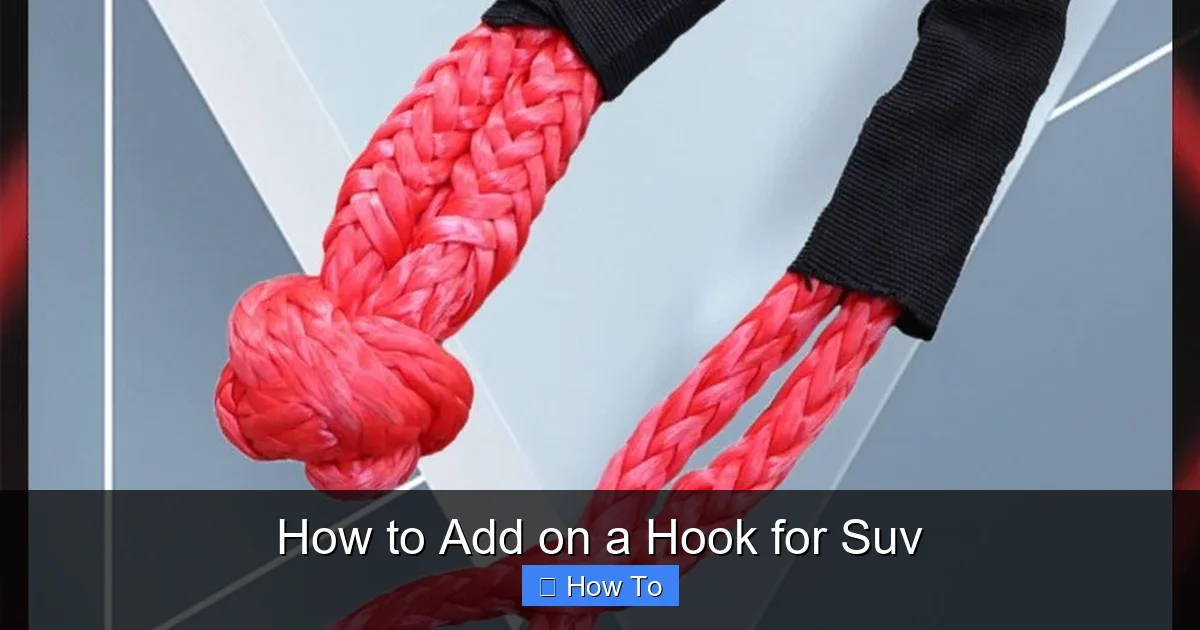
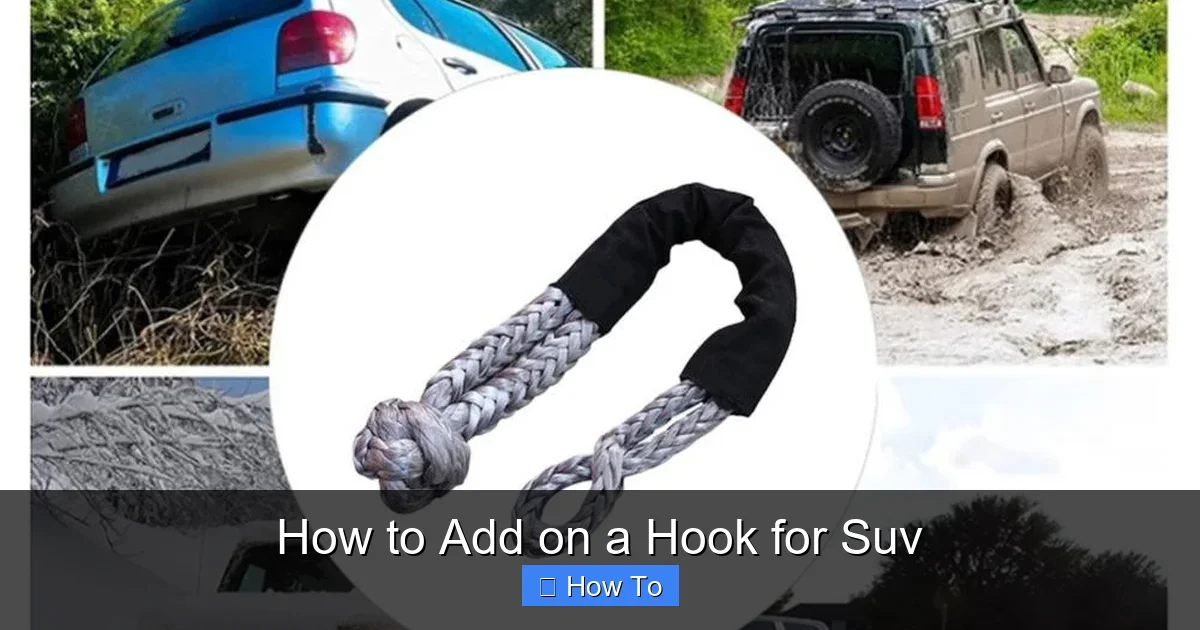
Recovery Hooks (D-Rings or Shackle Mounts)
Popular among off-roaders, recovery hooks like D-rings or shackle mounts attach to tow points or bumpers for winching or pulling. They’re often used with recovery straps or kinetic ropes.
These hooks must be mounted to structural parts of the vehicle—never to plastic bumpers or weak brackets.
Tools and Materials You’ll Need
Having the right tools makes the job easier and safer. Here’s a checklist of what you’ll need to add on a hook for SUV:
- Socket wrench set (metric and standard)
- Torque wrench
- Drill and drill bits (if drilling is required)
- Measuring tape
- Marker or pencil
- Safety glasses and gloves
- Thread locker (like Loctite)
- Replacement bolts, washers, and nuts (if not included)
- Jack and jack stands (for under-vehicle access)
- Wire brush (to clean rust or debris)
- Silicone sealant (for roof rack installations)
Always use high-quality hardware rated for automotive use. Cheap bolts can rust, strip, or break under stress.
Visual guide about How to Add on a Hook for Suv
Image source: thumbs.dreamstime.com
Step 1: Identify Your SUV’s Mounting Points
The first and most critical step is locating where you can safely attach the hook. Never guess or improvise—your SUV’s structure determines what’s safe.
Check the Owner’s Manual
Your SUV’s owner’s manual is your best friend. It will show you:
- Factory-installed tow points
- Approved aftermarket accessories
- Weight limits for hooks and carriers
- Warnings about drilling or modifying certain areas
For example, many Toyota RAV4 and Honda CR-V models have hidden tow points under the bumper cover. You’ll need to remove a plastic panel to access them.
Inspect the Frame and Bumper
Look underneath your SUV or behind the bumper for reinforced metal brackets or threaded holes. These are designed for tow hooks or recovery points.
Avoid mounting hooks to plastic bumpers, trim pieces, or non-structural parts. These can crack or tear under load.
Roof Rail or Door Frame Mounting
For roof rack hooks, check if your SUV has factory roof rails or rain gutters. Most modern SUVs use door frame clamps that grip the edge of the roof without drilling.
If your SUV has a bare roof, you may need a no-drill roof rack system that uses door frame hooks. These are safe and reversible.
Step 2: Choose the Right Hook for Your Needs
Now that you know where to mount, pick the right hook.
Match the Hook to Your SUV’s Make and Model
Not all hooks fit all SUVs. Always buy hooks designed for your specific vehicle. For example, a tow hook for a Ford Explorer won’t fit a Subaru Outback.
Check compatibility on the manufacturer’s website or with a trusted auto parts retailer.
Consider Weight and Load Ratings
Every hook has a working load limit (WLL) and breaking strength. For example:
- A tow hook might be rated for 5,000 lbs WLL
- A roof rack hook may support 150 lbs per crossbar
- A cargo carrier hook could handle 500 lbs
Never exceed these limits. Overloading can cause failure, even if the hook looks strong.
Material Matters
Look for hooks made from forged steel or high-strength aluminum. Avoid cheap cast iron or thin metal that can bend or snap.
For off-road use, choose corrosion-resistant finishes like powder coating or zinc plating.
Step 3: Prepare the Mounting Area
A clean, secure surface is key to a safe installation.
Clean the Mounting Surface
Use a wire brush to remove rust, dirt, or old paint from the mounting area. This ensures a tight fit and prevents corrosion.
For roof rack hooks, wipe the door frame with rubbing alcohol to remove grease or wax that could reduce grip.
Mark Drill Points (If Required)
If you’re installing a hook that requires drilling (rare for modern SUVs), use a measuring tape and marker to mark exact spots.
Double-check alignment before drilling. One misplaced hole can ruin the installation.
Apply Thread Locker
Add a drop of medium-strength thread locker (like Loctite Blue) to bolt threads. This prevents loosening from vibration but allows future removal.
Don’t use permanent thread locker unless specified—you may need to remove the hook later.
Step 4: Install the Hook
Now it’s time to attach the hook. Follow these steps carefully.
Position the Hook
Hold the hook in place and align it with the mounting holes. Make sure it sits flat and doesn’t interfere with other components like brakes, fuel lines, or suspension.
For tow hooks, ensure the hook faces outward and is accessible for attaching straps or chains.
Insert and Tighten Bolts
Insert the bolts through the hook and into the mounting points. Add washers and nuts as needed.
Hand-tighten first, then use a socket wrench to snug them up. Don’t fully tighten yet—you’ll do that with a torque wrench.
Torque to Specification
Use a torque wrench to tighten bolts to the manufacturer’s recommended torque. This is usually listed in the instructions or your SUV’s manual.
For example, a typical tow hook bolt might require 45–60 ft-lbs of torque. Over-tightening can strip threads; under-tightening can lead to loosening.
Seal Roof Rack Hooks (If Applicable)
If you’re installing roof rack hooks that clamp to the door frame, apply a small bead of silicone sealant where the clamp contacts the roof. This prevents water leaks.
Wipe away excess sealant immediately to avoid stains.
Step 5: Test the Installation
Never assume the hook is secure just because it’s tight. Always test it.
Perform a Visual Inspection
Check that:
- All bolts are tight and washers are in place
- The hook moves freely (if designed to swivel)
- No wires, hoses, or lines are pinched
- The hook doesn’t interfere with tire movement or suspension
Do a Gentle Load Test
For tow hooks, attach a recovery strap and gently pull with another vehicle or a come-along. Watch for movement, creaking, or bending.
For roof rack hooks, load a lightweight item (like a soft duffel bag) and drive slowly on a quiet road. Listen for rattling or shifting.
If anything feels loose or makes noise, stop and recheck the installation.
Check After First Use
After your first trip, re-inspect the hook and bolts. Vibration can loosen hardware over time.
Re-torque bolts if needed, especially after off-roading or heavy loads.
Troubleshooting Common Issues
Even with careful installation, problems can arise. Here’s how to fix them.
Hook Feels Loose After Installation
This usually means bolts weren’t torqued properly or the mounting surface isn’t flat. Re-tighten with a torque wrench and check for gaps. Add a flat washer if needed.
Rust or Corrosion Around Mounting Point
Clean the area with a wire brush and apply rust converter. Use stainless steel or coated bolts to prevent future rust.
Roof Rack Hook Slipping
This happens when the clamp isn’t tight enough or the roof edge is too smooth. Use rubber pads or upgrade to a clamp with better grip. Never over-tighten and crack the door frame.
Hook Interferes with Parking Sensors or Cameras
Some tow hooks block rear sensors or backup cameras. Choose a low-profile hook or one with a sensor cutout. Test camera visibility after installation.
Bolt Stripped During Installation
If a bolt strips, don’t force it. Remove it, clean the threads with a tap, and replace it with a new bolt. Consider using a thread insert (like a Helicoil) for added strength.
Maintenance Tips for Long-Term Use
A well-maintained hook lasts for years. Follow these tips:
- Inspect monthly: Look for cracks, rust, or loose bolts.
- Lubricate moving parts: Apply grease to swivel hooks or shackle pins.
- Clean after off-roading: Mud and salt accelerate corrosion.
- Store properly: If removable, keep hooks in a dry place.
- Replace worn parts: Don’t risk failure—swap out damaged hooks immediately.
Safety Reminders
Safety should always come first when working on your SUV.
- Never use a hook beyond its rated capacity.
- Always use recovery straps, not tow ropes, for towing—they’re safer and more elastic.
- Wear gloves and eye protection when installing or using hooks.
- Never stand in line with a recovery strap—it can snap and cause injury.
- Ensure all passengers are clear during testing or recovery.
Conclusion
Adding a hook to your SUV doesn’t have to be intimidating. With the right tools, knowledge, and attention to detail, you can add on a hook for SUV safely and effectively. Whether you’re prepping for a weekend camping trip, planning an off-road adventure, or just want peace of mind for emergencies, a properly installed hook is a smart investment.
Remember: always check your owner’s manual, use quality hardware, follow torque specs, and test before relying on the hook. Regular maintenance keeps everything in top shape.
Now that you know how to do it, you’re ready to enhance your SUV’s functionality and safety. Get out there and enjoy the journey—secure in the knowledge that your gear is safely attached.