
This guide walks you through how to adjust side mirrors on a Mercedes SUV for maximum visibility and safety. You’ll learn manual and power mirror settings, proper angles, and common mistakes to avoid.
Key Takeaways
- Proper mirror adjustment reduces blind spots: Correctly positioning your side mirrors helps you see vehicles approaching from behind and beside you, improving lane-change safety.
- Use the memory seat function for convenience: Many Mercedes SUVs allow you to save mirror positions with seat memory, so your preferred settings are restored automatically.
- Adjust mirrors before driving: Always set your mirrors before starting your trip—never make major adjustments while the vehicle is in motion.
- Power mirrors are standard on most models: Most Mercedes SUVs come with electrically adjustable side mirrors controlled via a switch on the driver’s door panel.
- Manual override is available if power fails: If the power mirror controls stop working, you can still adjust the mirrors by hand using the manual release mechanism.
- Heated and auto-dimming mirrors enhance safety: Take advantage of advanced features like heated mirrors (for fog/ice) and auto-dimming (to reduce glare at night).
- Regular checks ensure optimal performance: Periodically verify mirror alignment, especially after car washes or repairs that may shift components.
How to Adjust Side Mirrors on a Mercedes SUV
Driving a Mercedes SUV means enjoying luxury, performance, and advanced safety technology—but even the most sophisticated vehicle needs proper setup to perform at its best. One of the most overlooked yet critical aspects of safe driving is correctly adjusting your side mirrors. Whether you’re behind the wheel of a GLE, GLS, GLC, or G-Class, knowing how to adjust side mirrors on a Mercedes SUV ensures you have maximum visibility, minimizes blind spots, and enhances overall driving confidence.
In this comprehensive guide, we’ll walk you through every step—from locating the mirror controls to fine-tuning angles for optimal coverage. We’ll cover both manual and power mirror adjustments, explain how to use memory settings, and share expert tips to avoid common mistakes. By the end, you’ll be able to confidently set up your mirrors like a pro, whether you’re a new Mercedes owner or just looking to refresh your knowledge.
Why Proper Side Mirror Adjustment Matters
Visual guide about How to Adjust Side Mirrors on a Mercedes Suv
Image source: 7space.sgp1.digitaloceanspaces.com
Before diving into the how-to steps, it’s important to understand why mirror adjustment is so crucial. Side mirrors are your primary tools for monitoring traffic behind and beside you—especially during lane changes, merging, or reversing. Poorly adjusted mirrors can create dangerous blind spots, leading to accidents that could easily be avoided.
Mercedes-Benz designs its SUVs with safety in mind, equipping them with wide-angle mirrors, power controls, and advanced features like blind-spot monitoring. However, these technologies work best when the mirrors themselves are properly aligned. Even with radar-based assistance systems, your eyes and mirrors remain your first line of defense.
Studies show that up to 20% of lane-change accidents are caused by inadequate mirror use. By taking just a few minutes to adjust your side mirrors correctly, you significantly reduce your risk. Plus, proper alignment improves comfort—no more constant head-turning or guessing whether a car is in your blind spot.
Understanding Your Mercedes SUV’s Mirror System
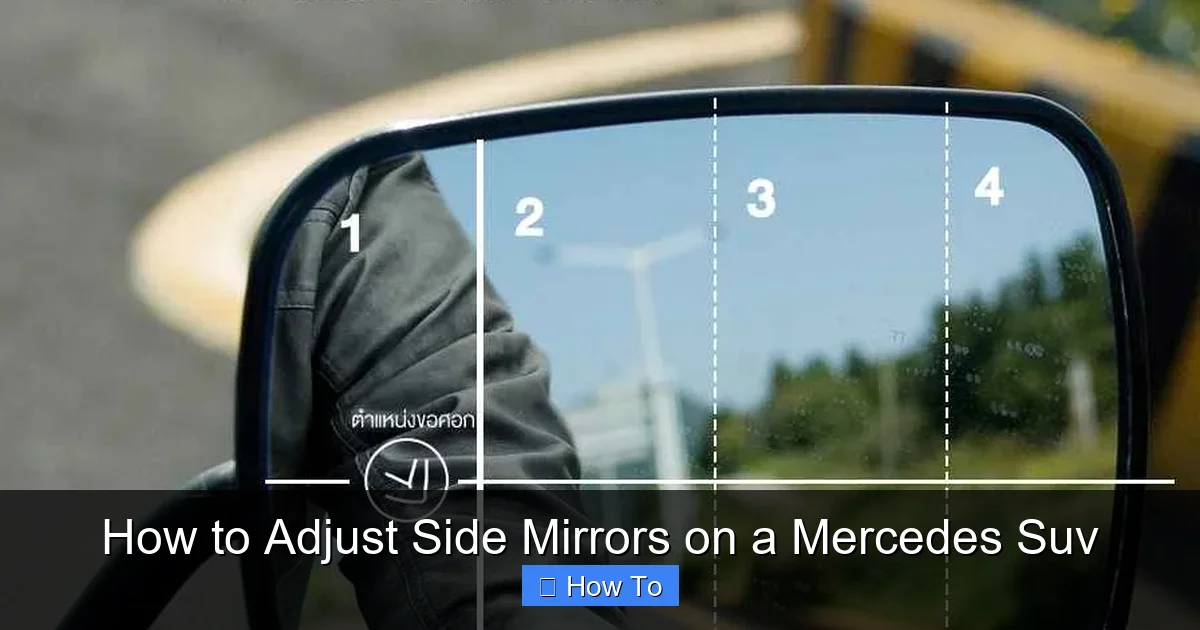
Visual guide about How to Adjust Side Mirrors on a Mercedes Suv
Image source: i.ytimg.com
Mercedes SUVs typically come with power-adjustable side mirrors as standard equipment. These mirrors are controlled electronically from the driver’s door panel and often include additional features like heating, auto-dimming, and memory settings.
Here’s a quick overview of what you’ll find:
- Power Mirror Switch: Located on the driver’s door, usually near the window controls. It allows you to select the left or right mirror and adjust its position using a joystick or directional pad.
- Memory Buttons: Found on the door panel or center console, these let you save up to three mirror positions linked to seat and steering wheel settings.
- Folding Function: Many models allow you to fold the mirrors inward electronically—useful in tight parking spaces or car washes.
- Heated Mirrors: Activated via the rear defroster button, these melt ice and clear fog for better visibility in cold weather.
- Auto-Dimming Mirrors: Reduce glare from headlights behind you, improving nighttime driving comfort.
Knowing your vehicle’s specific features helps you make the most of its capabilities. Check your owner’s manual if you’re unsure which options your SUV has.
Step-by-Step: How to Adjust Side Mirrors on a Mercedes SUV
Now that you understand the basics, let’s get into the actual process. Follow these steps carefully to ensure your mirrors are set correctly every time.
Step 1: Sit in the Driver’s Seat and Get Comfortable
Start by sitting in the driver’s seat and adjusting your seat, steering wheel, and headrest to your normal driving position. Your posture affects how you see the mirrors, so it’s essential to be in the correct position before making any adjustments.
Make sure your back is against the seat, your hands are at 9 and 3 o’clock on the steering wheel, and your head is centered. This ensures that the mirror angles you set will work for your natural line of sight.
Step 2: Locate the Mirror Control Switch
On the driver’s door panel, look for a small switch or dial labeled with “L” (left) and “R” (right). This is your mirror selector. Next to it, you’ll usually find a directional pad or joystick for adjusting the mirror position.
In some newer models, the controls may be touch-sensitive or integrated into a touchscreen interface. Refer to your owner’s manual if you can’t locate them.
Step 3: Select the Left Mirror
Turn the selector switch to “L” to activate the left-side mirror. You should see a light or indicator confirming the selection. Now, use the directional pad to move the mirror up, down, left, or right.
The goal is to position the left mirror so that you can see the edge of your own vehicle in the inner corner of the mirror—but not too much. You want just a sliver of your SUV visible, with the majority of the mirror showing the lane to your left.
Step 4: Adjust the Left Mirror for Optimal Coverage
Here’s a pro tip: lean your head against the left window while looking into the left mirror. Adjust the mirror until you can just barely see the edge of your vehicle. Then, sit back in your normal driving position. The mirror should now show the lane beside you with minimal overlap from your own SUV.
This technique minimizes the blind spot on the left side. When a car passes you, it should disappear from your rearview mirror and immediately appear in your side mirror—without a gap.
Step 5: Select and Adjust the Right Mirror
Now, turn the selector switch to “R” to control the right-side mirror. Repeat the same process: lean your head toward the center of the vehicle (or slightly to the right) and adjust the mirror so you can just see the edge of your SUV.
Again, when you return to your normal seating position, the mirror should show the adjacent lane with minimal view of your own vehicle. This ensures maximum coverage of the right-side blind spot.
Step 6: Fine-Tune for Comfort and Safety
Once both mirrors are set, take a moment to review them. Sit upright and glance at each mirror. Ask yourself:
- Can I see the lane beside me clearly?
- Is there too much of my own vehicle in the mirror?
- Do the mirrors overlap too much with the rearview mirror?
If the side mirrors show too much of your SUV, you’re not getting enough coverage of the surrounding traffic. If they’re angled too far out, you might miss vehicles directly behind you.
Aim for a balance: just enough of your vehicle to orient yourself, and plenty of space to monitor adjacent lanes.
Step 7: Use Memory Settings (If Available)
If your Mercedes SUV has memory seating, you can save your mirror positions along with your seat and steering wheel settings. This is especially helpful if multiple people drive the vehicle.
To save a memory setting:
- Adjust your seat, steering wheel, and mirrors to your preferred positions.
- Press and hold the “SET” button on the door panel.
- While holding “SET,” press one of the memory buttons (1, 2, or 3).
- Release both buttons. A chime or indicator will confirm the setting is saved.
Now, whenever you press that memory button, your seat and mirrors will automatically return to your saved position.
Advanced Tips for Better Mirror Use
Beyond basic adjustment, there are several advanced techniques and features you can use to enhance safety and convenience.
Use the Folding Mirror Function
Many Mercedes SUVs allow you to fold the side mirrors inward electronically. This is useful when parking in tight spaces or driving through narrow alleys.
To fold the mirrors:
- Turn the mirror selector to the center or “Fold” position (varies by model).
- Press the directional pad inward or use a dedicated fold button.
Some models also fold the mirrors automatically when you lock the vehicle using the key fob or smartphone app.
Activate Heated Mirrors in Cold Weather
In winter, foggy or icy mirrors can seriously impair visibility. Most Mercedes SUVs have heated side mirrors that activate when you turn on the rear defroster.
Simply press the rear defroster button (usually marked with a windshield icon). The mirrors will begin to warm up, melting ice and clearing condensation within minutes.
Enable Auto-Dimming for Night Driving
If your SUV has auto-dimming side mirrors, make sure they’re turned on. These mirrors use sensors to detect bright headlights from behind and reduce glare by darkening the glass.
The feature is usually enabled by default, but you can check in the vehicle settings menu under “Lighting” or “Comfort.”
Check Mirror Alignment After Car Washes or Repairs
Automatic car washes, especially those with brushes, can sometimes shift your mirrors out of alignment. Similarly, after bodywork or mirror replacement, the angles may need readjustment.
Make it a habit to check your mirror positions after any service or wash. A quick glance while parked can save you from a dangerous blind spot on the road.
Troubleshooting Common Mirror Issues
Even with advanced technology, mirror problems can occur. Here’s how to handle some common issues.
Power Mirrors Won’t Move
If your mirrors don’t respond to the controls, check the following:
- Fuse: Locate the fuse box (usually under the dashboard or hood) and check the fuse for the mirror circuit. Replace if blown.
- Selector Switch: Ensure the switch is set to “L” or “R.” If it’s in the center or off position, the mirrors won’t adjust.
- Battery: A weak battery can affect electrical components. Try restarting the vehicle or charging the battery.
Mirrors Move in Wrong Direction
If the mirror moves opposite to the direction you press, the motor or wiring may be faulty. This requires professional diagnosis. Visit a Mercedes service center for repair.
Manual Adjustment When Power Fails
If the power controls fail completely, you can still adjust the mirrors manually. Most Mercedes SUVs have a small access panel or lever behind the mirror glass.
Gently push or pull the mirror glass to reposition it. Be careful not to force it—excessive pressure can damage the internal mechanism.
Mirror Vibrates While Driving
A vibrating mirror can be distracting and reduce visibility. Causes include loose mounting, worn motors, or damaged glass.
Tighten the mirror housing if possible, or have it inspected by a technician. In some cases, replacing the mirror assembly is necessary.
Common Mistakes to Avoid
Even experienced drivers make mirror adjustment errors. Here are some pitfalls to watch out for:
- Adjusting mirrors while driving: Never make major mirror changes while the vehicle is in motion. Pull over safely first.
- Setting mirrors too close to the vehicle: This creates large blind spots. Aim for minimal visibility of your own SUV.
- Ignoring memory settings: If your SUV has memory functions, use them! They save time and ensure consistency.
- Forgetting to check after service: Always verify mirror alignment after repairs or washes.
- Over-relying on blind-spot monitoring: Technology is helpful, but it’s not perfect. Always check your mirrors and glance over your shoulder.
Final Thoughts: Drive Safer with Properly Adjusted Mirrors
Adjusting your side mirrors might seem like a small task, but it has a big impact on your safety and driving experience. On a Mercedes SUV—a vehicle built for performance and comfort—taking the time to set up your mirrors correctly ensures you’re getting the most out of its advanced design.
By following this guide, you’ve learned how to adjust side mirrors on a Mercedes SUV using both manual and power controls, how to use memory settings, and how to troubleshoot common issues. You’ve also discovered tips to enhance visibility in all conditions, from icy mornings to nighttime highways.
Remember: safe driving starts with awareness, and awareness starts with what you see in your mirrors. Make mirror adjustment part of your pre-drive routine, and you’ll enjoy greater confidence, fewer surprises, and a smoother ride—every time you get behind the wheel.