

This guide walks you through how to attach a bike rack to your SUV using different mounting methods. Whether you’re using a hitch, trunk, or roof rack, we’ll help you do it safely and correctly.
Key Takeaways
- Choose the right bike rack type: Hitch, trunk, roof, or spare tire mounts each have pros and cons—pick one that fits your SUV and biking needs.
- Check your SUV’s compatibility: Not all racks fit all vehicles. Verify weight limits, hitch size, and rear access before buying.
- Install the rack securely: Follow manufacturer instructions carefully to prevent damage to your SUV or bikes during transport.
- Load bikes properly: Distribute weight evenly, secure frames (not wheels), and avoid blocking lights or license plates.
- Test before you drive: Always do a shake test and double-check straps or locks after installation.
- Maintain your rack: Clean and inspect regularly to ensure long-term safety and performance.
- Know local laws: Some areas require additional lighting or flags if bikes extend beyond your vehicle.
How to Attach Bike Rack to SUV: A Complete Step-by-Step Guide
So you’ve got your bikes, your SUV, and a sense of adventure—now all you need is a reliable way to get those bikes to the trailhead, lake, or mountain pass. That’s where a bike rack comes in. But before you hit the road, you need to know how to attach a bike rack to your SUV safely and correctly.
In this comprehensive guide, we’ll walk you through every step—from choosing the right rack to installing it, loading your bikes, and driving with confidence. Whether you’re a weekend warrior or a family of cyclists, this guide will help you avoid common mistakes and ensure your bikes arrive safely at your destination.
We’ll cover the four main types of bike racks: hitch-mounted, trunk-mounted, roof-mounted, and spare tire-mounted. Each has its own installation process, so we’ll break them down clearly. You’ll also learn essential safety tips, troubleshooting advice, and maintenance tricks to keep your rack in top shape.
By the end of this guide, you’ll be able to attach your bike rack to your SUV like a pro—no guesswork, no stress, just smooth sailing (or should we say, smooth pedaling?).
Step 1: Choose the Right Bike Rack for Your SUV
Visual guide about How to Attach Bike Rack to Suv
Image source: pyramydair.com
Before you can attach a bike rack to your SUV, you need to pick the right one. Not all racks are created equal, and not all SUVs are compatible with every type. Here’s how to choose wisely.
Understand the Four Main Types of Bike Racks
There are four primary types of bike racks designed for SUVs:
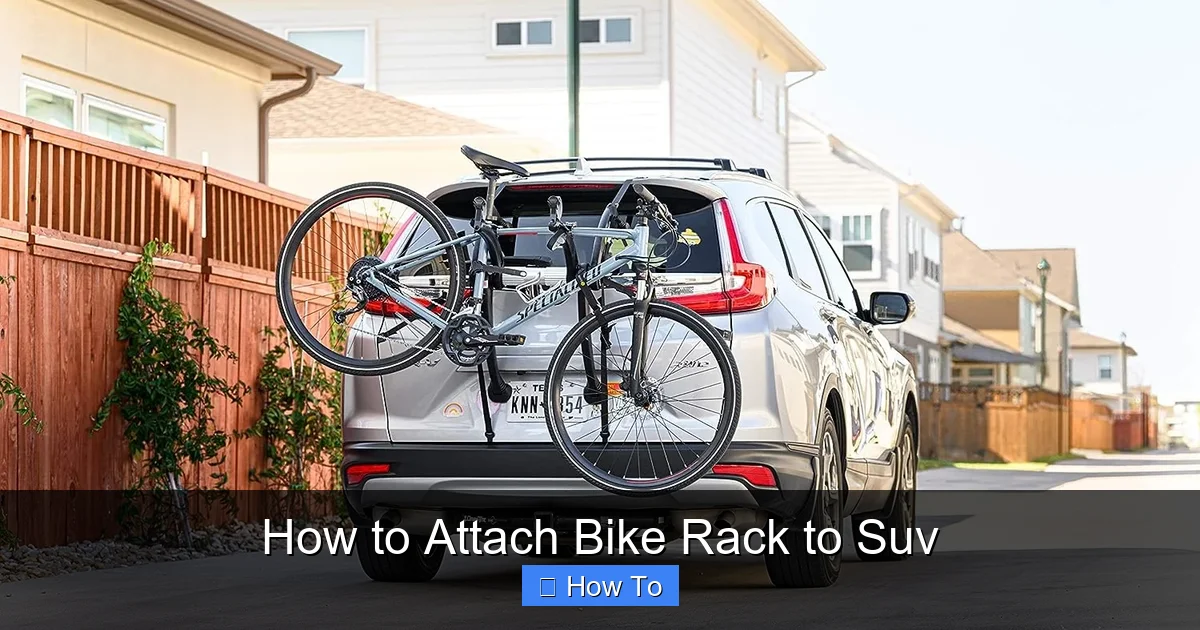
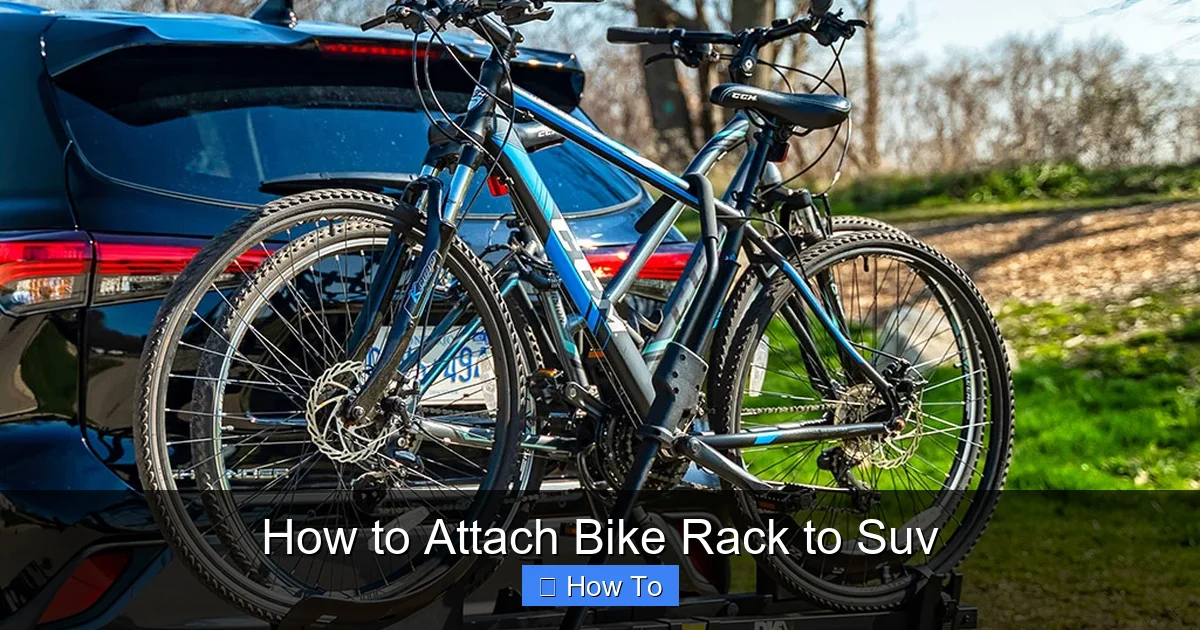
- Hitch-mounted racks: These attach to a trailer hitch receiver (usually 1.25” or 2”). They’re sturdy, easy to load, and don’t touch your vehicle’s body. Best for frequent riders.
- Trunk-mounted racks: These strap onto the rear hatch or trunk of your SUV. They’re affordable and don’t require a hitch, but can scratch paint and block rear visibility.
- Roof-mounted racks: These mount to roof rails or crossbars. They keep your rear hatch free and are great for tall SUVs, but loading bikes can be tricky and they increase wind resistance.
- Spare tire-mounted racks: Designed specifically for SUVs with rear-mounted spare tires (like Jeep Wranglers). They clamp onto the tire and are very secure.
Match the Rack to Your SUV and Needs
Ask yourself these questions:
- Do I have a trailer hitch? If yes, a hitch rack is often the best choice.
- How many bikes do I need to carry? Most racks hold 2–4 bikes. Make sure your SUV can handle the weight.
- Do I need rear hatch access? Trunk and hitch racks may block your trunk. Roof racks don’t.
- Am I okay with lifting bikes overhead? Roof racks require lifting bikes onto the roof—this can be tough for heavy e-bikes.
- Do I have a rear spare tire? If so, a spare tire rack might be ideal.
For example, if you drive a Toyota RAV4 with a 2” hitch and carry two mountain bikes, a hitch-mounted platform rack is a great fit. But if you have a Subaru Outback without a hitch, a trunk rack might be your best bet.
Check Weight and Bike Capacity
Always check the rack’s weight limit and bike capacity. Most SUVs can handle 100–150 lbs on a hitch rack, but older models or smaller crossovers may have lower limits. Overloading can damage your hitch or cause accidents.
Also, consider bike types. Fat tire bikes, e-bikes, and full-suspension models may need special adapters or racks with wider wheel trays.
Step 2: Gather Your Tools and Prepare Your SUV
Visual guide about How to Attach Bike Rack to Suv
Image source: contentgrid.homedepot-static.com
Once you’ve chosen your rack, it’s time to get ready for installation. Preparation is key to a smooth, safe setup.
What You’ll Need
Depending on your rack type, you may need:
- The bike rack (obviously!)
- Owner’s manual (read it first!)
- Torque wrench (for hitch racks)
- Rubbing alcohol and microfiber cloth (to clean contact points)
- Zip ties or bungee cords (for securing loose parts)
- Gloves (to protect your hands)
- Measuring tape (to check clearance)
Prepare Your SUV
Before attaching anything, clean the area where the rack will mount. For trunk racks, wipe down the hatch and bumper to prevent scratches. For hitch racks, clean the hitch receiver and apply a light coat of grease to prevent rust.
Check your SUV’s owner’s manual for towing and hitch specifications. Some SUVs have reinforced hitches, while others require a dealer-installed receiver.
Inspect the Rack
Unbox your rack and inspect all parts. Make sure nothing is damaged or missing. Compare the pieces to the instruction manual. If something’s wrong, contact the manufacturer before installing.
Step 3: Install a Hitch-Mounted Bike Rack
Hitch-mounted racks are among the most popular for SUVs because they’re stable, easy to use, and don’t damage your vehicle. Here’s how to install one.
Step 3.1: Insert the Rack into the Hitch
Slide the rack’s shank into the hitch receiver. Make sure it’s fully inserted. Most racks have a pin hole that aligns with the hitch.
Step 3.2: Secure with the Hitch Pin
Insert the hitch pin through the shank and hitch. Use a locking pin if your rack came with one—this prevents theft and adds security.
Step 3.3: Tighten the Anti-Rattle Device
Many hitch racks have an anti-rattle bolt or knob. Tighten it to eliminate wobble. Use a torque wrench if specified (usually 15–20 ft-lbs). Over-tightening can damage the hitch.
Step 3.4: Fold or Extend the Rack
If your rack has a folding or tilting feature, extend it to the riding position. Make sure it locks in place.
Step 3.5: Test the Stability
Give the rack a firm shake. It should not move side-to-side or up-and-down. If it wobbles, recheck the pin and anti-rattle device.
Pro Tip: Use a Hitch Lock
For added security, especially in urban areas, use a hitch lock that requires a key to remove the rack. This deters thieves and gives you peace of mind.
Step 4: Install a Trunk-Mounted Bike Rack
Trunk racks are budget-friendly and don’t require a hitch, but they require careful installation to avoid damage.
Step 4.1: Position the Rack on the Trunk
Lay the rack on the rear of your SUV, centered over the trunk or hatch. Make sure the top hooks will attach to the top edge of the trunk, and the bottom hooks to the bumper or underbody.
Step 4.2: Attach the Top Hooks
Hook the upper straps over the top edge of the trunk. Make sure they’re secure and not twisted. Use rubber pads or foam protectors to prevent paint scratches.
Step 4.3: Secure the Bottom Hooks
Attach the lower hooks to the bumper or under the rear valance. Avoid hooking onto plastic trim that could break.
Step 4.4: Tighten All Straps
Pull each strap tight, but not so tight that it warps the trunk. The rack should be snug and not move when shaken.
Step 4.5: Check for Clearance
Open the trunk or hatch to ensure the rack doesn’t interfere. If it blocks access, you may need to adjust or consider a different rack type.
Pro Tip: Use Frame Protectors
Place soft pads or towels between the rack and your SUV’s paint to prevent scratches, especially on glossy finishes.
Step 5: Install a Roof-Mounted Bike Rack
Roof racks keep your rear hatch free and are great for tall SUVs, but they require lifting bikes overhead.
Step 5.1: Install Roof Crossbars (If Needed)
Most SUVs come with roof rails, but you may need crossbars. Install them according to the manufacturer’s instructions, ensuring they’re level and secure.
Step 5.2: Attach the Bike Rack to the Crossbars
Slide the rack’s clamps onto the crossbars. Tighten the bolts or levers until the rack is secure. Use a torque wrench if specified.
Step 5.3: Adjust the Bike Holders
Position the bike holders so they’re spaced evenly and won’t interfere with each other. Some racks have adjustable arms.
Step 5.4: Test the Rack
Give the rack a shake. It should not move on the crossbars. Check that all bolts are tight.
Pro Tip: Use a Step Stool
If you’re not tall enough to lift bikes onto the roof, use a sturdy step stool. Never stand on your SUV’s bumper or doors.
Step 6: Install a Spare Tire-Mounted Bike Rack
These racks are perfect for SUVs like the Jeep Wrangler, Toyota 4Runner, or Ford Bronco with rear-mounted spare tires.
Step 6.1: Position the Rack on the Spare Tire
Place the rack against the spare tire, aligning the mounting arms with the tire’s bolts or rim.
Step 6.2: Secure the Mounting Arms
Use the provided U-bolts or clamps to attach the rack to the spare tire bolts. Tighten evenly to avoid warping the tire mount.
Step 6.3: Lock the Rack in Place
Some models have a locking mechanism or pin. Engage it to prevent theft.
Step 6.4: Test for Stability
Shake the rack. It should not move. Check that the spare tire still spins freely (if applicable).
Pro Tip: Check Tire Pressure
After installing, check your spare tire’s pressure. The added weight of the rack and bikes can affect it.
Step 7: Load Your Bikes Safely
Now that your rack is installed, it’s time to load your bikes. Doing this wrong can damage your bikes or SUV.
Step 7.1: Remove Loose Items
Take off water bottles, pumps, or bags that could fall off during transit.
Step 7.2: Load Bikes Frame-First
Always secure the bike frame—not the wheels or handlebars—to the rack. Use the provided clamps or straps.
Step 7.3: Space Bikes Evenly
Leave at least 2–3 inches between bikes to prevent contact. Use frame protectors if needed.
Step 7.4: Secure All Straps and Locks
Tighten all straps and use locks if your rack has them. Double-check that nothing is loose.
Step 7.5: Check Clearance
Make sure bikes don’t block your license plate, taillights, or rearview camera. If they do, adjust the rack or use a flag or light extension.
Pro Tip: Load Heaviest Bikes First
Place heavier bikes (like e-bikes) on the inside to improve balance and reduce sway.
Step 8: Test Before You Drive
Never hit the road without a quick safety check.
Step 8.1: Do a Shake Test
Grab the rack and bikes and shake them firmly. If anything moves, tighten it.
Step 8.2: Check Straps and Locks
Ensure all straps are tight and locks are engaged.
Step 8.3: Test Trunk Access
Open your trunk or hatch to make sure it still works.
Step 8.4: Take a Short Test Drive
Drive slowly around the block. Listen for rattling or unusual noises. Stop and recheck if needed.
Troubleshooting Common Issues
Even with careful installation, problems can happen. Here’s how to fix them.
Rack Wobbles or Sways
- For hitch racks: Tighten the anti-rattle bolt or use a hitch tightener.
- For trunk racks: Re-tighten straps and ensure hooks are secure.
- For roof racks: Check crossbar tightness and redistribute bike weight.
Bikes Scrape the Ground
This usually happens with long-wheelbase bikes on trunk racks. Try:
- Using a hitch rack instead.
- Angling the bikes upward.
- Adding a ramp or lowering the suspension (if safe).
Rack Blocks Trunk Access
- Switch to a roof or hitch rack with a tilt feature.
- Use a rack that folds up when not in use.
Straps Keep Loosening
- Use cam buckle straps instead of ratchet types.
- Add zip ties as backup.
- Check for worn or damaged straps—replace if needed.
Bikes Get Damaged During Transit
- Always secure the frame, not wheels.
- Use frame protectors.
- Space bikes properly.
Maintenance and Care for Your Bike Rack
To keep your rack in top condition:
- Clean it after each use, especially if you ride in mud or salt.
- Inspect straps, bolts, and locks for wear.
- Lubricate moving parts (like tilt hinges) with silicone spray.
- Store indoors when not in use to prevent rust and UV damage.
- Check torque settings on hitch bolts periodically.
Conclusion
Attaching a bike rack to your SUV doesn’t have to be complicated. With the right rack, proper installation, and a few safety checks, you can transport your bikes confidently and securely.
Remember: how to attach a bike rack to your SUV depends on your vehicle type, rack style, and biking needs. Take the time to choose wisely, install carefully, and maintain regularly.
Whether you’re heading to the mountains, the beach, or just around town, your bike rack is your gateway to adventure. So get out there, ride safe, and enjoy the journey!