
Learn how to attach a kayak to SUV safely and efficiently with this complete guide. From choosing the right roof rack to securing your kayak and driving tips, we cover everything you need for a smooth, damage-free trip to the water.
Key Takeaways
- Choose the right roof rack system: A proper roof rack is essential for safely transporting your kayak. Look for crossbars that match your SUV’s roof type and weight capacity.
- Use kayak-specific carriers: J-style, saddle, or stacker carriers provide better support and reduce the risk of damage compared to tying the kayak directly to crossbars.
- Secure with high-quality straps: Always use cam buckle or ratchet straps made for outdoor use. Avoid bungee cords, which can loosen during travel.
- Double-check all connections: Before hitting the road, tug-test every strap and ensure the kayak doesn’t shift or rattle.
- Drive cautiously and monitor regularly: High winds and speed can affect stability. Pull over every hour to check your load.
- Protect your kayak and SUV: Use padding on crossbars and nose/tail lines to prevent scratches and improve aerodynamics.
- Practice loading and unloading: The more you do it, the easier and safer it becomes. Practice in your driveway before your first trip.
How to Attach a Kayak to SUV: A Complete Step-by-Step Guide
So you’ve got your kayak, your paddle, and your sense of adventure—now all you need is a safe way to get it to the water. Whether you’re heading to a serene lake, a rushing river, or the open ocean, knowing how to attach a kayak to SUV properly is essential. A poorly secured kayak can damage your vehicle, ruin your gear, or even become a dangerous hazard on the road.
In this guide, we’ll walk you through every step of safely and securely attaching your kayak to your SUV. You’ll learn about the right equipment, proper loading techniques, and smart driving practices. By the end, you’ll feel confident strapping down your kayak and hitting the road with peace of mind.
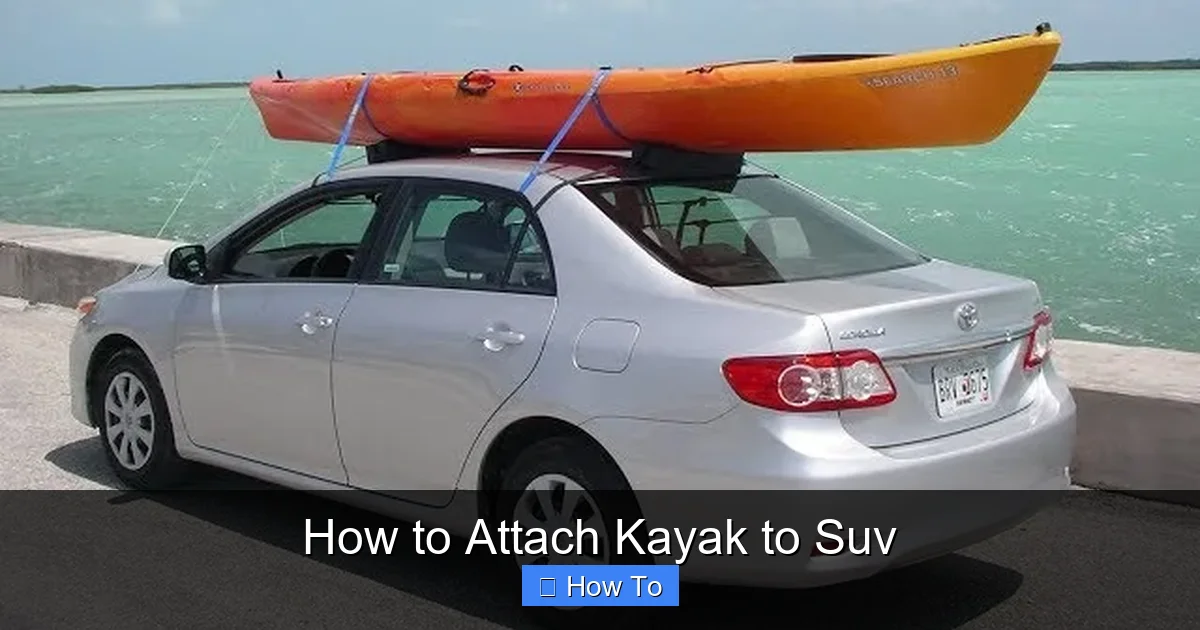
Why Proper Kayak Transport Matters
Visual guide about How to Attach Kayak to Suv
Image source: i.ytimg.com
Transporting a kayak isn’t just about convenience—it’s about safety. A kayak that shifts or comes loose while driving can cause serious accidents. Even a small wobble at highway speeds can throw off your SUV’s balance. Plus, improper loading can scratch your roof, bend your crossbars, or crack your kayak.
Many beginners make the mistake of thinking “as long as it’s tied down, it’s fine.” But kayaks are long, lightweight, and aerodynamic—meaning they act like sails in the wind. Without the right setup, they can lift, shift, or even fly off your roof.
That’s why it’s crucial to use the correct gear and follow proven methods. This guide will help you avoid common mistakes and ensure your kayak arrives safely at your destination.
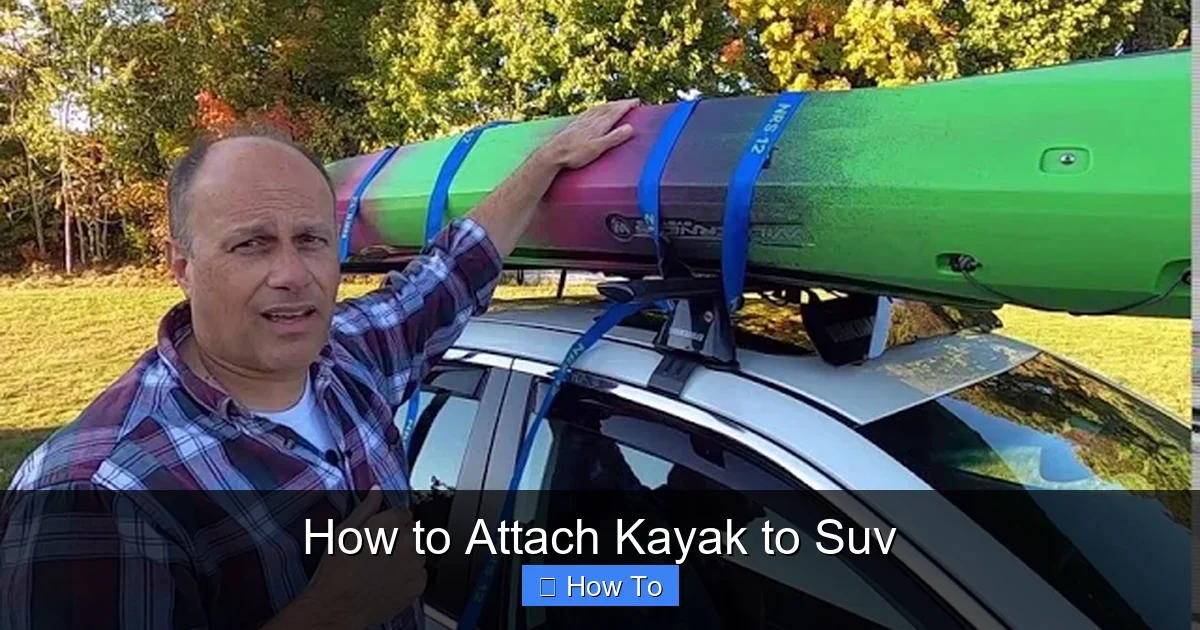
Step 1: Choose the Right Roof Rack System
Visual guide about How to Attach Kayak to Suv
Image source: kayakpaddling.net
Before you can attach a kayak to SUV, you need a solid foundation: a roof rack. Not all SUVs come with factory-installed crossbars, and not all crossbars are created equal.
Check Your SUV’s Roof Type
SUVs typically have one of three roof types:
- Raised Rails: These are the most common. Two longitudinal bars run along the roof edges. You can easily attach crossbars between them.
- Flush Rails: These are hidden under the roof and require specific adapters to install crossbars.
- Bare Roof (No Rails): Some SUVs have a smooth roof with no rails. In this case, you’ll need a clamp-on roof rack system that attaches to the door frames.
Check your owner’s manual or visit the manufacturer’s website to confirm your roof type. This will help you choose compatible crossbars.
Select the Right Crossbars
Crossbars should be:
- Strong enough: Check the weight rating. Most kayaks weigh 30–70 pounds, but you also need to account for wind resistance and dynamic forces while driving. Aim for crossbars rated for at least 100–150 pounds.
- Wide enough: The crossbars should extend slightly beyond the width of your SUV’s roof to provide stable support. Too narrow, and your kayak may overhang dangerously.
- Aerodynamic: Look for oval or teardrop-shaped bars that reduce wind noise and drag.
Popular brands include Thule, Yakima, and Rhino-Rack. These companies offer vehicle-specific kits that ensure a perfect fit.
Install the Crossbars Correctly
Follow the manufacturer’s instructions carefully. Most systems involve:
- Attaching mounting feet to the roof rails or door frames.
- Sliding crossbars into the feet and tightening them securely.
- Using a torque wrench or included tool to ensure proper tightness—don’t overtighten, as this can damage the roof.
Once installed, give the crossbars a firm shake. They shouldn’t move or creak.
Step 2: Choose the Right Kayak Carrier
Now that your roof rack is ready, it’s time to choose how to support your kayak. You have several options, each with pros and cons.
Saddle-Style Carriers
These are the most common and user-friendly. The kayak rests directly on padded arms that cradle the hull.
- Pros: Easy to load, good for most kayak types, affordable.
- Cons: Can cause hull stress over time if not padded properly.
Look for models with thick, UV-resistant foam padding. Some include adjustable arms to fit different hull shapes.
J-Style Carriers
These hold the kayak on its side, like a J-hook. They’re great for saving space—especially if you’re carrying two kayaks.
- Pros: Space-efficient, secure, good for longer trips.
- Cons: Harder to load alone, may require a step stool or loading assist.
J-carriers often come with built-in padding and locking mechanisms for added security.
Stacker Carriers
These allow you to stack multiple kayaks vertically. Ideal for families or groups.
- Pros: Carry up to four kayaks, compact design.
- Cons: Top kayaks are harder to access, increased wind resistance.
If you’re carrying more than one kayak, stackers are a smart choice—but make sure your SUV’s roof can handle the extra weight.
Foam Blocks (Budget Option)
If you don’t want to invest in a carrier, foam blocks can work in a pinch. These rest on your crossbars and support the kayak hull.
- Pros: Inexpensive, easy to store.
- Cons: Less secure, not ideal for long trips or high speeds.
Only use foam blocks for short, low-speed drives. Always add extra straps and nose/tail lines.
Step 3: Prepare Your Kayak and SUV
Before loading, take a few minutes to prepare both your kayak and your vehicle.
Clean the Kayak
Remove any dirt, sand, or debris from the hull. This prevents scratching your SUV’s roof and keeps your gear clean.
Check for Damage
Inspect your kayak for cracks, soft spots, or weak areas. Don’t transport a damaged kayak—it could fail during the trip.
Remove Accessories
Take off any detachable parts like rod holders, hatches, or rudders. These can catch wind or get damaged during transport.
Protect Your SUV’s Roof
Use a soft towel or moving blanket under the crossbars if they’re metal and might scratch the paint. Some crossbars come with rubber pads—use them.
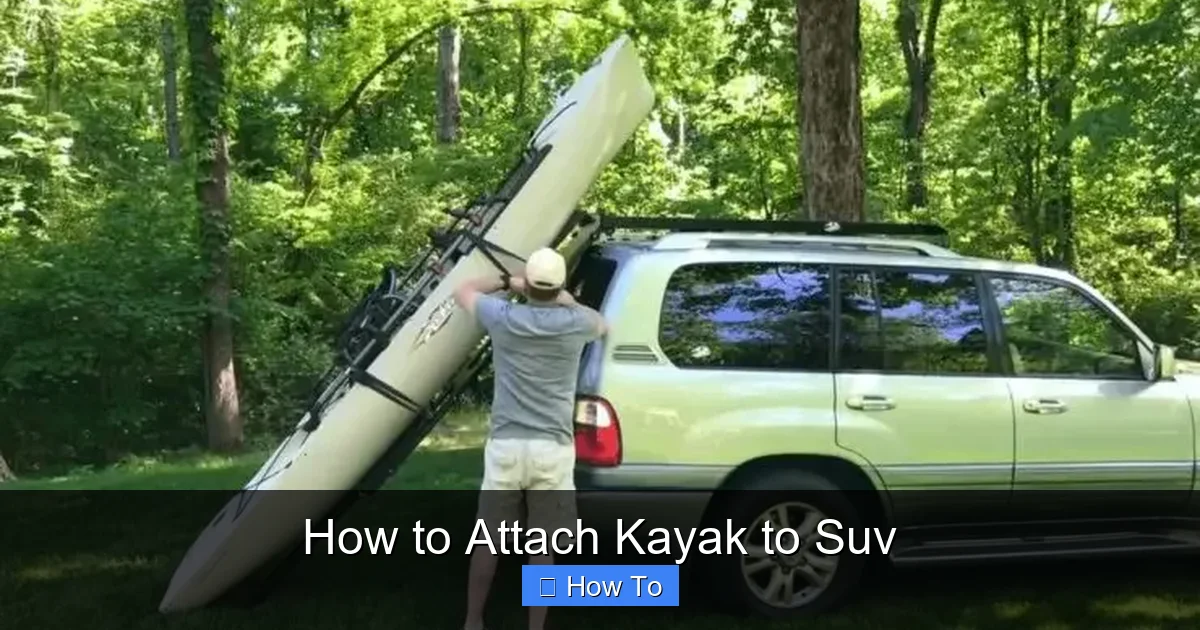
Step 4: Load the Kayak onto the SUV
Now for the fun part—getting your kayak on the roof. This can be tricky, especially if you’re doing it alone.
Use a Loading Assist (Optional but Helpful)
A kayak loader is a small ramp that helps you slide the kayak onto the roof. It reduces strain and prevents dropping.
Alternatively, use a pool noodle cut in half and placed on the edge of the roof. This creates a smooth surface to slide the kayak up.
Team Lift (Recommended for Heavy Kayaks)
If your kayak is over 50 pounds, ask a friend to help. Stand on opposite sides, lift together, and place the kayak gently on the carriers.
Solo Loading Tips
If you’re alone:
- Place the kayak on the ground next to the SUV, parallel to the vehicle.
- Lift one end and rest it on the roof.
- Walk to the other end and lift it up, sliding it into place.
- Use your legs, not your back—bend your knees and keep your back straight.
Take your time. Rushing increases the risk of dropping the kayak.
Position the Kayak Correctly
Once on the roof:
- Center the kayak so it’s balanced left to right.
- Make sure it’s not too far forward or back—this affects handling.
- If using a J-carrier, ensure the kayak is seated fully in the cradle.
Step 5: Secure the Kayak with Straps
This is the most critical step. A poorly secured kayak is a dangerous one.
Use the Right Straps
Avoid bungee cords—they stretch and can snap. Instead, use:
- Cam Buckle Straps: Easy to use, reliable, and less likely to overtighten.
- Ratchet Straps: Very secure, but can overtighten and damage the kayak if not used carefully.
Look for straps with a minimum breaking strength of 500 pounds and made from UV-resistant polyester webbing.
Attach Straps to Crossbars
Thread the strap under the crossbar and over the kayak. Make sure the strap isn’t twisted.
Tighten Securely—But Not Too Tight
Pull the strap tight so the kayak doesn’t move. But don’t crank it down so hard that you deform the hull. A good rule: you should be able to fit one finger between the strap and the kayak.
Use at Least Two Straps
One near the front and one near the back. For longer kayaks or high-speed driving, add a third in the middle.
Add Nose and Tail Lines (Highly Recommended)
These are extra straps that run from the front and back of the kayak to the bumper or tow hooks of your SUV.
- They prevent the kayak from shifting forward or backward.
- They reduce wind lift at high speeds.
- They add an extra layer of security in case a main strap fails.
Attach nose and tail lines to solid anchor points—not plastic bumpers or trim. Use bow and stern loops if your kayak has them.
Step 6: Double-Check Everything
Before you drive away, do a thorough inspection.
Tug Test
Grab the kayak and try to move it side to side and front to back. It shouldn’t shift more than an inch.
Check Strap Tension
Make sure all straps are tight and not loose or sagging.
Inspect Anchor Points
Ensure straps are attached to crossbars, not loose parts of the roof rack.
Look for Obstructions
Make sure the kayak doesn’t block your view in mirrors or interfere with the antenna.
Secure Loose Ends
Tuck or tie down any loose strap ends so they don’t flap in the wind.
Step 7: Drive Safely and Monitor Your Load
Even with a perfect setup, driving with a kayak requires extra caution.
Reduce Speed
High winds and crosswinds can affect stability. Drive slower than usual, especially on highways.
Avoid Sudden Maneuvers
No sharp turns, hard braking, or quick lane changes. These can shift the load.
Check Every Hour
Pull over and inspect your straps and kayak. Vibration and wind can loosen straps over time.
Be Mindful of Height
A kayak adds several feet to your vehicle’s height. Watch for low bridges, drive-thrus, and parking garages.
Use a Flag (Optional)
If your kayak extends more than 4 feet beyond the front or back of your SUV, attach a red or orange flag for visibility.
Troubleshooting Common Problems
Even experienced kayakers run into issues. Here’s how to solve the most common ones.
Straps Keep Loosening
- Use cam buckle straps with built-in tensioners.
- Check for worn or frayed webbing.
- Ensure the kayak isn’t rocking, which can loosen straps over time.
Kayak Shifts While Driving
- Re-tighten all straps.
- Add nose and tail lines if you haven’t already.
- Check that the kayak is centered and seated properly in the carriers.
Wind Noise or Whistling
- This is normal, but excessive noise means poor aerodynamics.
- Use a kayak cover or fairing to reduce drag.
- Ensure the kayak is as low as possible on the roof.
Scratches on Roof or Kayak
- Use more padding on crossbars and carriers.
- Clean the roof and kayak before loading.
- Consider upgrading to padded carriers.
Difficulty Loading Alone
- Invest in a kayak loader or ramp.
- Practice in your driveway.
- Use a kayak cart to wheel it closer to the SUV.
Final Tips for a Smooth Trip
- Practice at home: Load and unload your kayak a few times before your first trip. It builds confidence and reveals any issues.
- Keep a checklist: Write down your steps and use it every time. It ensures you don’t forget anything.
- Store gear properly: Keep straps, carriers, and tools in a dry, labeled bag in your SUV.
- Respect weight limits: Don’t overload your roof. Check your SUV’s manual for maximum dynamic roof load.
- Be weather-aware: Avoid transporting in high winds or storms if possible.
Conclusion
Learning how to attach a kayak to SUV doesn’t have to be stressful. With the right equipment, a little practice, and attention to detail, you can transport your kayak safely and confidently. Remember: a secure load is a safe load. Take your time, double-check everything, and enjoy the journey to the water.
Whether you’re a weekend warrior or a seasoned paddler, this guide gives you everything you need to get your kayak from your garage to the great outdoors—without a hitch.