

Building an off-road SUV transforms a standard vehicle into a rugged adventure machine. This guide walks you through essential upgrades like suspension, tires, skid plates, and recovery gear to handle tough trails safely and confidently.
Key Takeaways
- Start with a solid base vehicle: Choose a 4×4 SUV with good ground clearance and strong aftermarket support, like a Jeep Wrangler or Toyota 4Runner.
- Upgrade suspension first: A quality lift kit improves articulation, ride height, and off-road performance—don’t skip this step.
- Invest in all-terrain or mud-terrain tires: Proper tires are critical for traction; match tire size to your lift and driving style.
- Protect vital components: Install skid plates for the engine, transmission, and fuel tank to prevent damage on rocks and rough terrain.
- Add recovery gear and lighting: Winches, recovery straps, and LED light bars increase safety and capability during night or stuck situations.
- Test and tune gradually: Take your build to mild trails first, then progress to harder terrain as you gain confidence and identify needed improvements.
- Budget wisely: Off-road builds can get expensive—plan your mods in phases to spread out costs without sacrificing safety.
How to Build an Off Road SUV: A Complete Step-by-Step Guide
So you’ve got the itch to hit the trails, climb rocks, or explore remote backcountry roads—but your stock SUV just isn’t cutting it. Maybe it bottoms out on mild ruts, or the tires spin helplessly in mud. That’s where building an off-road SUV comes in. Whether you’re a weekend warrior or dreaming of overlanding across continents, turning your vehicle into a capable off-roader is one of the most rewarding automotive projects you can take on.
This guide will walk you through the entire process of how to build an off road SUV—from choosing the right base vehicle to installing critical upgrades and testing your rig on real terrain. We’ll keep it practical, budget-conscious, and beginner-friendly, so even if you’ve never lifted a wrench before, you’ll feel confident tackling each step.
By the end, you’ll have a tough, reliable, and adventure-ready SUV that can handle everything from forest service roads to rocky mountain passes. Let’s get started.
Step 1: Choose the Right Base Vehicle
Before you buy a single bolt or part, you need a solid foundation. Not all SUVs are created equal when it comes to off-road potential. The best off-road builds start with vehicles that already have strong 4×4 systems, good approach/departure angles, and a thriving aftermarket community.
What to Look For
Start by focusing on factory 4×4 models. Rear-wheel drive or part-time AWD won’t cut it for serious off-roading. Look for vehicles with:
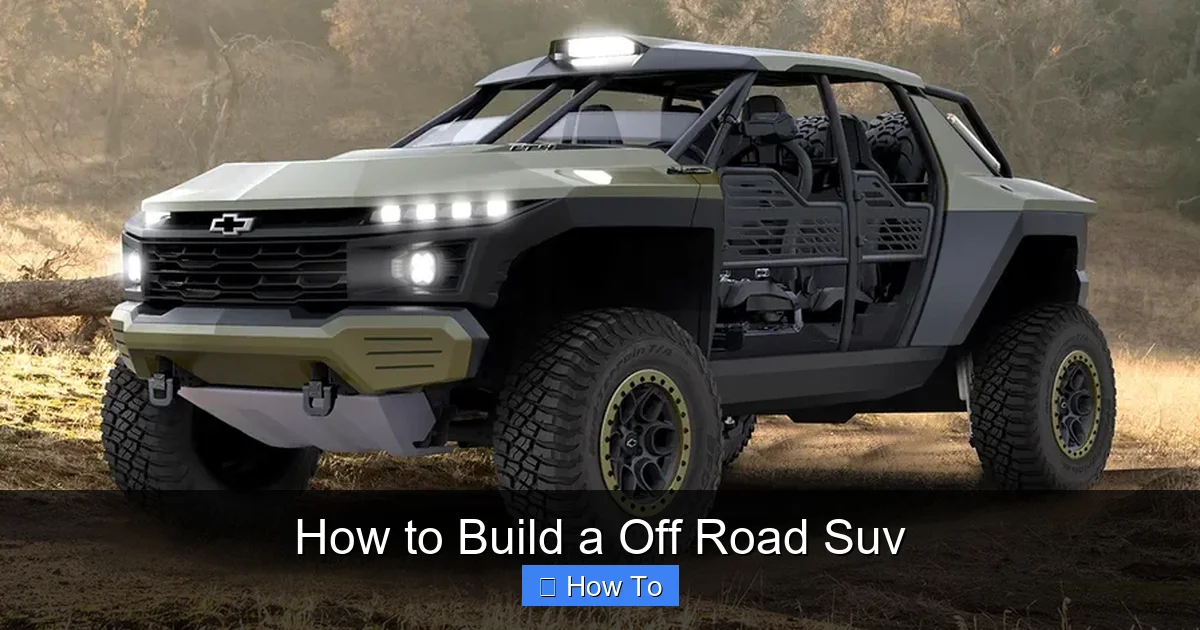
Visual guide about How to Build a Off Road Suv
Image source: a57.foxnews.com
- Low-range transfer case (essential for crawling over obstacles)
- Solid front and rear axles (or at least strong independent suspension with good articulation)
- High ground clearance (8+ inches is ideal)
- Short overhangs (for better approach and departure angles)
- Available lift kits, bumpers, and armor from reputable brands
Top Base Vehicle Options
Some of the most popular and capable base vehicles include:
- Jeep Wrangler (TJ, JK, JL): The gold standard for off-road builds. Easy to modify, tons of parts available, and built for trail use.
- Toyota 4Runner (3rd–5th gen): Reliable, durable, and great for overlanding. Slightly less extreme than a Wrangler but excellent for long trips.
- Nissan Xterra: Underrated and affordable, with a strong V6 and good aftermarket support.
- Ford Bronco (6th gen): Modern tech meets classic off-road design. Great for both daily driving and trail use.
- Chevrolet Colorado ZR2: A midsize truck with factory off-road upgrades—great if you want cargo space too.
Pro Tip: Buy used! Many off-road builds start with older, high-mileage vehicles that are cheaper to modify. Just make sure the frame, engine, and drivetrain are in good shape.
Step 2: Plan Your Build and Budget
Off-road builds can get expensive fast. A full transformation can cost anywhere from $5,000 to $20,000+, depending on how extreme you go. That’s why planning is crucial.
Set Clear Goals
Ask yourself:

Visual guide about How to Build a Off Road Suv
Image source: teslarati.com
- Will I use this for weekend trail rides, overlanding, rock crawling, or daily driving?
- How much time and money can I realistically invest?
- Do I want a mild upgrade or a full trail beast?
Your answers will shape your build. A daily driver that sees occasional trails needs different mods than a dedicated rock crawler.
Create a Phased Build Plan
Instead of blowing your budget all at once, break your build into phases:
- Phase 1: Suspension lift + tires + basic recovery gear
- Phase 2: Skid plates + bumpers + lighting
- Phase 3: Lockers + winch + interior mods (roof rack, fridge, etc.)
This approach lets you enjoy your vehicle sooner and spread out costs. Plus, you’ll learn what you really need along the way.
Budget Wisely
Here’s a rough cost breakdown for a mid-level build:
- Suspension lift kit: $800–$2,500
- Tires (4): $600–$1,200
- Wheels: $600–$1,500
- Skid plates: $400–$1,000
- Front bumper + winch: $1,000–$2,500
- LED light bar: $200–$600
- Recovery gear (straps, shackles, jack): $300–$600
Total: $3,900–$9,900 (before labor or tools)
Pro Tip: Buy used parts when possible—many forums and Facebook groups have great deals on gently used off-road gear.
Step 3: Upgrade the Suspension
The suspension is the heart of any off-road build. It determines how well your SUV handles bumps, rocks, and uneven terrain. A good lift kit not only raises your vehicle but also improves articulation, ride quality, and tire clearance.
Choose the Right Lift Type
There are two main types of lifts:
- Body Lift: Raises the body off the frame using spacers. Cheap and easy, but doesn’t improve suspension performance. Best for looks only.
- Suspension Lift: Replaces or modifies suspension components (springs, shocks, control arms) to raise the entire vehicle. This is what you want for real off-road performance.
For most builds, a 2–4 inch suspension lift is ideal. It gives you room for bigger tires without requiring major drivetrain modifications.
Pick Quality Components
Don’t skimp here. Cheap lift kits can cause poor handling, premature wear, and even safety issues. Look for reputable brands like:
- Old Man Emu (OME)
- Fox
- Bilstein
- Teraflex (for Jeeps)
- Icon Vehicle Dynamics
A complete kit should include:
- Coil springs or leaf springs
- Shocks (preferably remote reservoir for serious use)
- Control arms (if needed for alignment)
- Track bar and drop bracket
- Brake line extensions
Installation Tips
Unless you’re experienced, consider having a professional install your lift—especially if it involves welding or cutting. But if you’re DIY-ing:
- Always use a jack and jack stands—never work under a vehicle supported only by a jack.
- Follow the kit instructions carefully.
- After installation, get a professional alignment.
- Test drive on pavement first to check for vibrations or steering issues.
Pro Tip: Add a steering stabilizer to reduce bump steer and improve control on rough trails.
Step 4: Install Bigger, Better Tires
Tires are your only contact with the ground—so they matter more than almost anything else. Stock tires are designed for pavement, not mud, rocks, or sand.
Choose the Right Tire Type
There are three main off-road tire categories:
- All-Terrain (A/T): Great for mixed use—pavement, dirt, light mud. Quieter and longer-lasting. Examples: BFGoodrich All-Terrain T/A KO2, Goodyear Wrangler Duratrac.
- Mud-Terrain (M/T): Aggressive tread for deep mud, rocks, and extreme terrain. Louder and wear faster on pavement. Examples: Nitto Trail Grappler, Mickey Thompson Baja Boss.
- Hybrid: A mix of both—good for overlanders who want capability without the noise.
For most builders, all-terrain tires are the best balance of performance and daily drivability.
Pick the Right Size
Larger tires improve ground clearance and traction, but they can cause problems if not matched to your lift and gearing.
- A 2–3 inch lift can typically handle 33-inch tires.
- A 4-inch lift can fit 35-inch tires (may require fender trimming).
- 37-inch+ tires usually need regearing and major modifications.
Use a tire size calculator to check clearance and speedometer accuracy.
Don’t Forget the Spare
If you’re running bigger tires, you’ll need a full-size spare. Stock spare tire carriers often can’t handle the weight. Upgrade to a heavy-duty rear bumper with an integrated tire carrier or a roof-mounted spare.
Pro Tip: Carry a tire repair kit and portable air compressor—punctures happen, and you don’t want to be stranded.
Step 5: Add Skid Plates and Armor
When you’re crawling over rocks or driving through rough terrain, the underside of your SUV is vulnerable. Skid plates protect critical components from damage.
Essential Skid Plates
At a minimum, install:
- Engine skid plate: Protects the oil pan and engine block.
- Transmission skid plate: Shields the transmission from rocks.
- Transfer case skid plate: Often overlooked but vital for 4×4 systems.
- Fuel tank skid plate: Prevents punctures that could cause leaks or fires.
Look for 3/16” or 1/4” steel plates from brands like RCI Offroad, PSC, or C4 Fabrication.
Optional Armor
For more extreme use, consider:
- Sliders (rock rails): Protect doors and rocker panels.
- Front and rear differential skids.
- Steering and brake line guards.
Pro Tip: Aluminum skid plates are lighter but less durable than steel. Choose based on your terrain and budget.
Step 6: Upgrade Bumpers and Add a Winch
Stock bumpers are lightweight and not designed for off-road abuse. Upgrading gives you better protection, more mounting options, and the ability to add a winch.
Choose Off-Road Bumpers
Look for bumpers that offer:
- High approach/departure angles
- Winch compatibility
- Recovery points (D-rings)
- Lighting mounts
- Lightweight but strong construction (steel or aluminum)
Popular brands: ARB, Smittybilt, Poison Spyder, and Rugged Ridge.
Add a Winch
A winch is one of the most important recovery tools. If you get stuck, it can pull you out—or help others.
- Choose a winch with at least 1.5x your vehicle’s weight (e.g., 9,500 lbs for a 6,000 lb SUV).
- Look for synthetic rope—it’s lighter, safer, and easier to handle than steel cable.
- Ensure your bumper and frame can support the winch’s load.
Pro Tip: Practice using your winch before you need it. Learn how to use a snatch block for double-line pulls.
Step 7: Improve Lighting
Off-roading often happens at dawn, dusk, or night. Good lighting is essential for safety and visibility.
Upgrade Your Lights
Start with:
- LED light bar: Mount on the roof or grille for wide, bright illumination.
- Fog lights or ditch lights: Improve peripheral vision on trails.
- Reverse lights: Bright LEDs help when backing up in the dark.
Look for IP67 or higher waterproof ratings and durable housings.
Wiring and Switches
Use a relay harness and install switches in the cabin. Label them clearly. Consider a dual-battery system if you’re running multiple high-draw accessories.
Pro Tip: Avoid blinding other drivers—angle light bars downward and use amber lights for dusty or foggy conditions.
Step 8: Add Recovery Gear
Even the best-built SUV can get stuck. Be prepared with the right recovery tools.
Essential Recovery Gear
- Recovery straps (kinetic and flat)
- D-shackles (rated for off-road use)
- Hi-Lift jack or hydraulic off-road jack
- Shovel and traction boards (like Maxtrax)
- First aid kit and fire extinguisher
- CB radio or satellite communicator (for remote areas)
Store gear in a secure, waterproof box or cargo organizer.
Step 9: Test and Tune Your Build
Once your build is complete, it’s time to test it—safely.
Start Easy
Begin with mild forest roads or gravel trails. Check for:
- Unusual noises (squeaks, clunks)
- Steering or braking issues
- Tire rub when turning
- Overheating (especially with bigger tires)
Gradually Increase Difficulty
Move to moderate trails, then rocky terrain. Pay attention to how your suspension, tires, and drivetrain perform.
Tune as Needed
You might need to:
- Adjust tire pressure (lower for sand/mud, higher for rocks)
- Re-torque suspension bolts after 500 miles
- Add a transmission cooler if towing or crawling
- Upgrade to regearing if acceleration feels sluggish
Pro Tip: Join a local off-road club. Experienced drivers can offer advice, trail recommendations, and help if you get stuck.
Troubleshooting Common Issues
Even the best builds can have problems. Here’s how to fix common issues:
Tire Rubbing
If your tires rub when turning or over bumps, you may need:
- Fender trimming
- Larger wheel spacers
- A slightly taller lift
Poor Fuel Economy
Bigger tires and added weight reduce MPG. Solutions:
- Regear the differentials
- Keep tires properly inflated
- Reduce unnecessary weight
Vibrations at Highway Speeds
Often caused by driveline angles after a lift. Fix with:
- A transfer case drop or adjustable control arms
- A new driveshaft (if lifted over 3 inches)
Winch Not Working
Check:
- Battery charge
- Connections and fuses
- Remote control battery
Conclusion
Building an off-road SUV is more than just adding parts—it’s about creating a vehicle that matches your adventure style. Whether you’re exploring backcountry trails, crossing deserts, or just want the confidence to go further, the right build makes all the difference.
Start with a solid base, plan your mods, and invest in quality components. Focus on suspension, tires, protection, and recovery gear first. Test your build gradually, and don’t be afraid to ask for help or join a community of fellow off-roaders.
Remember, the best off-road SUV isn’t the one with the most expensive parts—it’s the one that’s reliable, capable, and ready for whatever the trail throws at it. So get out there, get dirty, and enjoy the ride.