
Building a power chair loader for your SUV can make transporting mobility devices easier, safer, and more convenient. This guide walks you through the entire process—from planning and materials to assembly and testing—so you can create a custom solution that fits your vehicle and power chair.
Key Takeaways
- Assess your SUV and power chair first: Measure weight, dimensions, and door clearance to ensure compatibility before starting the build.
- Use sturdy, lightweight materials: Aluminum framing and high-grade steel hardware provide strength without adding excessive weight.
- Prioritize safety with secure anchoring: Always use locking mechanisms, straps, and anti-slip surfaces to prevent movement during transit.
- Include a motorized lift system: A 12V electric actuator or scissor lift simplifies loading and reduces physical strain.
- Test thoroughly before regular use: Perform multiple dry runs with the actual power chair to check stability, alignment, and ease of operation.
- Follow local vehicle modification laws: Some regions require inspections or certifications for aftermarket mobility equipment.
- Consider professional help if unsure: If welding or electrical work is beyond your skill level, consult a certified technician.
Introduction: Why Build a Power Chair Loader for Your SUV?
If you or a loved one relies on a power chair, you know how challenging it can be to transport it safely and efficiently. SUVs offer more space than sedans, but loading a heavy, bulky power chair manually is often impractical—or even dangerous. That’s where a custom-built power chair loader comes in.
This guide will show you how to build a reliable, affordable, and easy-to-use power chair loader specifically designed for your SUV. Whether you’re a DIY enthusiast or someone looking for a practical mobility solution, this project combines mechanical ingenuity with everyday usability. You’ll learn how to design, assemble, and install a loader that fits your vehicle, supports your power chair’s weight, and makes getting in and out of your SUV a breeze.
By the end of this guide, you’ll have a fully functional loader that reduces physical strain, increases independence, and gives you peace of mind every time you travel. Let’s get started!
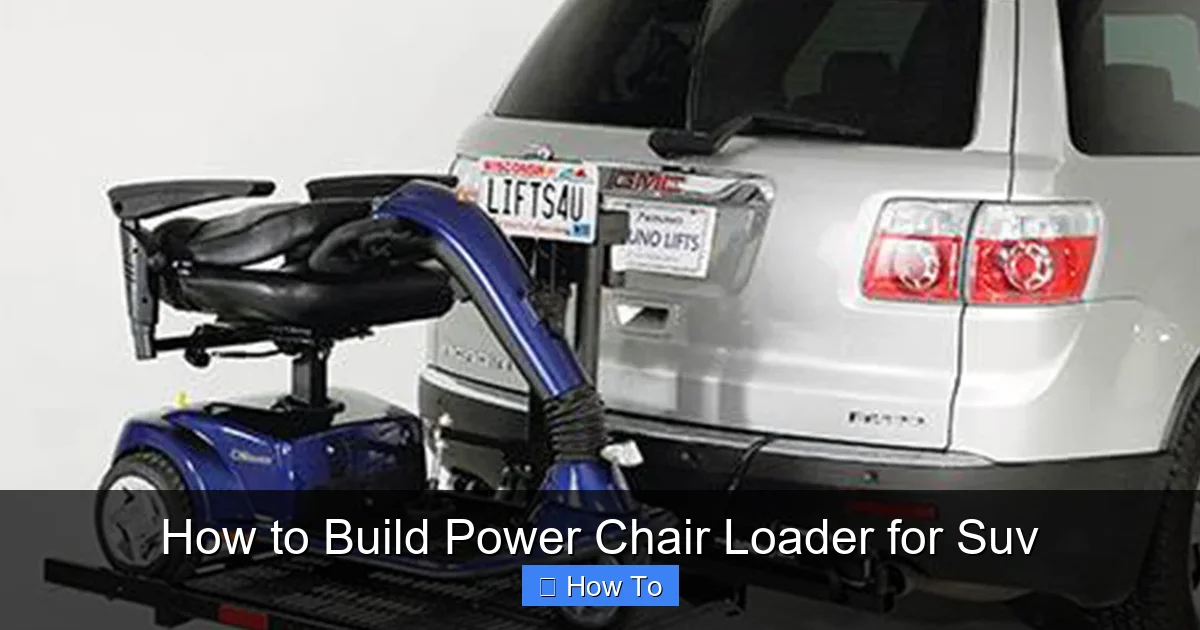
Step 1: Assess Your Needs and Equipment
Before picking up a wrench or ordering materials, take time to evaluate your specific situation. A successful build starts with understanding what you’re working with.
Visual guide about How to Build Power Chair Loader for Suv
Image source: necaonline.com
Measure Your Power Chair
Grab a tape measure and note down the following:
- Weight: Check the manufacturer’s specs or use a bathroom scale (weigh yourself holding the chair, then subtract your weight).
- Length, width, and height: Measure from the front wheels to the back, side to side, and from the ground to the highest point (including joystick or canopy).
- Wheelbase and turning radius: Important for maneuvering the chair onto the loader platform.
Most power chairs weigh between 150 and 300 pounds. If yours is heavier, you’ll need a more robust lifting mechanism.
Inspect Your SUV
Not all SUVs are created equal when it comes to loading access. Consider:
- Rear door type: Is it a liftgate, swing door, or split door? Liftgates are easiest for mounting equipment.
- Interior height and width: Measure the opening when the door is fully open. You need at least 6–12 inches of clearance beyond the chair’s dimensions.
- Ground clearance: How high is the cargo floor from the ground? This affects ramp angle and loader height.
- Towing capacity and hitch receiver: If you plan to mount the loader externally, check if your SUV has a 2-inch receiver hitch.
For example, a Honda CR-V has about 30 inches of ground clearance and a 57-inch-wide cargo opening—ideal for most compact power chairs.
Determine Loading Style
There are three main types of loaders:
- Internal ramp system: The chair rolls up a ramp into the cargo area. Best for lighter chairs and frequent use.
- External lift platform: A motorized platform extends from the rear, lifts the chair, and retracts into the cargo area. Ideal for heavier chairs.
- Hitch-mounted lift: Attaches to the trailer hitch and lifts the chair from behind the vehicle. Great for SUVs with limited interior space.
For most SUVs, an external lift platform offers the best balance of safety, accessibility, and ease of use.
Step 2: Gather Tools and Materials
Now that you know what you’re building, it’s time to collect the right tools and parts. Don’t skip this step—using low-quality materials can lead to failure or injury.
Visual guide about How to Build Power Chair Loader for Suv
Image source: d3j17a2r8lnfte.cloudfront.net
Essential Tools
- Measuring tape and level
- Drill and drill bits (metal and wood)
- Socket wrench set
- Angle grinder or hacksaw
- Welder (if fabricating metal parts)
- Screwdrivers and pliers
- Multimeter (for electrical testing)
- Safety gear: gloves, goggles, ear protection
Recommended Materials
- Frame: 1.5″ x 1.5″ aluminum square tubing (lightweight and corrosion-resistant)
- Platform: ½” plywood or aluminum diamond plate (non-slip surface)
- Lifting mechanism: 12V electric linear actuator (rated for 500–1000 lbs) or scissor lift kit
- Mounting hardware: Grade 8 bolts, washers, and locking nuts
- Hinges and latches: Heavy-duty stainless steel
- Electrical components: 12V relay, toggle switch, fuse holder, 10-gauge wire, and battery connection kit
- Safety features: Ratchet straps, wheel chocks, and reflective tape
Tip: Buy materials from reputable suppliers like McMaster-Carr, Northern Tool, or local metal fabricators. Avoid cheap hardware store alternatives for critical load-bearing parts.
Step 3: Design Your Loader
A well-thought-out design prevents headaches during assembly and ensures long-term reliability. Sketch your plan before cutting any metal.
Create a Blueprint
Use graph paper or free software like SketchUp to draft your loader. Include:
- Platform dimensions (slightly larger than your power chair’s footprint)
- Actuator mounting points
- Hinge locations for folding or retracting parts
- Clearance for SUV door operation
- Weight distribution (center of gravity should be low and forward)
For example, a typical platform might be 30″ wide by 40″ long, with the actuator mounted at a 45-degree angle for optimal lift.
Choose the Right Actuator
Electric linear actuators are the heart of your loader. Look for:
- Stroke length: At least 12–18 inches to clear the SUV’s bumper
- Load capacity: 1.5x your chair’s weight (e.g., 450 lbs for a 300-lb chair)
- Duty cycle: Continuous or high-duty models for frequent use
- IP rating: Water-resistant (IP65 or higher) for outdoor use
Popular brands include Progressive Automations, Firgelli, and Actuonix. A 12V 500-lb actuator costs around $150–$250.
Plan the Electrical System
Your loader needs power from the SUV’s 12V system. Design a simple circuit:
- Run 10-gauge wire from the battery (via a fuse) to a toggle switch inside the cabin
- Connect the switch to a relay, which controls the actuator
- Use a double-pole switch to allow up/down movement
- Install an inline fuse (30–40 amps) near the battery
Warning: Always disconnect the negative battery terminal before working on electrical systems.
Step 4: Build the Platform and Frame
Now it’s time to turn your design into reality. Work in a clean, well-lit space with plenty of room.
Cut and Assemble the Frame
Using your measurements, cut the aluminum tubing to size. For a rectangular platform:
- Cut two long side rails (e.g., 40″)
- Cut two short end rails (e.g., 30″)
- Use a miter saw or angle grinder for clean 90-degree cuts
- Drill pilot holes and bolt the corners together with corner brackets
Reinforce the frame with cross braces every 12 inches for added rigidity.
Attach the Platform Surface
Secure the plywood or aluminum diamond plate to the frame using wood screws or rivets. If using wood, seal it with outdoor-grade varnish to prevent moisture damage.
Add non-slip tape or rubber matting to the surface—this prevents the chair from sliding during loading.
Install Wheel Chocks and Strap Anchors
Safety first! Bolt or weld small metal blocks at the front of the platform to stop the chair’s wheels. Also, install D-ring anchors at the corners for securing ratchet straps.
Example: Use 2″ x 2″ steel blocks welded 6″ from the front edge. Space them to match your chair’s wheelbase.
Step 5: Install the Lifting Mechanism
This is the most technical part of the build. Take your time and double-check all connections.
Mount the Actuator
Position the actuator so it lifts the platform evenly. Typically, it’s mounted at the rear center, angled upward.
- Bolt one end to the SUV’s frame or a custom bracket
- Bolt the other end to the underside of the platform
- Ensure full extension lifts the platform above the cargo floor
- Use spherical rod ends or flexible mounts to allow slight movement
Tip: Weld a steel plate to the SUV’s subframe for a secure mount. Never attach directly to plastic body panels.
Connect the Electrical System
Follow your circuit diagram:
- Run the power wire through the firewall (use an existing grommet)
- Connect to the battery with a fused link
- Install the toggle switch in the cabin (dashboard or center console)
- Test the actuator before final mounting
Use heat-shrink tubing and electrical tape on all connections to prevent shorts.
Add Safety Features
Include these critical safeguards:
- Limit switches: Automatically stop the actuator at full up/down positions
- Manual override: A hand crank or release valve in case of power failure
- Warning lights: LED indicators when the platform is in motion
- Emergency stop button: Mounted near the switch for quick shutdown
These features prevent accidents and give you control in unexpected situations.
Step 6: Install and Test the Loader
With everything built, it’s time to install and test your creation.
Mount to the SUV
For an external lift:
- Position the loader under the rear bumper
- Bolt the frame to the SUV’s chassis or hitch receiver
- Ensure the platform clears the ground when retracted
- Check that the rear door opens fully without interference
Use rubber isolators to reduce vibration and noise.
Perform Dry Runs
Before loading the actual power chair:
- Test the actuator with a dummy load (e.g., sandbags)
- Check for wobbling, binding, or overheating
- Verify the platform levels correctly
- Test the electrical system repeatedly
Make adjustments as needed—loosen bolts, realign parts, or reinforce weak spots.
Load the Power Chair
When ready:
- Drive the chair onto the platform slowly
- Engage the wheel chocks
- Secure with ratchet straps
- Operate the lift using the toggle switch
- Watch for smooth, even movement
Practice this process 5–10 times until it feels natural.
Troubleshooting Common Issues
Even the best builds can have hiccups. Here’s how to fix common problems:
Platform Wobbles During Lift
Cause: Weak frame or loose mounts.
Solution: Add cross braces or tighten all bolts. Check for bent tubing.
Actuator Overheats or Slows Down
Cause: Overloading or poor wiring.
Solution: Verify weight limits and upgrade to thicker wire (8-gauge). Add a cooling fan if needed.
Platform Doesn’t Level Properly
Cause: Uneven mounting or misaligned actuator.
Solution: Adjust hinge points or add shims under the frame.
Electrical Failure
Cause: Blown fuse or loose connection.
Solution: Check the fuse first. Then inspect all wires and terminals.
Chair Slides During Transit
Cause: Insufficient straps or smooth surface.
Solution: Use two ratchet straps (front and back) and add more non-slip material.
Maintenance and Long-Term Care
To keep your loader working safely for years:
- Lubricate hinges and actuator joints every 6 months
- Inspect bolts and welds for cracks or looseness
- Clean the platform after muddy or wet use
- Test the electrical system monthly
- Store indoors or cover when not in use
A little maintenance goes a long way in preventing breakdowns.
Conclusion: Enjoy Your Custom Power Chair Loader
Building a power chair loader for your SUV is a rewarding project that enhances mobility and independence. By following this guide, you’ve created a safe, reliable, and personalized solution that fits your lifestyle.
Remember, the key to success is careful planning, quality materials, and thorough testing. Don’t rush the process—safety is more important than speed. If you ever feel unsure, consult a professional or reach out to online DIY communities for support.
Now, every trip can be easier, smoother, and more enjoyable. Whether you’re heading to the store, visiting family, or exploring new places, your power chair goes with you—effortlessly. Happy building, and happy travels!