
Building custom storage drawers for your SUV is a smart way to maximize space and keep gear organized. This guide walks you through planning, measuring, cutting, assembling, and installing durable, functional drawers using simple tools and affordable materials.
Key Takeaways
- Plan before you build: Measure your SUV’s cargo area carefully and sketch a layout to ensure your drawers fit perfectly and don’t block access to other features.
- Choose the right materials: Use ½” or ¾” plywood for strength, and consider moisture-resistant or birch plywood for durability and a clean finish.
- Invest in quality drawer slides: Heavy-duty, full-extension ball-bearing slides (rated for 100+ lbs) ensure smooth operation and long-term reliability.
- Secure everything properly: Anchor the drawer system to your SUV’s tie-down points using bolts or straps to prevent shifting during driving.
- Add practical features: Include dividers, foam inserts, or non-slip mats to keep tools and gear organized and protected.
- Test and refine: After installation, test the drawers with real gear and make adjustments for smoother operation or better fit.
- Safety first: Always wear safety goggles, gloves, and a mask when cutting or sanding materials.
Introduction: Why Build Storage Drawers for Your SUV?
If you’ve ever struggled to find a tool, spare tire, or camping gear in the cluttered back of your SUV, you’re not alone. Whether you’re an outdoor enthusiast, a weekend warrior, or just someone who likes to stay organized, building custom storage drawers for your SUV can transform your vehicle into a mobile command center. Unlike flimsy plastic bins or temporary solutions, DIY drawers offer sturdy, tailored storage that maximizes every inch of cargo space.
In this guide, we’ll walk you through the entire process—from planning and measuring to cutting, assembling, and installing your very own SUV storage drawers. You don’t need to be a master carpenter to pull this off. With basic tools, some patience, and this step-by-step plan, you’ll have a professional-looking, highly functional storage system that fits your lifestyle. Plus, building it yourself saves money and lets you customize everything to your exact needs.
By the end of this guide, you’ll know how to design drawers that slide smoothly, hold heavy loads, and stay secure while driving. Whether you’re storing recovery gear, tools, coolers, or camping supplies, these drawers will keep everything neat, accessible, and protected. Let’s get started!
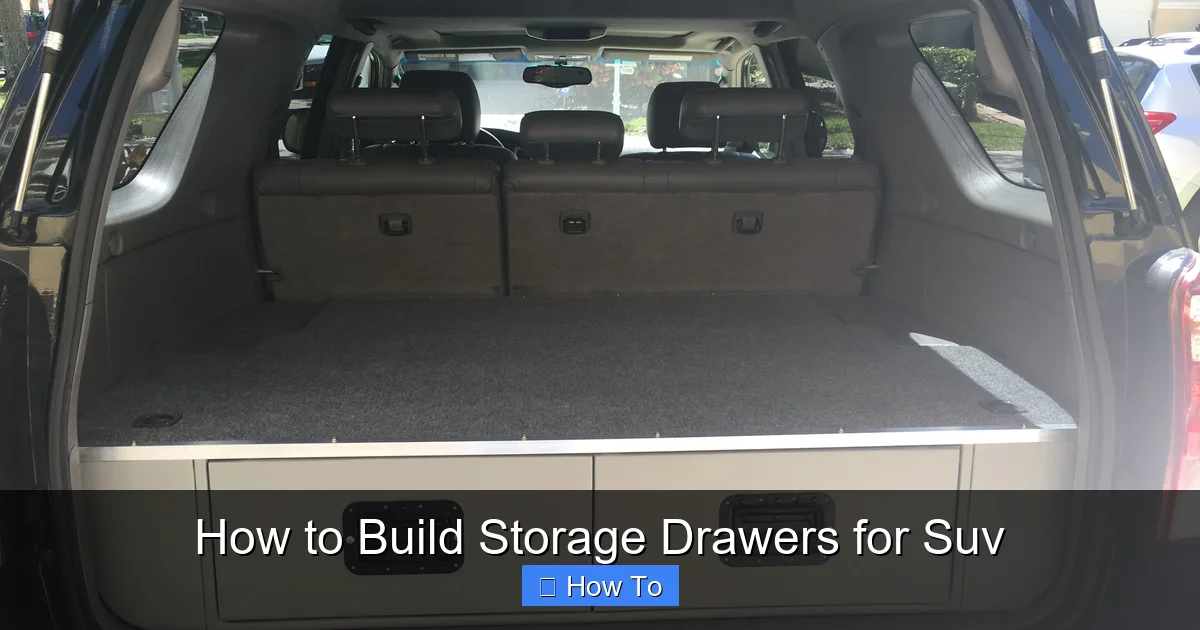
Step 1: Plan and Measure Your SUV’s Cargo Area
Before you buy a single screw or sheet of wood, take the time to plan your storage system. A well-thought-out design prevents frustration and wasted materials later.
Visual guide about How to Build Storage Drawers for Suv
Image source: i.pinimg.com
Gather Your Tools and Supplies
You’ll need a tape measure, notepad, pencil, and a smartphone or camera to document your SUV’s interior. If possible, bring a friend to help hold the tape measure steady.
Measure the Cargo Space
Start by removing any existing floor mats, cargo trays, or temporary storage. Measure the length, width, and height of the cargo area from the back of the rear seats to the tailgate. Don’t forget to measure around obstacles like wheel wells, spare tire compartments, or seat anchors. Note the exact dimensions of these features—they’ll affect how your drawers are designed.
For example, if your SUV has 48” of usable width but a 10” wheel well on each side, your drawer width might be limited to 28” in the center. Also, measure the height from the floor to the bottom of the tailgate opening. This tells you how tall your drawers can be without blocking access.
Sketch a Layout
Draw a simple top-down and side-view sketch of your cargo area. Include all measurements and obstacles. Then, sketch your ideal drawer configuration. Do you want one large drawer? Two smaller ones? A shallow top drawer for frequently used items and a deeper one below for heavier gear?
Consider how you’ll access the drawers. Will they slide out fully? Do they need to open when the tailgate is closed? Think about weight distribution—placing heavier items lower and toward the center improves stability.
Decide on Features
Now’s the time to think about extras. Do you want dividers for tools? A foam-lined compartment for fragile items? A latch to keep drawers closed while driving? Maybe you want a top platform for a cooler or portable table. Jot down these ideas—they’ll influence your build.
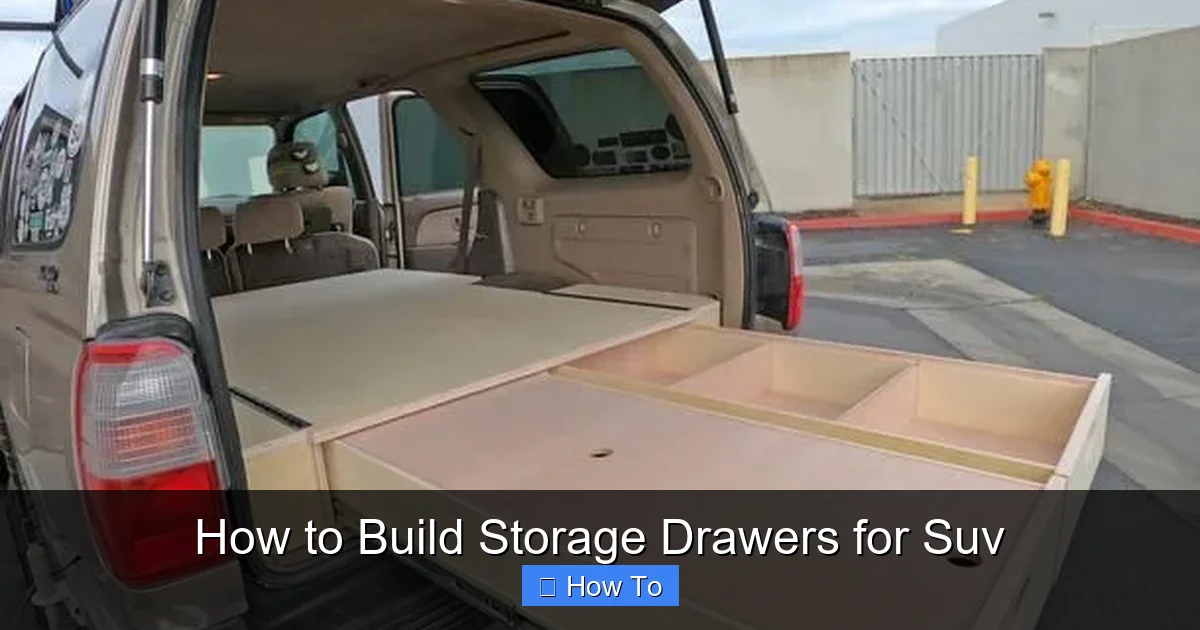
Step 2: Choose the Right Materials
The success of your SUV storage drawers depends heavily on the materials you choose. You want something strong, lightweight, and resistant to wear and moisture.
Visual guide about How to Build Storage Drawers for Suv
Image source: lirp-cdn.multiscreensite.com
Plywood: The Foundation of Your Drawers
For most DIYers, ½” or ¾” plywood is the best choice. It’s strong enough to hold heavy loads but light enough to keep your SUV’s weight down. Avoid particleboard or MDF—they absorb moisture and can swell or warp.
Look for birch or maple plywood with a smooth face. These are durable and easy to finish. If you’re storing wet gear or driving in rainy climates, consider moisture-resistant (MR) plywood or even marine-grade plywood for extra protection.
Buy full sheets (4’ x 8’) and have them cut at the store if possible. This saves time and ensures straight edges. You’ll need enough for the drawer boxes, fronts, and any top platforms.
Drawer Slides: The Key to Smooth Operation
Don’t skimp on drawer slides. Cheap ones bend, jam, or break under load. Invest in heavy-duty, full-extension ball-bearing slides rated for at least 100 pounds. Look for brands like Accuride or Knipex.
Choose slides that match your drawer depth. For example, if your drawer is 24” deep, get 22” slides (they’re usually 2” shorter than the drawer). Make sure they’re side-mount style—they’re easier to install and more stable than bottom-mount.
Hardware and Fasteners
You’ll need wood screws (1¼” and 2”), wood glue, corner braces (optional), and bolts for anchoring. Use #8 or #10 screws for strength. For a clean look, choose flat-head screws and countersink them slightly.
If you want to add a latch or lock, look for heavy-duty drawer latches designed for automotive use. Rubber bumpers or felt pads can reduce noise and prevent scratches.
Optional: Finishing Touches
Consider adding a non-slip mat to the drawer bottoms—this keeps gear from sliding around. You can also line compartments with foam or use adjustable dividers. For a polished look, sand the wood and apply a clear polyurethane sealant.
Step 3: Cut the Wood to Size
Now it’s time to turn that plywood into drawer parts. Accuracy is key—measure twice, cut once!
Create a Cutting List
Based on your sketch, list every piece you need. For a single drawer, you’ll typically need:
- 1 bottom panel
- 2 side panels
- 1 back panel
- 1 front panel
If you’re building a double-drawer system, double the list. Add any top platform or support frames.
Use a Circular Saw or Table Saw
A circular saw with a straight-edge guide works great for most DIYers. Clamp a straight board to the plywood as a guide, then run the saw along it. For cleaner edges, use a fine-tooth blade (40+ teeth).
If you have access to a table saw, it’s even better for precise, repeatable cuts. Always wear safety goggles and a dust mask. Plywood creates fine dust that’s harmful to breathe.
Label Each Piece
As you cut, label each piece with a pencil (e.g., “Left Side,” “Drawer Front”). This prevents confusion during assembly. Sand all edges lightly to remove splinters.
Step 4: Assemble the Drawer Boxes
With your pieces cut, it’s time to build the drawer boxes. This is where your storage system starts to take shape.
Apply Wood Glue and Screws
Start by attaching the side panels to the bottom panel. Apply wood glue to the edges, then clamp them together. Drill pilot holes to prevent splitting, then drive screws through the sides into the bottom.
Next, attach the back panel. Glue and screw it into place, making sure everything is square. Use a carpenter’s square to check 90-degree angles.
Install the Drawer Slides
Mount the drawer slide halves to the sides of the drawer box. Most slides have pre-drilled holes—align them carefully and screw them in. Make sure the slides are level and parallel.
Then, attach the other half of the slides to the drawer frame (which you’ll build next). This ensures the drawer will slide smoothly when installed.
Attach the Front Panel
The front panel is the visible face of your drawer. Make sure it’s flush with the sides and bottom. Use glue and screws, and consider adding a decorative edge or handle later.
Reinforce if Needed
For heavy-duty use, add corner braces inside the drawer box. These metal brackets add strength and prevent racking (twisting).
Step 5: Build the Drawer Frame
The frame holds the drawer in place inside your SUV and attaches to the vehicle’s floor. It’s the backbone of your system.
Cut the Frame Pieces
The frame consists of side rails, a back rail, and cross supports. The side rails run the length of the cargo area and hold the drawer slides. The back rail connects the sides and provides stability.
Cut two long side rails to match the depth of your cargo area. Cut a back rail to fit between them. Add cross supports every 12–18” for extra rigidity.
Assemble the Frame
Use wood glue and screws to join the pieces. Make sure the frame is square and level. The top of the frame should be flush with the top of the drawer slides.
Anchor the Frame to the SUV
This is critical for safety. Use the SUV’s existing tie-down points (usually found in the floor) to bolt the frame in place. Drill holes through the frame and secure it with bolts, washers, and nuts.
If there are no tie-downs, use heavy-duty L-brackets to attach the frame to the floor or side walls. Never rely on friction or tape—your drawers must stay put during sudden stops or off-road driving.
Step 6: Install the Drawers
With the frame secured, it’s time to slide in the drawers and test them.
Slide the Drawers Into Place
Carefully align the drawer slides and push the drawers into the frame. They should glide smoothly. If they stick, check for misalignment or debris.
Test the Operation
Open and close each drawer several times. Load it with weight (like a toolbox or sandbags) and test again. Make sure it doesn’t bind or tilt.
Add Latches or Locks (Optional)
To keep drawers closed while driving, install a latch or lock. A simple push-to-close latch works well. For security, consider a keyed lock.
Install Dividers or Inserts
Cut foam or thin plywood to create custom compartments. Use removable dividers so you can reconfigure the space as needed.
Step 7: Add Finishing Touches
Your drawers are functional, but a few final touches make them feel professional and last longer.
Sand and Seal the Wood
Lightly sand all exposed surfaces with 120-grit sandpaper. Wipe away dust, then apply a coat of clear polyurethane. This protects the wood from moisture and wear. Let it dry completely.
Install Non-Slip Mats
Cut rubber or carpet mats to fit the drawer bottoms. This prevents gear from sliding and reduces noise.
Add Handles or Pulls
Install sturdy handles on the front of each drawer. Choose recessed or flush handles to avoid snagging.
Label the Drawers
Use labels or paint to mark what goes in each drawer (e.g., “Tools,” “Camping Gear”). This makes finding items faster.
Troubleshooting Common Issues
Even with careful planning, problems can arise. Here’s how to fix the most common ones.
Drawers Won’t Slide Smoothly
If your drawers stick or jam, check the slides for misalignment. Loosen the screws slightly, adjust the position, and retighten. Make sure the frame is level and the drawer isn’t warped.
Drawers Shift While Driving
This means your frame isn’t anchored properly. Double-check all bolts and brackets. Add more tie-down points if needed. Never drive with unsecured drawers.
Wood Splits or Cracks
This usually happens from over-tightening screws or not drilling pilot holes. Always pre-drill, especially near edges. If a crack forms, reinforce it with wood glue and a small brace.
Drawers Are Too Heavy
If the drawers are hard to pull out, consider lighter materials for non-load-bearing parts (like the front panel). Or upgrade to heavier-duty slides with a higher weight rating.
Conclusion: Enjoy Your Custom SUV Storage
Congratulations! You’ve built a custom storage system that’s tailored to your SUV and your lifestyle. These drawers will keep your gear organized, protected, and easy to access—whether you’re heading to the trailhead, the job site, or a weekend getaway.
Remember, the key to success is planning, quality materials, and careful assembly. Take your time, follow safety practices, and don’t hesitate to tweak the design as you use it. Over time, you might add more drawers, upgrade the finishes, or even build a matching overhead shelf.
Building storage drawers for your SUV isn’t just practical—it’s empowering. You’ve taken control of your space, saved money, and created something truly useful. Now go enjoy the ride, knowing everything you need is right where it should be.