
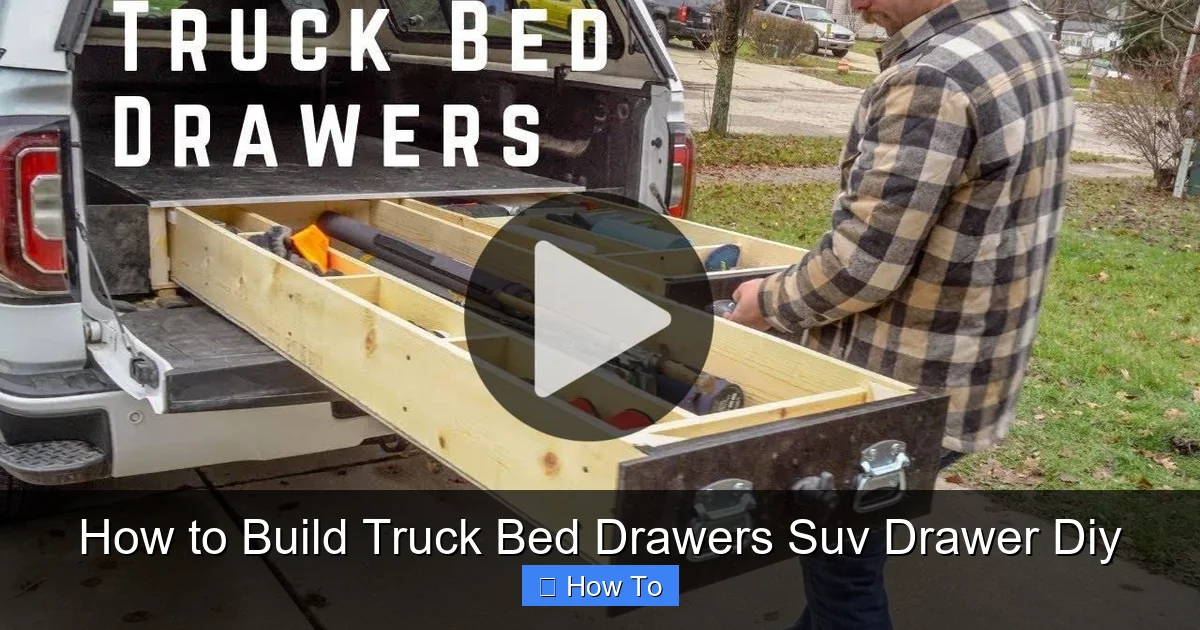
Build your own truck bed or SUV drawer system with simple tools and materials to keep gear secure and organized. This DIY project is affordable, customizable, and perfect for overlanders, campers, and weekend warriors.
Key Takeaways
- Step-by-step: Easy to follow instructions
How to Build Truck Bed Drawers or SUV Drawer DIY
If you’re tired of digging through a messy truck bed or SUV cargo area every time you need a tool, spare part, or camping gear, it’s time to build your own drawer system. Whether you drive a pickup truck, SUV, or overlanding rig, custom-built drawers can transform your vehicle into a mobile storage powerhouse. This DIY guide will walk you through the entire process—from planning and measuring to cutting, assembling, and installing your very own truck bed or SUV drawer system.
You don’t need to be a master carpenter or spend hundreds on commercial solutions. With basic tools, some plywood, drawer slides, and a little patience, you can create a durable, functional, and stylish storage solution that fits your exact needs. This project is perfect for weekend warriors, campers, contractors, and anyone who values organization on the go.
By the end of this guide, you’ll know how to design, build, and install custom drawers that maximize space, protect your gear, and make your adventures more enjoyable. Let’s get started!
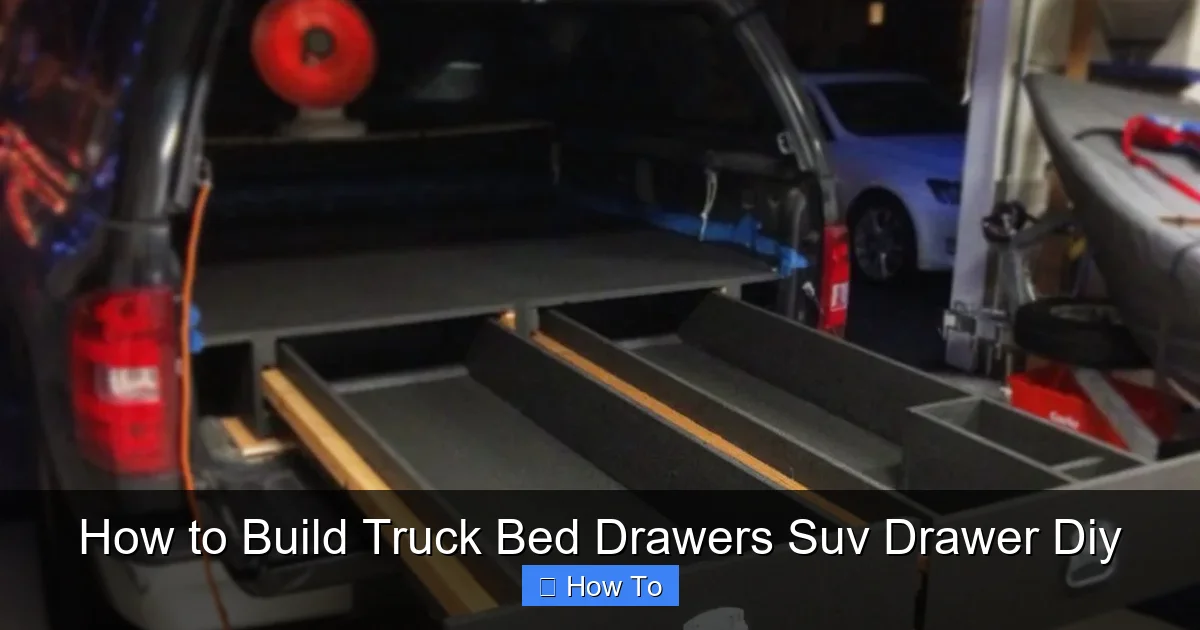
Why Build Your Own Truck Bed or SUV Drawers?
Visual guide about How to Build Truck Bed Drawers Suv Drawer Diy
Image source: i.pinimg.com
Before diving into the build, it’s worth understanding why DIY drawers are such a smart investment. Commercial drawer systems can cost $500 to $1,500 or more, depending on size and features. While they’re well-made, they often lack customization and may not fit your vehicle perfectly.
Building your own drawers gives you full control over:
– **Size and layout:** Match the dimensions to your truck bed or SUV cargo area.
– **Compartments:** Add dividers, tool trays, or lockable sections.
– **Materials:** Choose weather-resistant plywood, aluminum, or even recycled materials.
– **Budget:** A DIY system typically costs $150–$300, saving you hundreds.
– **Personal touch:** Paint, label, or add custom handles to match your style.
Plus, the satisfaction of building something useful with your own hands is priceless. Whether you’re hauling recovery gear, camping supplies, or work tools, custom drawers keep everything in place—even on bumpy backroads.
Tools and Materials You’ll Need
Visual guide about How to Build Truck Bed Drawers Suv Drawer Diy
Image source: i.pinimg.com
Before you start, gather all the tools and materials. Having everything ready will make the process smoother and reduce frustration.
Essential Tools
- Circular saw or table saw (for cutting plywood)
- Drill/driver with bits
- Measuring tape
- Combination square
- Clamps (at least 2–4)
- Sander or sanding block (80–120 grit)
- Level
- Pencil and marker
- Safety gear (gloves, goggles, dust mask)
Materials List
- ½-inch or ¾-inch exterior-grade plywood (birch or ACX recommended)
- Heavy-duty drawer slides (full-extension, 100–250 lb capacity)
- Wood screws (1¼-inch and 2-inch)
- Wood glue (waterproof, like Titebond III)
- Corner brackets or L-brackets (optional, for reinforcement)
- Weather stripping or rubber edging (for a clean finish)
- Drawer handles or pulls
- Locking mechanisms (optional, for security)
- Paint or sealant (optional, for weather protection)
Optional Upgrades
- LED strip lights (for nighttime access)
- Foam inserts or custom dividers
- Aluminum angle trim for edges
- Non-slip matting for the drawer base
Step 1: Measure Your Vehicle’s Cargo Area
Accurate measurements are the foundation of a successful build. A small mistake here can lead to drawers that don’t fit or slide properly.
Measure the Length, Width, and Height
Start by measuring the interior of your truck bed or SUV cargo area. Use a tape measure and record:
– **Length:** From the front (cab side) to the tailgate.
– **Width:** Between the wheel wells (if applicable) or side panels.
– **Height:** From the floor to the top of the bed rails or cargo cover.
Tip: Measure in multiple spots—truck beds and SUVs aren’t always perfectly rectangular. Use the smallest dimensions to ensure a snug fit.
Account for Obstacles
Check for:
– Wheel wells (common in trucks)
– Tie-down hooks or D-rings
– Spare tire compartments (in SUVs)
– Sliding covers or tonneau covers
You’ll need to design around these features. For example, if your truck has wheel wells, you might build two separate drawers on either side, or one long drawer that spans the center.
Decide on Drawer Configuration
Common layouts include:
– **Single large drawer:** Best for bulky items like coolers or recovery boards.
– **Dual drawers:** Side-by-side for balanced weight and easy access.
– **Stacked drawers:** One on top of the other (requires strong mounting).
– **Modular system:** Multiple small drawers for tools and small parts.
For most SUVs and trucks, dual drawers (left and right) work well. They’re easier to access and don’t block the center of the cargo area.
Step 2: Design Your Drawer System
Now that you have your measurements, sketch a simple design. You don’t need fancy software—paper and pencil work fine.
Create a Simple Blueprint
Include:
– Overall dimensions of the drawer box
– Number of drawers
– Slide placement
– Handle locations
– Any dividers or compartments
Example: For a mid-size truck bed (60″ long x 48″ wide), you might design two 28″-wide drawers with a 4″ gap in the center for a cooler or spare tire.
Calculate Material Needs
Based on your design, calculate how much plywood you’ll need. A standard 4′ x 8′ sheet is usually enough for one or two drawers.
Example cut list for dual 28″ x 18″ x 8″ drawers:
– 2 pieces: 28″ x 18″ (drawer fronts and backs)
– 4 pieces: 26.5″ x 18″ (drawer sides)
– 2 pieces: 26.5″ x 26.5″ (drawer bottoms)
– 2 pieces: 28″ x 48″ (main box top and bottom)
Tip: Add ½” to drawer width to accommodate the slides. Most heavy-duty slides are about 2″ wide, so each drawer needs 4″ total for both sides.
Choose Drawer Slide Type
Look for **full-extension ball-bearing slides** with a weight rating that matches your needs:
– Light duty (50–100 lbs): For tools and camping gear
– Medium duty (100–150 lbs): For recovery equipment
– Heavy duty (200+ lbs): For generators or toolboxes
Popular brands include Accuride, Knipex, and Hafele. Buy slides that are 2–4 inches shorter than your drawer depth to allow for mounting space.
Step 3: Cut the Plywood
Now it’s time to cut your materials. Accuracy is key—measure twice, cut once.
Prepare Your Workspace
Set up a flat, stable surface like a workbench or sawhorses. Use clamps to secure the plywood so it doesn’t move during cutting.
Mark and Cut the Pieces
Use a combination square and pencil to mark all cuts. For straight cuts, clamp a straightedge guide to the plywood and run your circular saw along it.
Cut in this order:
1. Main box panels (top, bottom, sides)
2. Drawer components (fronts, backs, sides, bottoms)
3. Dividers or supports (if using)
Tip: Label each piece with a marker (e.g., “Drawer Left Side”) to avoid confusion during assembly.
Sand the Edges
Use 80-grit sandpaper to smooth rough edges, then finish with 120-grit for a clean look. This prevents splinters and helps paint or sealant adhere better.
Step 4: Assemble the Main Drawer Box
The main box sits in your truck bed or SUV and holds the drawers. It needs to be sturdy and level.
Build the Frame
Start by assembling the bottom, sides, and back of the main box. Apply wood glue to the joints, then clamp and screw them together using 2-inch screws.
Use corner brackets for extra strength, especially at the back corners.
Attach the Top Panel
Once the frame is square, attach the top panel. This creates a rigid structure and provides a surface to mount the drawer slides.
Check for squareness: Measure diagonally from corner to corner. Both measurements should be equal.
Reinforce the Structure
Add cross braces or vertical supports if your box is longer than 4 feet. This prevents sagging under weight.
Step 5: Install the Drawer Slides
Drawer slides are the heart of your system. Proper installation ensures smooth operation and long life.
Mount the Slides to the Box
– Position the slide’s cabinet part (the stationary side) inside the main box.
– Use a level to ensure it’s straight.
– Drill pilot holes and secure with screws.
Tip: Install slides 1–2 inches above the bottom of the box to allow for drawer height and clearance.
Attach Slides to the Drawers
– Measure and mark the drawer side where the slide will go.
– Align the drawer part of the slide and screw it in place.
– Test the fit: The drawer should slide in and out smoothly.
Test the Drawer Movement
Before finalizing, slide each drawer in and out several times. It should move freely without binding or wobbling.
If it’s tight, sand the edges slightly or adjust the slide alignment.
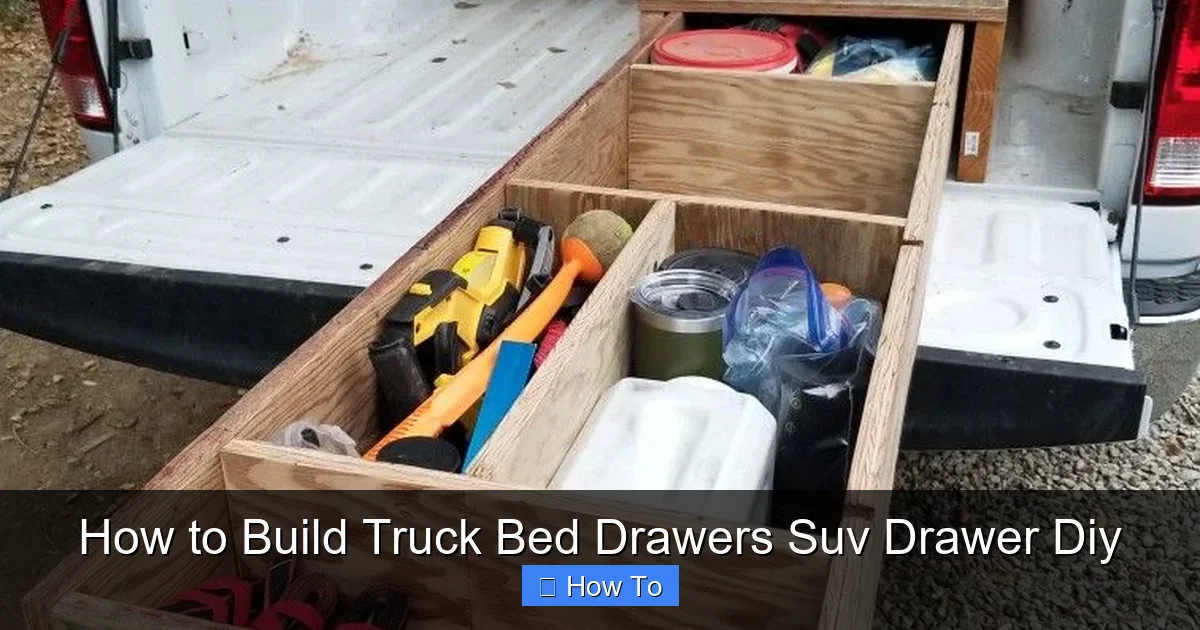
Step 6: Build and Install the Drawers
Now build the individual drawers that will slide in and out.
Assemble the Drawer Boxes
Use the same method as the main box: glue and screw the front, back, sides, and bottom. Keep joints tight and square.
Add Dividers or Compartments (Optional)
Cut smaller pieces of plywood to create tool trays or gear sections. Glue and screw them in place.
Install Handles and Locks
Drill holes for handles and attach them with screws. If adding locks, follow the manufacturer’s instructions for mounting.
Line the Drawers (Optional)
Add non-slip matting or foam to protect gear and reduce noise. Cut to size and glue in place.
Step 7: Mount the System in Your Vehicle
With the drawers built and slides installed, it’s time to secure the system in your truck or SUV.
Position the Main Box
Carefully place the assembled unit in the cargo area. Make sure it’s level and centered.
Secure with Bolts or Straps
For trucks:
– Drill through the box bottom into the truck bed.
– Use carriage bolts with washers and nuts to anchor it.
For SUVs:
– Use heavy-duty ratchet straps or L-track systems to tie down the box.
– Avoid drilling into the vehicle if possible.
Tip: Add rubber pads under the box to reduce vibration and protect the vehicle’s finish.
Test the Drawers
Open and close each drawer to ensure smooth operation. Load them with gear to test weight capacity.
Step 8: Finishing Touches
Make your drawers look great and last longer with these final steps.
Seal the Wood
Apply exterior-grade sealant or paint to protect against moisture, especially if you’re camping or driving in wet conditions.
Add Weather Stripping
Attach rubber edging to drawer fronts and box openings to reduce noise and keep out dust.
Label the Drawers
Use labels or paint to mark contents (e.g., “Tools,” “Recovery Gear”) for quick identification.
Install Lighting (Optional)
Add LED strip lights inside the drawers or under the main box for nighttime use. Wire them to a switch or the vehicle’s accessory circuit.
Troubleshooting Common Issues
Even with careful planning, problems can arise. Here’s how to fix them:
Drawers Bind or Don’t Slide Smoothly
– Check slide alignment: Loosen screws and adjust.
– Sand drawer edges if too tight.
– Ensure the main box is level.
Drawers Sag When Extended
– Upgrade to heavier-duty slides.
– Add a center support or cross brace.
System Shifts During Driving
– Use more secure mounting (bolts instead of straps).
– Add anti-slip pads between the box and vehicle floor.
Wood Swells or Warps
– Use higher-grade plywood (birch or marine).
– Apply sealant to all surfaces.
– Store in dry conditions when not in use.
Conclusion
Building your own truck bed or SUV drawer system is a rewarding DIY project that pays off every time you hit the road. You’ll save money, gain valuable storage space, and enjoy the peace of mind that comes with a well-organized vehicle.
From measuring and cutting to assembling and installing, each step brings you closer to a custom solution that fits your lifestyle. Whether you’re overlanding through the desert, hauling tools to a job site, or just trying to keep your gear in order, DIY drawers make life easier.
So grab your tools, gather your materials, and start building. Your truck or SUV will thank you—and so will your back, when you’re not digging through a pile of loose gear.
With a little effort and attention to detail, you can create a professional-looking drawer system that’s as tough as your adventures. Happy building!