
This guide teaches you how to carry a ladder on an SUV roof rack safely and securely. You’ll learn proper loading techniques, essential gear, and safety checks to prevent accidents and damage.
Key Takeaways
- Use the right roof rack: Ensure your SUV has a compatible crossbar system rated for ladder weight and length.
- Secure with quality straps: Always use ratchet or cam buckle straps with soft loops to avoid damaging the ladder or vehicle.
- Center the ladder properly: Position the ladder evenly across the roof rack to maintain balance and reduce wind resistance.
- Double-check all connections: Before driving, test each strap and tie-down point to confirm everything is tight and secure.
- Drive cautiously: Reduce speed, avoid sudden maneuvers, and allow extra stopping distance due to added height and wind drag.
- Inspect regularly during long trips: Stop every hour to check straps and ladder position, especially on highways or in windy conditions.
- Follow local laws: Some areas have regulations about overhanging loads—know the rules to avoid fines or hazards.
How to Carry a Ladder on an SUV Roof Rack
Carrying a ladder on your SUV’s roof rack might seem straightforward, but doing it safely and correctly requires planning, the right equipment, and attention to detail. Whether you’re a weekend DIYer, a contractor, or just helping a friend move, transporting a ladder improperly can lead to serious accidents, vehicle damage, or even legal trouble. This comprehensive guide walks you through every step—from choosing the right gear to securing the ladder and driving safely—so you can transport your ladder with confidence.
In this guide, you’ll learn how to assess your SUV’s roof rack, select the best tie-down method, load the ladder properly, and drive responsibly with an extended load. We’ll also cover common mistakes, troubleshooting tips, and safety checks to ensure your trip is smooth and accident-free. By the end, you’ll know exactly how to carry a ladder on an SUV roof rack like a pro.
Step 1: Assess Your SUV and Roof Rack
Visual guide about How to Carry a Ladder on an Suv Roof Rack
Image source: theladderguide.com
Before you even think about loading a ladder, you need to make sure your SUV and roof rack are up to the task. Not all roof racks are created equal, and overloading or using incompatible equipment is a leading cause of accidents.
Check Your Roof Rack Type
Most SUVs come with factory-installed roof rails, but these alone aren’t enough to secure a ladder. You need crossbars—horizontal bars that span the width of your vehicle and attach to the rails. Common types include:
- Factory crossbars: Often sleek and low-profile, these are designed for light loads like cargo boxes or bikes. Check the weight rating—many are only rated for 100–165 lbs.
- Aftermarket crossbars: Brands like Thule, Yakima, and Rhino-Rack offer heavy-duty options rated for 200+ lbs, ideal for ladders.
- Clamp-on crossbars: These attach directly to door frames or roof edges and are great for vehicles without rails. Make sure they’re tightly secured.
Verify Weight and Load Capacity
Every roof rack has a maximum dynamic (while driving) and static (parked) weight limit. The dynamic limit is what matters when driving. For example, if your crossbars are rated for 165 lbs dynamic, don’t exceed that—even if the ladder weighs less, added wind force and movement can increase stress.
Check your owner’s manual or the manufacturer’s website for exact specs. If you’re unsure, assume a lower capacity and upgrade if needed.
Inspect for Damage or Wear
Look for rust, cracks, loose bolts, or bent components. Even small damage can fail under stress. Tighten all bolts and replace worn parts before loading.
Step 2: Choose the Right Ladder and Prepare It
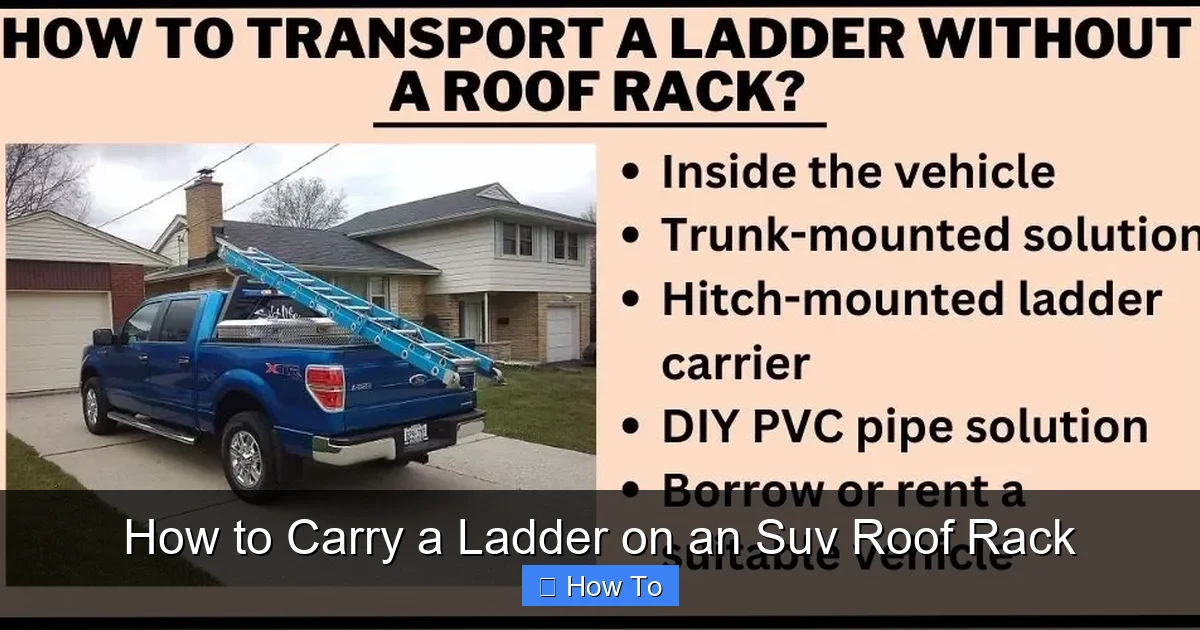
Visual guide about How to Carry a Ladder on an Suv Roof Rack
Image source: theladderguide.com
Not all ladders are suitable for roof transport. The type, material, and condition of your ladder affect how you secure it.
Select the Appropriate Ladder
- Extension ladders: Most common for roof transport. Fold or collapse them before loading.
- Step ladders: Can be carried flat, but ensure they’re fully closed and locked.
- Material matters: Aluminum ladders are lightweight and common, but fiberglass is heavier and more rigid. Wood ladders are rare but possible—just ensure they’re dry and splinter-free.
Avoid carrying damaged ladders. Check for bent rungs, loose rivets, or cracks. A compromised ladder is unsafe to use and harder to secure.
Clean and Dry the Ladder
Dirt, mud, or moisture can make the ladder slippery and harder to grip. Wipe it down with a cloth and let it dry completely. Wet straps can weaken over time, and a damp ladder increases the risk of shifting.
Remove Accessories
Take off tool belts, hooks, or attachments that could snag or create uneven weight distribution. If you need tools, pack them separately in a secure cargo box or inside the vehicle.
Step 3: Gather the Right Equipment
You can’t secure a ladder with just rope and hope. Use proper tie-down gear designed for vehicle transport.
Use High-Quality Straps
Avoid bungee cords or cheap nylon ropes. They stretch, snap, or loosen over time. Instead, use:
- Ratchet straps: Provide strong, adjustable tension. Ideal for heavy ladders.
- Cam buckle straps: Easier to use than ratchets but still secure. Great for lighter loads.
Look for straps with a minimum breaking strength of 1,000 lbs and a working load limit (WLL) of at least 300–500 lbs. Always check the label.
Use Soft Loops or Protectors
Metal hooks can scratch your SUV’s paint or damage the ladder. Use soft loops—fabric sleeves that wrap around the crossbars and straps—to prevent abrasion. They also reduce noise and vibration.
Consider Additional Safety Gear
- Reflective flags: Required in many states if the ladder extends more than 4 feet beyond the vehicle. Use a bright orange or red flag to increase visibility.
- Bungee cord retainers: Keep loose strap ends from flapping in the wind.
- Gloves: Protect your hands when handling straps and ladders.
Step 4: Position the Ladder on the Roof Rack
How you place the ladder affects stability, aerodynamics, and safety.
Load the Ladder Flat and Centered
Place the ladder horizontally across the crossbars, not diagonally. Center it so equal lengths extend on both sides. This balances weight and reduces wind resistance.
If the ladder is too long, it may overhang the front or back. That’s okay—as long as it’s within legal limits (usually 4 feet max without a flag).
Orient the Ladder Correctly
For extension ladders, place the side with the locking mechanism facing up or inward to prevent snagging. For step ladders, ensure the hinges are secure and won’t open during transport.
Use a Ladder Carrier or Cradle (Optional)
Some roof racks come with ladder-specific cradles or pads that hold the ladder in place. These reduce movement and protect both the ladder and vehicle. If you transport ladders often, consider investing in one.
Step 5: Secure the Ladder with Straps
This is the most critical step. A poorly secured ladder can fly off at highway speeds, causing catastrophic damage.
Attach Straps to Crossbars, Not Rails
Always loop straps around the crossbars, not the side rails. Rails aren’t designed to handle lateral force and can bend or break.
Use at Least Two Straps
One strap isn’t enough. Use a minimum of two—one near the front and one near the rear. For longer ladders (over 16 feet), use three or more.
Create a “Figure 8” or “X” Pattern
Cross the straps over the ladder to create tension and prevent side-to-side movement. This also helps distribute force evenly.
Tighten Gradually and Evenly
Start with hand-tight straps, then use the ratchet or cam buckle to tighten. Don’t overtighten—this can warp the ladder or damage the roof rack. Aim for firm but not excessive pressure.
Use the “Tug Test”
After tightening, try to shift the ladder by hand. It shouldn’t move more than an inch in any direction. If it does, re-tighten the straps.
Secure Loose Ends
Tuck or tie down any excess strap length so it doesn’t flap in the wind. Flapping straps can wear out quickly and create noise or distraction.
Step 6: Add Overhang Protection and Flags
If your ladder extends beyond the front or rear of your SUV, you must comply with local laws.
Check Local Regulations
Most states require a red or orange flag if the load extends more than 4 feet beyond the vehicle. Some also require lights at night. Check your state’s Department of Transportation (DOT) website for specifics.
Attach a Bright Flag
Use a 12×12 inch flag made of reflective material. Attach it to the farthest point of the overhang with zip ties or straps. Make sure it’s visible from all angles.
Use Warning Lights (If Needed)
For nighttime transport, add battery-powered LED lights to the ends of the ladder. This increases visibility and reduces the risk of rear-end collisions.
Step 7: Perform a Final Safety Check
Before you hit the road, do a thorough inspection.
Walk Around the Vehicle
Check that:
- The ladder is centered and not tilted.
- All straps are tight and properly routed.
- No parts are rubbing against the roof or windows.
- The flag is secure and visible.
Test Drive in a Safe Area
Drive slowly in a parking lot or quiet street. Listen for flapping, rattling, or unusual noises. Feel for vibrations or instability. If anything feels off, pull over and recheck.
Recheck After 10–15 Minutes
Straps can loosen as the vehicle moves and temperature changes. Stop and retighten if needed.
Step 8: Drive Safely with a Ladder on Top
Driving with a ladder changes how your SUV handles. Be extra cautious.
Reduce Speed
Wind resistance increases significantly with a roof load. Drive below the speed limit, especially on highways or in windy conditions.
Avoid Sudden Maneuvers
Hard braking, sharp turns, or quick lane changes can shift the ladder or cause loss of control. Give yourself extra space and time.
Watch for Low Clearances
Gas station canopies, drive-thrus, and parking garages may be too low. Know your SUV’s height with the ladder—add at least 6–12 inches for safety.
Use Mirrors and Check Blind Spots
The ladder may block part of your rearview mirror. Adjust side mirrors and use caution when changing lanes.
Take Breaks on Long Trips
Stop every hour to inspect the straps and ladder. Heat, vibration, and wind can loosen connections over time.
Troubleshooting Common Issues
Even with careful planning, problems can arise. Here’s how to handle them.
Ladder Shifts During Transport
If the ladder moves, pull over immediately. Re-center it and tighten all straps. Consider adding a third strap or using a ladder carrier for better grip.
Straps Keep Loosening
This often happens with cam buckle straps. Switch to ratchet straps for more consistent tension. Also, ensure the ladder surface is clean and dry—wet or greasy surfaces reduce friction.
Wind Noise or Flapping
Use soft loops and secure loose strap ends. If noise persists, consider a wind deflector or fairing for your roof rack.
Roof Rack Feels Unstable
Check bolt tightness and crossbar alignment. If the rack wobbles, stop driving and inspect for damage. Never ignore instability—it can lead to failure.
Ladder Damages Vehicle Paint
Always use soft loops or foam padding between the ladder and roof. Avoid direct contact, especially with aluminum ladders that can scratch paint.
Conclusion
Carrying a ladder on an SUV roof rack doesn’t have to be stressful. With the right preparation, equipment, and technique, you can transport your ladder safely and legally. Remember to assess your roof rack, use quality straps, center the ladder, and drive cautiously. Regular checks during long trips are just as important as the initial setup.
By following this guide, you’ll protect your vehicle, your ladder, and everyone on the road. Whether you’re heading to a job site or tackling a home project, knowing how to carry a ladder on an SUV roof rack gives you peace of mind and confidence. Stay safe, stay prepared, and happy hauling!