
Discover how to carry cargo on SUV roof safely and securely with the right equipment and techniques. This guide covers everything from choosing roof racks to loading gear and driving tips for a smooth, worry-free trip.
Key Takeaways
- Choose the right roof rack system: Match your SUV’s roof type (raised rails, flush rails, or bare roof) with compatible crossbars and cargo carriers.
- Use proper cargo boxes or baskets: Hard-shell boxes protect gear from weather, while baskets offer flexibility for oversized items.
- Distribute weight evenly: Place heavier items in the center and low on the roof to maintain vehicle balance and stability.
- Secure all loads with quality straps: Use ratchet or cam buckle straps with edge guards to prevent damage and ensure tight fastening.
- Check height and clearance: Always measure your loaded vehicle height to avoid low bridges, garage doors, or tree branches.
- Drive cautiously and inspect regularly: Reduce speed, avoid sudden moves, and stop to check straps every 50–100 miles.
- Follow manufacturer guidelines: Never exceed your SUV’s dynamic or static roof load limits to prevent damage or accidents.
How to Carry Cargo on SUV Roof: A Complete Step-by-Step Guide
If you’ve ever packed for a family road trip, a camping adventure, or a weekend getaway, you know how quickly an SUV’s interior space fills up. Luggage, coolers, sports gear, and outdoor equipment can leave little room for passengers—or comfort. That’s where learning how to carry cargo on SUV roof comes in handy.
Roof cargo solutions let you maximize your vehicle’s storage without sacrificing passenger space. Whether you’re hauling skis, bikes, camping gear, or extra suitcases, the roof of your SUV can become a valuable extension of your storage capacity. But doing it safely and effectively requires the right gear, proper installation, and smart loading techniques.
In this guide, you’ll learn everything you need to know about how to carry cargo on SUV roof—from choosing the right equipment to securing your load and driving safely. We’ll walk you through each step, share practical tips, and help you avoid common mistakes. By the end, you’ll be confident loading up your SUV roof for any adventure.
Step 1: Assess Your SUV’s Roof Type
Visual guide about How to Carry Cargo on Suv Roof
Image source: s3.amazonaws.com
Before buying any roof cargo gear, you need to understand your SUV’s roof configuration. Not all roofs are the same, and the type of roof determines what kind of rack system you can install.
There are three main types of SUV roofs:
Raised Roof Rails
These are the most common. You’ll see two parallel metal bars running front to back along the edges of the roof. They’re usually found on SUVs like the Toyota RAV4, Honda CR-V, and Ford Explorer. Raised rails make it easy to attach crossbars and cargo carriers using clamp-style mounts.
Flush Roof Rails
These rails are integrated into the roof and sit flat or nearly flush with the surface. They’re often found on luxury SUVs like the Lexus RX or Acura MDX. Flush rails usually have hidden attachment points under caps or covers. You’ll need crossbars specifically designed to bolt or clip into these points.
Bare Roof (No Rails)
Some SUVs, especially older models or base trims, have no rails at all. Examples include certain versions of the Subaru Outback or Jeep Cherokee. In this case, you’ll need a roof rack system that uses door jamb clamps or foot pads that attach directly to the roof’s edge.
Pro Tip: Check your owner’s manual or the manufacturer’s website to confirm your roof type and load capacity. This information is crucial for safety and compatibility.
Step 2: Choose the Right Roof Rack System
Visual guide about How to Carry Cargo on Suv Roof
Image source: m.media-amazon.com
Once you know your roof type, it’s time to select a roof rack system. A complete system includes crossbars and mounting hardware. Here’s what to look for:
Crossbars
Crossbars are the horizontal bars that run across your roof, connecting to the rails or roof edges. They support your cargo carrier and distribute weight.
– Material: Aluminum is lightweight, rust-resistant, and common. Steel is stronger but heavier and prone to rust unless coated.
– Shape: Aerodynamic (tapered) bars reduce wind noise and improve fuel efficiency. Square or round bars are more affordable but noisier.
– Load Capacity: Most crossbars support 100–165 lbs (45–75 kg). Check the dynamic (while driving) and static (when parked) ratings.
Mounting Hardware
This includes clamps, brackets, or foot pads that attach the crossbars to your roof. Make sure the hardware is compatible with your SUV model. Many brands like Thule, Yakima, and Rhino-Rack offer vehicle-specific fit kits.
Example: If you drive a 2022 Honda CR-V with raised rails, a Thule WingBar Evo with a Fit Kit for Honda CR-V will provide a secure, low-profile setup.
Installation Tips
– Clean the roof and rails before installing.
– Tighten bolts or clamps to the manufacturer’s recommended torque (usually 5–8 ft-lbs).
– Use a torque wrench if possible to avoid over-tightening.
– Double-check that all connections are secure before loading.
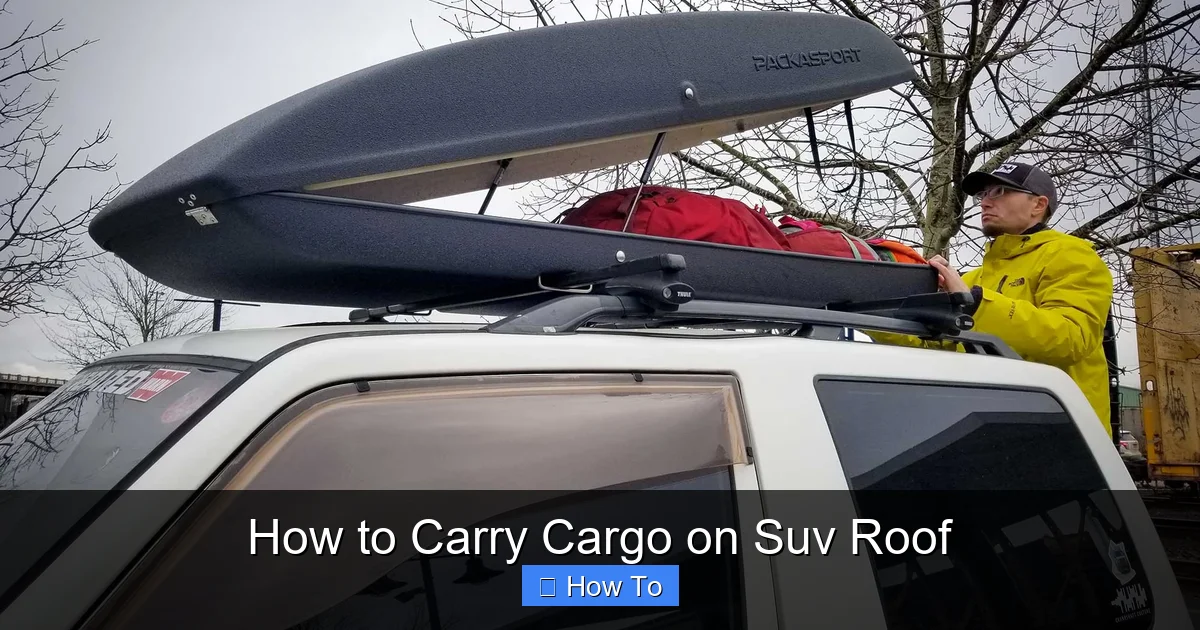
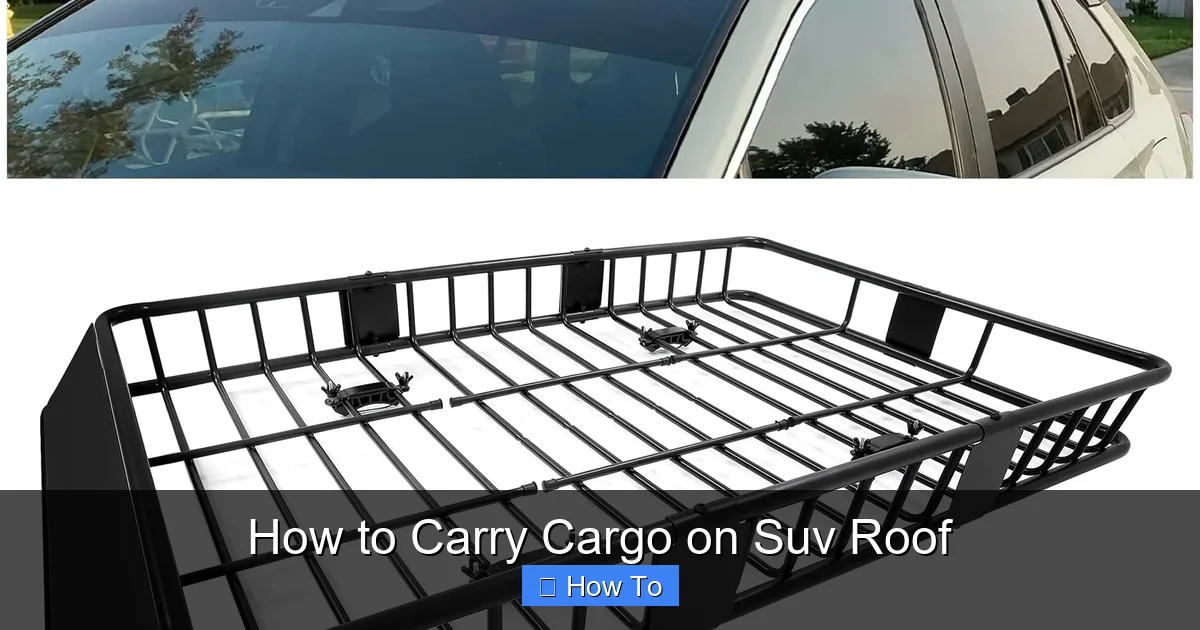
Step 3: Select the Right Cargo Carrier
Now that your roof rack is in place, choose a cargo carrier that fits your needs. The two main types are cargo boxes and cargo baskets.
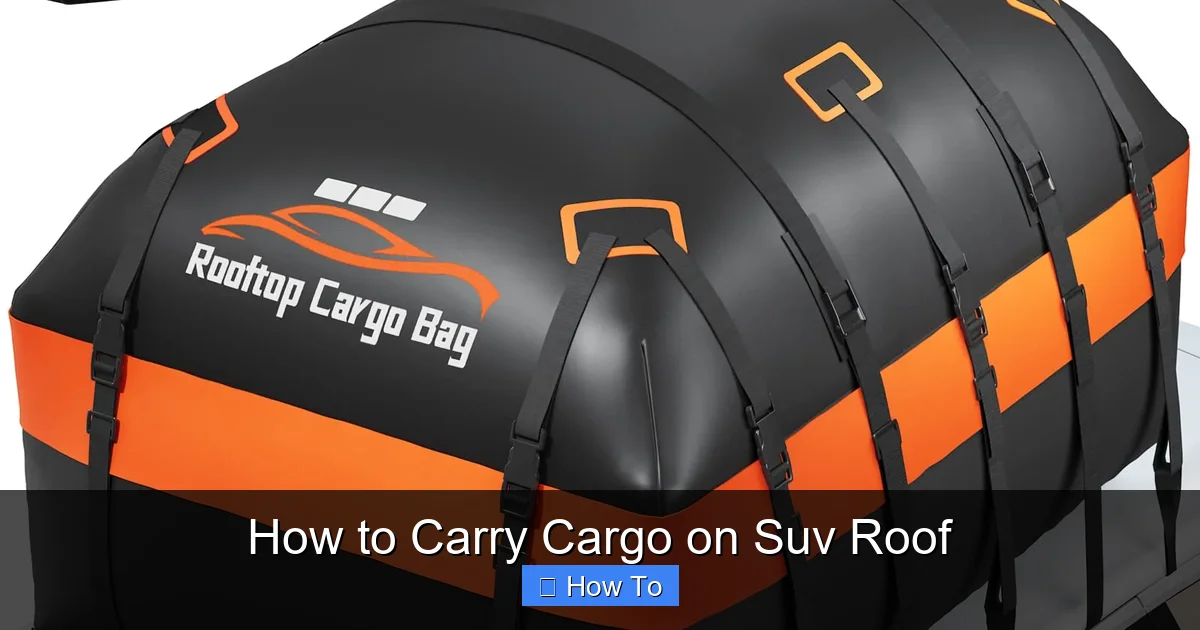
Cargo Boxes (Hard-Shell)
These are enclosed, weatherproof containers that mount on crossbars. They’re ideal for protecting luggage, electronics, or valuables from rain, dust, and road debris.
– Pros: Weatherproof, secure (many have locks), aerodynamic, quiet.
– Cons: More expensive, limited to smaller items, can reduce fuel efficiency if oversized.
– Best for: Road trips, daily commuting with extra gear, protecting sensitive items.
Popular Options: Thule Motion XT, Yakima SkyBox, and SportRack Vista.
Cargo Baskets (Roof Racks with Rails)
These are open-frame platforms with raised sides. They’re great for bulky or oddly shaped items like coolers, camping chairs, or kayaks.
– Pros: Versatile, easy to load, affordable, can hold large items.
– Cons: Items are exposed to weather, require additional straps and covers, can be noisy.
– Best for: Camping, hauling sports gear, oversized luggage.
Popular Options: Thule Canyon, Yakima LoadWarrior, and Rhino-Rack Pioneer.
Pro Tip: If you plan to carry both small and large items, consider a hybrid setup—use a cargo box for valuables and a basket for bulky gear.
Step 4: Prepare Your Cargo for Loading
Before placing anything on the roof, take time to organize and prepare your items. This ensures a safe, balanced load.
Sort and Pack Smart
– Group similar items together (e.g., all camping gear in one bag).
– Use duffel bags, storage bins, or compression sacks to consolidate loose items.
– Avoid overpacking—soft bags can shift during driving.
Protect Your Gear
– Use waterproof bags or tarps for items that can’t get wet.
– Wrap fragile items in bubble wrap or towels.
– Label bags for easy identification at your destination.
Check Weight Limits
Every SUV has a maximum roof load capacity, usually listed in the owner’s manual. This includes the weight of the rack, carrier, and cargo.
– Dynamic Load: The weight the roof can handle while driving (typically 100–165 lbs).
– Static Load: The weight it can hold when parked (often 3–4 times higher, useful for rooftop tents).
Example: If your SUV’s dynamic roof limit is 150 lbs, and your crossbars + cargo box weigh 40 lbs, you can safely carry up to 110 lbs of cargo.
Step 5: Load the Cargo Safely and Securely
Now it’s time to load your gear onto the roof. Follow these steps for a secure and balanced load.
Step 1: Position the Carrier
Place the cargo box or basket on the crossbars. Center it front to back and side to side. Most carriers have markings or instructions for proper alignment.
Step 2: Load Heavier Items First
Place the heaviest items in the center of the carrier, low and as close to the roof as possible. This lowers the center of gravity and improves stability.
– Do: Put coolers, toolboxes, or packed duffels in the middle.
– Don’t: Load heavy items at the front or back—this can affect steering and braking.
Step 3: Distribute Weight Evenly
Balance the load side to side. If one side is heavier, it can cause swaying or reduce handling.
Tip: Use a bathroom scale to weigh bags if you’re unsure. Aim for no more than a 10–15 lb difference between sides.
Step 4: Secure the Load
Use high-quality straps to tie down your cargo. Never rely on the carrier’s built-in latches alone.
– Strap Types:
– Ratchet Straps: Provide tight, secure fastening. Use with edge guards to prevent damage.
– Cam Buckle Straps: Easier to use but less tension. Good for lighter loads.
– Attachment Points:
– Use the carrier’s built-in tie-down points.
– For baskets, loop straps around crossbars or use S-hooks to anchor to the rack.
Pro Tip: Use a cargo net or bungee cord over loose items in a basket to prevent shifting.
Step 5: Double-Check Everything
Before driving, give each strap a firm tug to ensure it’s tight. Check that:
– No straps are loose or twisted.
– Cargo doesn’t shift when pushed.
– All latches on cargo boxes are closed and locked (if applicable).
Step 6: Measure Height and Check Clearance
One of the most overlooked steps is measuring your loaded vehicle height. A roof cargo box can add 12–18 inches to your SUV’s height.
Why It Matters
Low-clearance hazards include:
– Garage doors (standard is 7 feet, but some are lower).
– Drive-thrus and parking structures.
– Tree branches or overpasses.
How to Measure
1. Park on level ground.
2. Use a tape measure to check from the ground to the highest point of your cargo.
3. Add a safety buffer of 6–12 inches.
Example: If your SUV is 6 feet tall and your cargo box adds 15 inches, your total height is 7 feet 3 inches. Avoid garages under 7.5 feet.
Use a Height Flag
Attach a bright flag or marker to the highest point of your cargo. This helps you judge clearance when approaching low areas.
Step 7: Drive Safely with Roof Cargo
Carrying cargo on your SUV roof changes how your vehicle handles. Adjust your driving habits for safety.
Reduce Speed
Wind resistance increases with roof cargo, especially at highway speeds. Drive 5–10 mph below the speed limit on highways.
Avoid Sudden Moves
– Brake earlier and more gradually.
– Take turns wider and slower to prevent sway.
– Avoid sharp lane changes.
Watch for Crosswinds
High-profile loads are more affected by wind. Be extra cautious on open highways, mountain passes, or during storms.
Check Straps Regularly
Stop every 50–100 miles to inspect your load. Vibration and wind can loosen straps over time.
Pro Tip: Use a checklist before long trips:
– [ ] Roof rack secure
– [ ] Cargo balanced
– [ ] Straps tight
– [ ] Height measured
– [ ] Locks engaged (if applicable)
Troubleshooting Common Issues
Even with careful planning, problems can arise. Here’s how to handle common issues.
Problem: Wind Noise or Whistling
Cause: Poorly fitted crossbars or gaps around cargo box.
Solution: Install wind deflectors or fairings. Ensure the cargo box is centered and sealed properly.
Problem: Cargo Shifts While Driving
Cause: Loose straps or uneven loading.
Solution: Stop safely, reposition the load, and retighten all straps. Use additional tie-downs if needed.
Problem: Roof Rack Squeaks or Rattles
Cause: Loose bolts or worn mounts.
Solution: Tighten all connections. Apply a small amount of silicone spray to moving parts to reduce noise.
Problem: Reduced Fuel Economy
Cause: Aerodynamic drag from roof cargo.
Solution: Remove the carrier when not in use. Choose aerodynamic boxes and drive at moderate speeds.
Problem: Water Leaks into Cargo Box
Cause: Damaged seals or improper closure.
Solution: Inspect the gasket around the lid. Replace if cracked. Always close the box securely and test before driving in rain.
Maintenance and Storage Tips
To keep your roof cargo system in top shape, follow these maintenance tips.
Clean Regularly
Wash crossbars, carriers, and straps with mild soap and water. Remove dirt, salt, and debris to prevent corrosion.
Inspect for Damage
Check for cracks, rust, or worn straps before each trip. Replace damaged parts immediately.
Store Properly
– Remove carriers when not in use to reduce wear and improve fuel efficiency.
– Store in a dry, cool place.
– Keep straps coiled and protected from UV light.
Lubricate Moving Parts
Apply a light lubricant to latches, hinges, and ratchets once a year to ensure smooth operation.
Conclusion
Learning how to carry cargo on SUV roof opens up new possibilities for travel, adventure, and everyday convenience. With the right equipment, proper installation, and smart loading techniques, you can safely transport extra gear without compromising passenger comfort or vehicle performance.
Remember to choose a roof rack system that matches your SUV’s roof type, select a cargo carrier that fits your needs, and always secure your load with quality straps. Distribute weight evenly, check height clearance, and drive cautiously to ensure a smooth journey.
Regular maintenance and pre-trip checks will keep your system reliable for years to come. Whether you’re heading to the mountains, the beach, or just need extra space for a big move, your SUV’s roof can be a powerful ally—when used correctly.
So next time you’re packing up, don’t stress about space. Load up your roof, hit the road, and enjoy the ride.