

This guide teaches you how to carry drywall on an SUV without damaging your vehicle or materials. You’ll learn the right tools, secure loading techniques, and safety tips for a successful trip.
Key Takeaways
- Use proper padding and support: Protect both your SUV and drywall with foam padding, moving blankets, and secure supports to prevent scratches and breaks.
- Choose the right drywall size: Standard 4×8 or 4×12 sheets are easier to manage; longer sheets may require a roof rack or extended support.
- Secure with high-quality straps: Use ratchet straps or bungee cords with hooks to keep drywall firmly in place during transit.
- Load carefully and evenly: Slide drywall in flat or upright with support, ensuring weight is balanced to avoid tipping or shifting.
- Drive slowly and avoid sudden moves: Drywall is fragile—smooth driving reduces the risk of cracking or shifting during transport.
- Consider a roof rack or trailer for large loads: If you’re carrying multiple sheets, a roof rack or small trailer can make the job safer and easier.
- Always inspect before driving: Double-check straps, padding, and positioning before hitting the road to ensure everything is secure.
Introduction: Why Knowing How to Carry Drywall on an SUV Matters
Whether you’re tackling a DIY home renovation or helping a friend with a basement finish, transporting drywall can be tricky—especially if you’re using an SUV. Drywall sheets are large, heavy, and surprisingly fragile. One wrong move, and you could end up with cracked panels, a dented SUV, or even a dangerous situation on the road.
But don’t worry—learning how to carry drywall on an SUV doesn’t have to be stressful. With the right preparation, tools, and techniques, you can move drywall safely and efficiently. This guide walks you through every step, from choosing the right equipment to loading, securing, and driving with your materials. By the end, you’ll feel confident handling drywall like a pro—no matter the size of your SUV or the length of your trip.
We’ll cover everything from measuring your vehicle to securing the load and driving safely. Whether you’re hauling one sheet or a full pack, these tips will help you avoid common mistakes and protect both your vehicle and your materials.
Step 1: Assess Your SUV and Drywall Needs
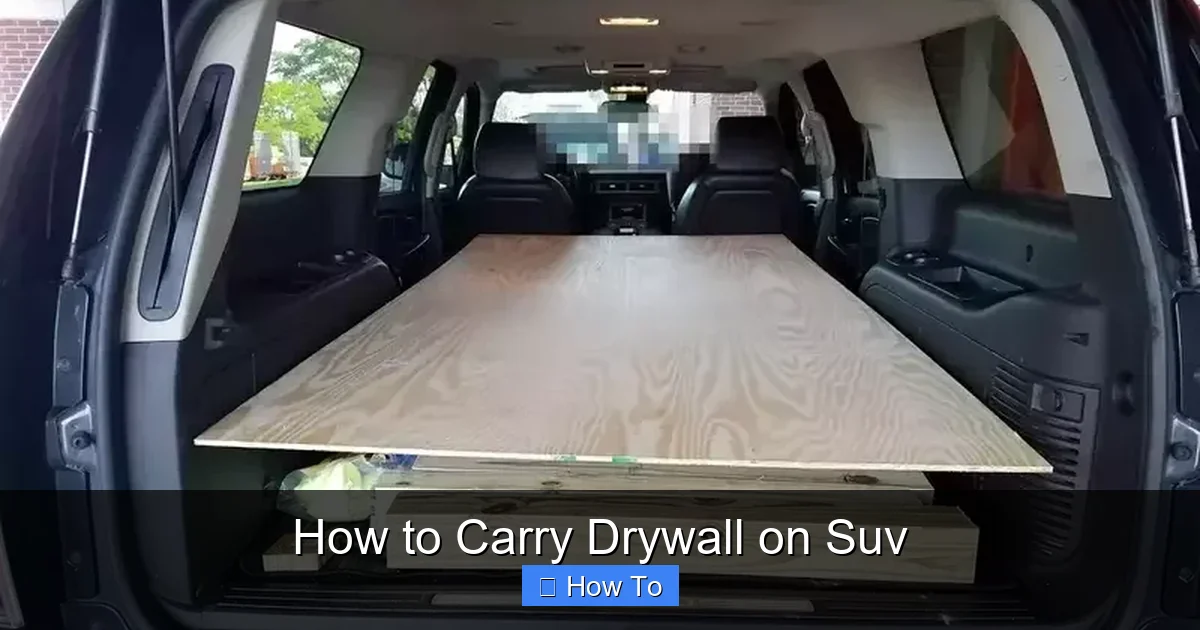
Visual guide about How to Carry Drywall on Suv
Image source: suvpedia.com
Before you even think about loading, take a moment to evaluate your SUV and the drywall you need to transport.
Check Your SUV’s Interior Dimensions
Most drywall sheets come in standard sizes: 4×8 feet, 4×9 feet, 4×10 feet, or 4×12 feet. Measure the interior length of your SUV from the back of the front seats to the rear hatch. If your SUV has fold-down rear seats, measure with them down.
For example:
– A Honda CR-V has about 65–70 inches of cargo space with rear seats folded.
– A Ford Explorer offers up to 87 inches.
– A Toyota RAV4 gives you roughly 63–68 inches.
If your drywall is longer than your cargo area, you’ll need to extend it out the rear or use the roof.
Determine How Many Sheets You’re Carrying
Drywall is heavy—each 4×8 sheet of ½-inch drywall weighs about 50–60 pounds. A full pack (10–12 sheets) can weigh over 600 pounds. Consider:
– Can your SUV handle the weight?
– Do you have enough space?
– Will you need help lifting?
If you’re carrying more than 4–5 sheets, consider using a trailer or making multiple trips.
Choose the Right Drywall Orientation
You can carry drywall flat (lying down) or upright (on edge). Each has pros and cons:
Flat loading:
– Best for shorter sheets (4×8 or 4×9).
– Provides more stability.
– Protects the surface from scratches.
– Takes up more floor space.
Upright loading:
– Ideal for longer sheets (4×10 or 4×12).
– Saves floor space.
– Requires extra support to prevent tipping.
– Risk of bending or cracking if not secured properly.
For most SUVs, flat loading is safer and easier—unless you’re carrying long sheets.
Step 2: Gather the Right Tools and Materials
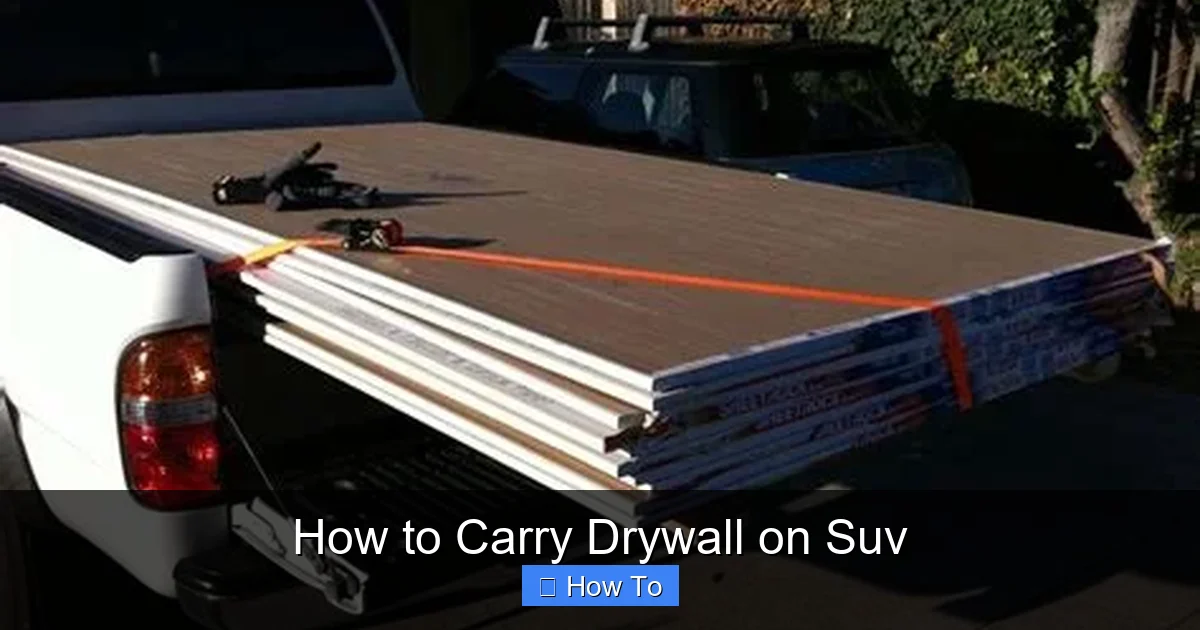
Visual guide about How to Carry Drywall on Suv
Image source: autozonic.com
Having the right gear makes all the difference. Here’s what you’ll need:
Protective Padding
Drywall is easily scratched or dented. Protect both your SUV and the drywall with:
– Moving blankets (at least 2–4)
– Foam pipe insulation (cut to size)
– Cardboard sheets (to line the floor)
– Old towels or rugs (for extra cushioning)
Place padding on the floor, walls, and any sharp edges inside the SUV.
Straps and Tie-Downs
Use high-quality ratchet straps (not just bungee cords) to secure the load. Look for:
– 2–4 ratchet straps with S-hooks or cam buckles
– Minimum 1,000-pound working load limit
– At least 10 feet long
Avoid using ropes or weak bungees—they can snap or loosen during transit.
Lifting and Handling Tools
Drywall is awkward to carry. Make it easier with:
– A drywall lift (rentable at hardware stores)
– A drywall carrier (a handle that grips the sheet)
– A helper (strongly recommended)
Even with tools, always lift with your legs—not your back.
Roof Rack (Optional but Helpful)
If your drywall extends beyond the SUV, a roof rack can help. Make sure it’s rated for the weight and has crossbars. Use:
– Roof rack pads or foam blocks
– Additional straps for roof mounting
– A red flag or marker if the load extends more than 4 feet
Check local laws—some states require flags for overhanging loads.
Step 3: Prepare Your SUV for Loading
A little prep goes a long way in preventing damage and ensuring safety.
Clear the Cargo Area
Remove all loose items from the back of your SUV. This gives you space to work and prevents shifting during transport.
Fold Down Rear Seats
If your SUV has fold-flat rear seats, lower them completely. This creates a flat, continuous surface for the drywall.
Line the Floor and Walls
Lay down cardboard or moving blankets on the floor. Cover side panels and the back of the front seats with padding. This protects your SUV’s interior from scratches and dust.
Mark Safe Zones
Use tape or chalk to mark where the drywall will sit. This helps you position it evenly and avoid blocking windows or mirrors.
Step 4: Load the Drywall Safely
Now it’s time to load. Take your time—rushing increases the risk of injury or damage.
Position the First Sheet
Slide the first drywall sheet into the SUV flat-side down. Start from the rear and push it forward until it’s snug against the front seats or a support.
Tip: Have a helper guide the sheet from the outside to prevent it from catching on the bumper or hatch.
Stack Additional Sheets (If Needed)
If carrying multiple sheets, stack them flat with cardboard or foam between each layer. This prevents scratching and reduces friction.
Never stack more than 4–5 sheets high in an SUV—too much weight can damage the suspension or make the vehicle unstable.
Support Long Sheets
If your drywall extends beyond the SUV:
– Use a 2×4 or foam block under the overhanging end for support.
– Secure the overhang with a strap tied to the trailer hitch or a roof rack.
– Add a red flag if the extension is more than 4 feet.
Upright Loading (For Long Sheets)
If loading upright:
– Stand the drywall on its long edge.
– Lean it gently against the side of the SUV or a support beam.
– Use foam blocks or a 2×4 brace to prevent tipping.
– Secure both top and bottom with straps.
Step 5: Secure the Load Properly
This is the most critical step. A loose load can shift, fall, or cause an accident.
Use Ratchet Straps
Attach straps to anchor points inside the SUV (usually under the floor or on the sides). Loop them over the drywall and tighten gradually.
Tip: Cross the straps in an “X” pattern for better stability.
Anchor Points Matter
Never tie straps to door handles, seat frames, or plastic trim. Use only factory-installed anchor points or the trailer hitch.
Check for Movement
After tightening, try to shift the drywall by hand. If it moves more than an inch, add more straps or reposition.
Cover the Load (If on Roof)
If using a roof rack, cover the drywall with a tarp or moving blanket to protect it from wind, rain, and road debris.
Step 6: Drive Safely with Drywall
Even with a secure load, driving requires extra caution.
Start Slow
Accelerate and brake gently. Sudden stops can shift the load or crack drywall.
Take Turns Wide
Drywall on the roof or extending out the back can affect balance. Take corners slowly and wide to avoid tipping.
Avoid High Speeds
Keep speeds under 60 mph, especially with roof loads. Wind resistance can loosen straps or damage drywall.
Check the Load Regularly
Stop every 20–30 minutes to inspect straps and padding. Re-tighten if needed.
Watch for Overhangs
If drywall extends beyond the vehicle, be extra cautious at intersections, driveways, and low-clearance areas.
Troubleshooting Common Problems
Even with careful planning, issues can arise. Here’s how to handle them:
Drywall is Too Long for the SUV
Solution: Use a roof rack or rent a trailer. Alternatively, cut the drywall to size at the store (many hardware stores offer this service).
Straps Keep Loosening
Solution: Use ratchet straps instead of bungees. Check for worn hooks or damaged webbing. Re-tighten after the first few miles.
Drywall is Scratching the SUV
Solution: Add more padding. Use foam pipe insulation on sharp edges. Avoid dragging drywall across surfaces.
Load Shifts While Driving
Solution: Pull over immediately. Re-secure the load and add more straps. Consider redistributing weight.
Wind Noise or Flapping
Solution: This usually means the load isn’t tight enough. Stop and re-tighten straps. Add a tarp if needed.
Alternative Methods: When an SUV Isn’t Enough
Sometimes, an SUV just isn’t the best option.
Use a Trailer
A small utility trailer (4×8 feet) can carry multiple sheets safely. It’s especially useful for long or heavy loads.
Rent a Truck
For large jobs, consider renting a pickup truck or cargo van. Many home improvement stores offer same-day rentals.
Hire a Delivery Service
If you’re buying from a store, ask about delivery. It’s often cheaper than renting a vehicle and safer for your SUV.
Final Tips for Success
– Plan ahead: Measure, gather tools, and enlist help before you go.
– Protect everything: Padding saves your SUV and your drywall.
– Secure twice: Always double-check straps before driving.
– Drive defensively: Assume other drivers don’t see your load.
– Unload carefully: Use the same caution when removing drywall.
Conclusion: Mastering How to Carry Drywall on an SUV
Transporting drywall in an SUV doesn’t have to be a headache. With the right preparation, tools, and techniques, you can move your materials safely and efficiently. Remember: protect your vehicle, secure your load, and drive with care.
Whether you’re a weekend warrior or a seasoned DIYer, knowing how to carry drywall on an SUV is a valuable skill. Follow these steps, stay safe, and your next project will start off on the right foot—literally.
Now go load up, strap down, and get building!