
Carving a SUV cake is a fun and creative way to celebrate car lovers. This guide walks you through planning, baking, carving, and decorating a realistic SUV-shaped cake with simple tools and techniques.
Key Takeaways
- Plan your design first: Sketch the SUV shape and choose a scale that fits your cake pan size to avoid frustration later.
- Use sturdy cake layers: Dense cakes like pound cake or mud cake hold their shape better when carved and support heavy frosting.
- Chill before carving: Refrigerate the cake for at least 2 hours to firm it up, making clean cuts and smooth edges easier.
- Start with a template: Print or draw a life-sized SUV outline to trace onto the cake for accurate proportions.
- Work slowly and safely: Use sharp knives and take small slices—rushing can ruin your cake’s shape.
- Frost in layers: Apply a crumb coat first, then add a final layer for a smooth, professional finish.
- Personalize with details: Add wheels, windows, and decals using fondant, chocolate, or edible markers for a realistic touch.
How to Carve a SUV Cake: A Step-by-Step Guide
If you’ve ever wanted to surprise a car enthusiast with a show-stopping dessert, carving a SUV cake is the perfect project. Whether it’s for a birthday, graduation, Father’s Day, or a car-themed party, a custom-shaped SUV cake adds a personal and impressive touch. While it might sound intimidating, with the right tools, a little patience, and this detailed guide, you’ll be able to create a realistic and delicious SUV cake that looks like it rolled right out of the showroom.
In this guide, you’ll learn everything from planning your design and baking the right cake to carving, shaping, and decorating your SUV masterpiece. We’ll cover essential tools, pro tips for smooth frosting, and how to troubleshoot common issues. By the end, you’ll have the confidence to tackle this fun and creative baking project—even if you’re a beginner.
So grab your apron, preheat the oven, and let’s get started on how to carve a SUV cake like a pro.
Why Choose a SUV Cake?
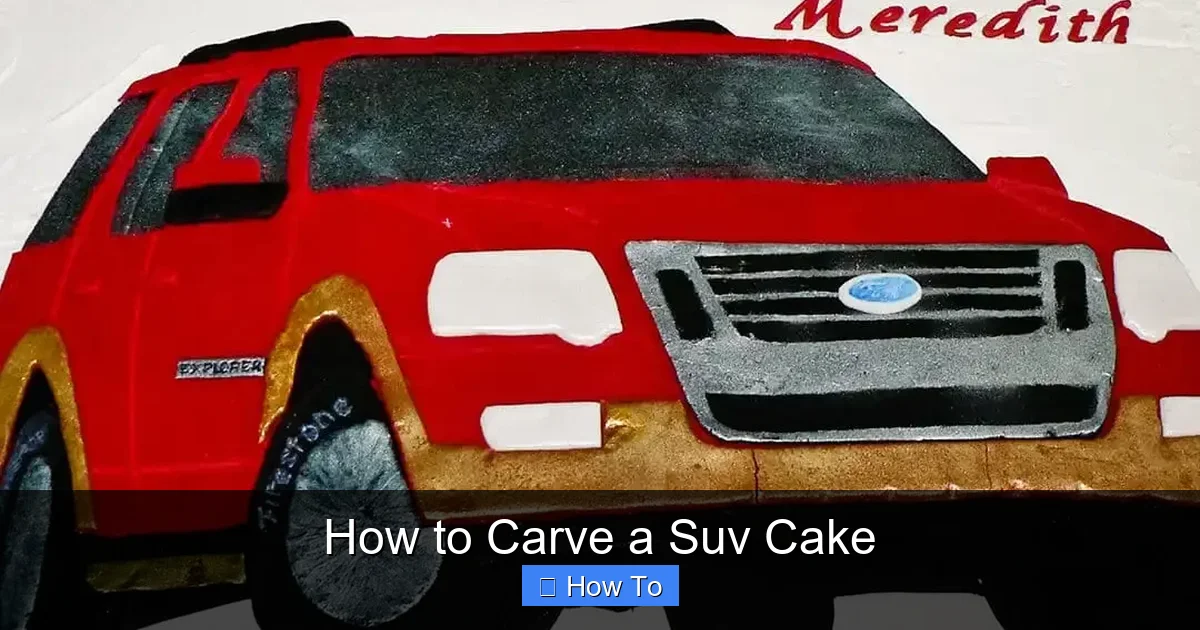
Visual guide about How to Carve a Suv Cake
Image source: i2.wp.com
SUVs are more than just vehicles—they represent adventure, family, and reliability. A SUV cake is a meaningful tribute to someone who loves their truck, enjoys road trips, or works in the automotive industry. It’s also a great conversation starter at parties and adds a unique twist to traditional birthday cakes.
Unlike standard round or sheet cakes, a carved SUV cake stands out visually and shows thoughtfulness. It’s a handmade gift that combines baking skill with personalization. Plus, it’s a fun challenge that lets you flex your creativity.
Whether you’re making a rugged Jeep, a sleek Range Rover, or a family-friendly minivan-style SUV, the process is similar. The key is to focus on proportions, symmetry, and realistic details. With practice, you can even create different models and styles.
Tools and Ingredients You’ll Need
Visual guide about How to Carve a Suv Cake
Image source: cdn001.cakecentral.com
Before you begin, gather all your tools and ingredients. Having everything ready will make the process smoother and less stressful.
Essential Tools
- Cake pans: Use a 9×13-inch rectangular pan and a 9-inch round pan for the main body and roof. You can also use two 9×13 pans if you want a larger cake.
- Sharp serrated knife: Ideal for cutting through cake without crushing it.
- Paring knife: For fine details like windows and trim.
- Cake leveler or long serrated knife: To trim the tops of cakes for even layers.
- Cutting board: A large, stable surface to work on.
- Pencil and paper: For sketching your design and creating a template.
- Printer (optional): To print a life-sized SUV outline from online images.
- Fondant smoother: For smoothing frosting and fondant.
- Offset spatula: For spreading frosting evenly.
- Turntable (optional but helpful): Makes rotating the cake easier during frosting.
- Food-safe paintbrushes: For applying edible paint or glue.
- Toothpicks or skewers: To hold pieces together if needed.
Ingredients
- Cake: 2–3 layers of dense cake (pound cake, chocolate fudge, or vanilla mud cake work best). You’ll need about 6–8 cups of baked cake.
- Frosting: 4–5 cups of buttercream or chocolate ganache. Buttercream is easier to shape and holds details well.
- Fondant (optional): 1–2 pounds for covering the cake or adding details like wheels and trim. Use white, black, gray, or red depending on your SUV color.
- Food coloring: Gel-based colors for tinting frosting or fondant.
- Edible glue or water: To attach fondant pieces.
- Chocolate or candy: For wheels, windows, or headlights (e.g., chocolate coins, licorice, or molded chocolate).
- Sprinkles or edible markers: For decals, license plates, or logos.
Step 1: Plan Your SUV Cake Design
The first and most important step is planning. A well-thought-out design prevents mistakes and ensures your cake looks realistic.
Choose Your SUV Model
Decide which type of SUV you want to recreate. Popular choices include:
- A rugged off-road Jeep
- A luxury SUV like a Range Rover or BMW X5
- A family minivan or crossover
- A cartoon-style SUV for kids
Look up reference images online. Pinterest, Google Images, and car websites are great sources. Save 2–3 photos from different angles to guide your carving.
Sketch the Shape
On a piece of paper, sketch the side and top views of your SUV. Include key features like:
- Wheel wells
- Windows (windshield, side windows, rear window)
- Door handles
- Grille and headlights
- Roof rack (if applicable)
Keep proportions in mind. SUVs are longer than they are tall, with a boxy but streamlined shape.
Create a Template
Print a life-sized image of your SUV or draw one to scale. Cut it out and use it to trace the shape onto your baked cake. This template will be your guide during carving.
Pro tip: If you’re making a large cake, use cardboard to create a reusable template. This helps with consistency if you make multiple cakes.
Step 2: Bake and Prepare the Cake
A sturdy cake is essential for carving. Soft or fluffy cakes crumble easily and won’t hold their shape.
Choose the Right Recipe
Use a dense, moist cake that can withstand cutting and stacking. Recommended options:
- Pound cake: Rich, firm, and holds detail well.
- Chocolate fudge cake: Dense and flavorful, great for dark-colored SUVs.
- Vanilla mud cake: Moist and sturdy, perfect for light-colored vehicles.
Avoid light sponge cakes—they’re too fragile.
Bake in the Right Pans
Use a 9×13-inch rectangular pan for the main body and a 9-inch round pan for the roof or cabin area. Bake according to the recipe, then let the cakes cool completely on a wire rack.
Level the Cakes
Use a cake leveler or long serrated knife to trim the domed tops. This creates flat, even surfaces for stacking and carving.
Chill the Cakes
Wrap the cooled cakes in plastic wrap and refrigerate for at least 2 hours (or overnight). Cold cakes are firmer and easier to carve without crumbling.
Step 3: Assemble and Carve the Cake
Now it’s time to shape your cake into a SUV. This step requires patience and precision.
Arrange the Cake Layers
Place the rectangular cake on a large cutting board or cake board. This will be the base of your SUV. If needed, trim the ends to create a more proportional length.
Trace the Template
Place your paper template on top of the cake and lightly trace the outline with a toothpick or paring knife. This will guide your cuts.
Carve the Main Body
Using a sharp serrated knife, carefully cut along the traced lines. Start with the overall shape:
- Cut the front bumper area (slightly rounded or angled).
- Shape the sides to create the wheel wells (use a small round cutter or knife to carve out curved areas).
- Trim the back to form the rear bumper.
- Carve the roofline if using a separate piece.
Work slowly and make small cuts. It’s easier to remove more cake than to add it back.
Attach the Roof (If Using a Separate Piece)
If you baked a round cake for the roof, carve it into a curved or flat top that matches your SUV design. Use a small amount of frosting or melted chocolate as “glue” to attach it to the main body. Secure with toothpicks if needed.
Refine the Shape
Step back and look at your cake from all angles. Make adjustments to ensure symmetry and proportion. Use a paring knife to smooth edges and create subtle curves.
Pro tip: Keep a damp cloth nearby to wipe your knife between cuts. This helps prevent crumbs from sticking and keeps your cuts clean.
Step 4: Frost and Cover the Cake
Frosting isn’t just for flavor—it’s what holds your cake together and creates a smooth surface for details.
Apply a Crumb Coat
Mix 1–2 cups of buttercream and spread a thin layer over the entire cake. This “crumb coat” seals in crumbs and creates a base for the final layer. Refrigerate for 15–20 minutes to set.
Add the Final Frosting Layer
Use the remaining frosting to cover the cake completely. Use an offset spatula to smooth the sides and top. For a realistic look, keep the frosting slightly textured to mimic metal panels.
Smooth the Surface
Dip your spatula in warm water, wipe it dry, and glide it over the frosting to smooth it. Repeat as needed. For a glossy finish, use fondant instead of frosting.
Cover with Fondant (Optional)
If using fondant, roll it out to ¼-inch thickness and drape it over the cake. Smooth it with a fondant smoother, trimming excess at the base. Fondant gives a clean, professional look and holds fine details well.
Step 5: Add Realistic Details
This is where your SUV cake comes to life. Small details make a big difference.
Create the Wheels
Use chocolate coins, molded chocolate, or fondant to make wheels. Roll black fondant into circles and attach to the wheel wells with edible glue. Add hubcaps using silver or gray fondant.
Make Windows
Cut clear plastic from food packaging or use black fondant to create windows. For a realistic look, slightly angle the windshield and side windows. Attach with edible glue.
Add Headlights and Taillights
Use white or yellow fondant for headlights and red for taillights. Shape into small ovals or rectangles and attach to the front and back.
Include a Grille and Bumpers
Use gray or black fondant to create a grille pattern. Cut thin strips for bumpers and attach with glue.
Personalize with Decals
Use edible markers to draw logos, license plates, or custom messages. You can also print edible images and apply them with water.
Add a Roof Rack or Accessories
Use licorice, pretzel sticks, or fondant to create a roof rack, spare tire, or luggage. These details add authenticity.
Troubleshooting Common Issues
Even experienced bakers run into problems. Here’s how to fix common issues when carving a SUV cake.
Cake is Crumbling
If your cake breaks while carving, it’s likely too soft or not chilled enough. Next time, use a denser recipe and refrigerate longer. For now, patch cracks with extra frosting or fondant.
Shape Looks Uneven
Step back frequently to check symmetry. Use a ruler or measuring tape to compare sides. Make small adjustments with a paring knife.
Frosting is Lumpy
Reheat your spatula with warm water and smooth again. If using fondant, knead it well before rolling to avoid air bubbles.
Details Won’t Stick
Use edible glue or a dab of water to attach fondant pieces. For heavier items, insert a toothpick for support.
Cake is Too Tall or Short
Plan your layers carefully. Use a template to estimate height. If the cake is too tall, trim the roof. If too short, add a thin layer of frosting or fondant to build it up.
Tips for Success
- Practice on a dummy cake: Use a foam board or extra cake to test your carving technique.
- Work in a cool room: Heat softens frosting and fondant, making them harder to shape.
- Take breaks: Step away for a few minutes to regain focus and perspective.
- Use reference images: Keep photos nearby to stay on track.
- Have fun: Don’t stress over perfection—personality makes the cake special.
Conclusion
Carving a SUV cake is a rewarding project that combines baking, art, and personalization. With careful planning, the right tools, and a little patience, you can create a stunning dessert that wows your guests and delights the guest of honor.
Remember to start with a sturdy cake, chill it before carving, and use a template for accuracy. Frost in layers, add realistic details, and don’t be afraid to personalize. Even if it’s not perfect, the effort and creativity will shine through.
Whether you’re celebrating a car lover, a new driver, or just want to try something new, this SUV cake is sure to make a lasting impression. So fire up the oven, grab your knife, and start carving your way to cake greatness.