
Replacing a headlight on a 1999 SUV is simpler than you think. With basic tools and clear instructions, you can complete this repair at home in under an hour. This guide walks you through every step safely and efficiently.
Key Takeaways
- Safety first: Always disconnect the battery before starting to avoid electrical shocks or short circuits.
- Know your SUV model: Different 1999 SUVs (like Ford Explorer, Chevy Tahoe, or Toyota 4Runner) have slightly different headlight assemblies—check your owner’s manual.
- Use the right bulb: Match the bulb type (e.g., 9007, H13) to your vehicle’s specifications—using the wrong one can damage the housing or cause poor visibility.
- Handle bulbs carefully: Never touch the glass part of halogen bulbs with bare hands—oils from your skin can cause overheating and early failure.
- Test before reassembling: Turn on the headlights after installation but before fully securing everything to confirm they work properly.
- Keep old parts handy: Save the old bulb and packaging in case you need to return or exchange the new one.
- Clean the lens: While the headlight is off, wipe the lens with a microfiber cloth to improve brightness and clarity.
How to Change a Headlight on a 1999 SUV
If you own a 1999 SUV—whether it’s a rugged Ford Explorer, a dependable Chevy Tahoe, or a trusty Toyota 4Runner—you know these vehicles were built to last. But even the most reliable SUVs eventually need maintenance, and one of the most common repairs is replacing a burnt-out headlight. The good news? You don’t need to visit a mechanic or spend $100+ on labor. With just a few basic tools and about 30–45 minutes of your time, you can change a headlight yourself—safely and correctly.
In this comprehensive guide, we’ll walk you through every step of replacing a headlight bulb on a 1999 SUV. We’ll cover safety precautions, tool requirements, step-by-step instructions for different models, troubleshooting tips, and best practices to ensure your new bulb lasts as long as possible. Whether you’re a first-time DIYer or a seasoned home mechanic, this guide will give you the confidence to tackle this simple but essential repair.
Why Replace Your Headlight Yourself?
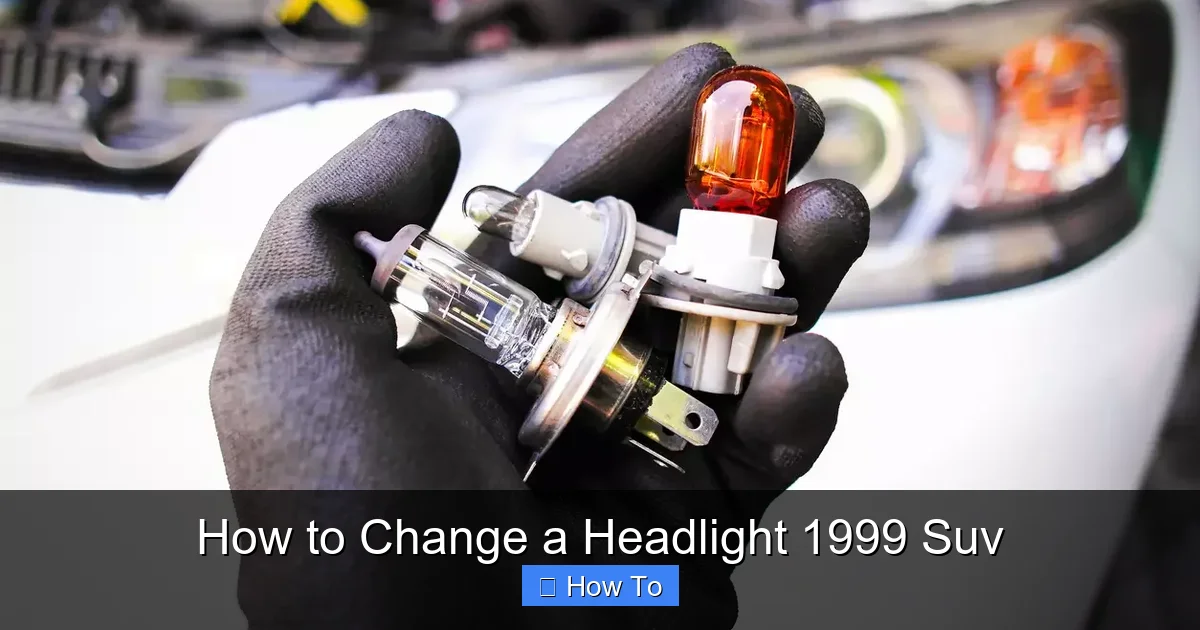
Visual guide about How to Change a Headlight 1999 Suv
Image source: hidnation.com
Headlights are critical for safe driving—especially at night or in poor weather. A dim or non-working headlight not only reduces your visibility but also makes it harder for other drivers to see you. In many states, driving with a broken headlight is illegal and can result in a traffic ticket.
While auto shops charge anywhere from $50 to $150 for a headlight replacement (including parts and labor), you can do it yourself for under $20. Most 1999 SUVs use standard halogen bulbs that are widely available at auto parts stores, big-box retailers, or online. Plus, the process is straightforward and doesn’t require specialized knowledge.
By learning how to change a headlight, you’ll save money, gain valuable DIY skills, and avoid the hassle of scheduling appointments or waiting at the shop. And once you’ve done it once, you’ll realize how quick and easy it really is.
Tools and Materials You’ll Need

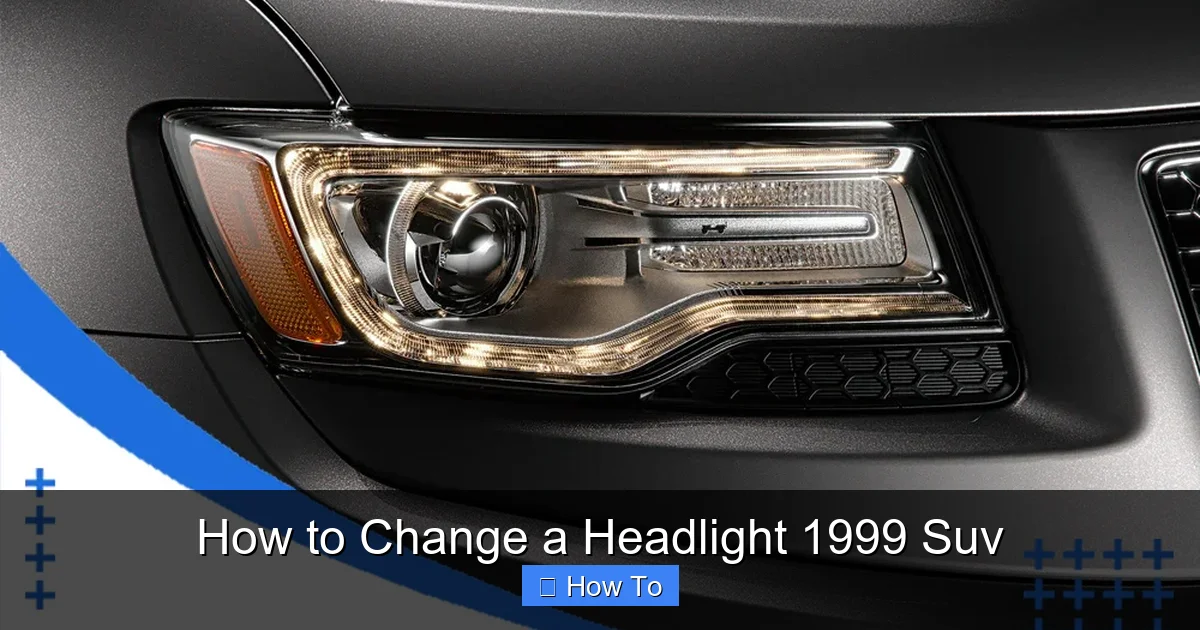
Visual guide about How to Change a Headlight 1999 Suv
Image source: adventurejeep.com
Before you begin, gather the following items to ensure a smooth process:
- Replacement headlight bulb: Make sure it matches your SUV’s make, model, and year. Common types for 1999 SUVs include 9007, H13, 9006, or 9005. Check your owner’s manual or the old bulb for the correct part number.
- Screwdrivers: A Phillips and flathead screwdriver are usually sufficient. Some models may require a socket wrench or Torx bit.
- Gloves: Wear clean, lint-free gloves (like nitrile or cotton) to avoid touching the bulb glass.
- Safety glasses: Protect your eyes from debris or accidental bulb breakage.
- Clean microfiber cloth: For wiping the lens and handling the bulb.
- Owner’s manual: Helpful for locating components and understanding your specific SUV’s setup.
- Work light or flashlight: In case you’re working in low-light conditions.
Optional but helpful:
- Trim removal tool (to avoid scratching plastic panels)
- Electrical contact cleaner (to clean corroded connectors)
- Dielectric grease (to protect electrical connections from moisture)
Safety Precautions
Safety should always come first when working on your vehicle. Here are a few essential tips:
- Turn off the engine and remove the keys: This prevents accidental activation of electrical systems.
- Disconnect the negative battery terminal: Use a wrench to loosen the clamp and pull the cable off. This eliminates the risk of short circuits or electrical shock.
- Allow the headlight to cool: If the light was recently on, wait 10–15 minutes before touching it—halogen bulbs get extremely hot.
- Work in a well-lit, dry area: Avoid working in rain or on wet surfaces to prevent slipping or electrical issues.
- Never touch the glass of a halogen bulb: Natural oils from your skin can create hot spots on the bulb, causing it to fail prematurely.
Taking these precautions only adds a few minutes to the process but can prevent injury, damage, or frustration.
Step-by-Step Guide to Changing a Headlight on a 1999 SUV
Now that you’re prepared, let’s get to the actual process. While specific steps may vary slightly depending on your SUV model, the general procedure is consistent across most 1999 vehicles. We’ll cover the most common setups and highlight model-specific differences where relevant.
Step 1: Locate the Headlight Assembly
Open the hood of your SUV and locate the back of the headlight assembly. On most 1999 SUVs, the headlight is accessible from the engine bay. Look for a round or rectangular cover behind the headlight—this is where the bulb connects to the wiring harness.
Some models, like the Ford Explorer or Jeep Grand Cherokee, have the headlight bulb accessible directly from the back. Others, such as the Chevy Tahoe or GMC Yukon, may require removing a plastic cover or air intake duct for better access.
Tip: If you’re unsure, consult your owner’s manual or search online for “1999 [your SUV model] headlight bulb replacement” to see a diagram or video.
Step 2: Disconnect the Electrical Connector
Once you’ve located the bulb housing, you’ll see a wiring harness connected to the back of the bulb. This is the electrical connector that supplies power to the headlight.
Gently press the release tab (usually a small plastic clip) and pull the connector straight out. Do not yank or twist it—this can damage the wires or connector.
If the connector feels stuck, wiggle it slightly while pulling. In older vehicles, connectors can become brittle or corroded. If you see rust or green buildup, use electrical contact cleaner and a small brush to clean it before reconnecting.
Step 3: Remove the Bulb Retaining Clip or Ring
Next, you’ll need to release the bulb from its housing. Most 1999 SUVs use one of two systems:
- Spring clip: A metal or plastic clip holds the bulb in place. Press the clip inward or outward (depending on the design) and lift it away from the bulb.
- Twist-lock ring: A circular metal or plastic ring secures the bulb. Turn it counterclockwise (usually about 1/4 turn) until it releases.
Be careful not to force anything. If the clip or ring won’t budge, double-check that you’ve fully disconnected the electrical connector first—some designs won’t release until the power is off.
Once the retaining mechanism is released, gently pull the old bulb straight out of the housing. Avoid twisting or bending it, as this can damage the socket.
Step 4: Install the New Bulb
Now it’s time to install the new bulb. Here’s how to do it correctly:
- Handle the bulb with gloves: As mentioned earlier, never touch the glass with bare hands. Even a small amount of oil can reduce the bulb’s lifespan.
- Align the tabs correctly: Most bulbs have notched or keyed bases that only fit one way. Match the tabs on the bulb with the slots in the housing.
- Insert gently: Push the bulb straight into the socket until it seats fully. Do not force it.
- Secure the retaining clip or ring: Reattach the spring clip or twist the locking ring clockwise until it clicks or feels tight.
Tip: If you’re replacing both headlights, do one at a time. This way, you can use the working side as a reference for alignment and installation.
Step 5: Reconnect the Electrical Connector
Push the wiring harness connector back onto the new bulb until it clicks into place. Give it a gentle tug to make sure it’s secure.
If your SUV has a dust cover or rubber boot over the connector, make sure it’s properly seated to prevent moisture from entering.
Step 6: Reassemble and Test
Before closing everything up, reconnect the negative battery terminal. Then, turn on your headlights to test the new bulb.
Check both low and high beams (if applicable) to ensure the light is bright and properly aligned. If the light doesn’t turn on, double-check the connection and make sure the bulb is seated correctly.
If everything works, turn off the lights and reassemble any parts you removed—such as plastic covers, air ducts, or trim panels.
Step 7: Clean the Headlight Lens (Optional but Recommended)
While the headlight is accessible, take a moment to clean the outer lens. Over time, plastic lenses can become cloudy or yellowed due to UV exposure, reducing light output.
Use a microfiber cloth and a plastic-safe cleaner (like headlight restoration wipes or a mixture of baking soda and water) to gently scrub the surface. Avoid abrasive materials that can scratch the lens.
For severely oxidized lenses, consider using a headlight restoration kit, which includes sandpaper and polish to restore clarity.
Model-Specific Tips for Popular 1999 SUVs
While the general process is similar, here are some model-specific notes to help you navigate common variations:
Ford Explorer (1999)
The 1999 Ford Explorer uses a 9007 dual-filament bulb. Access is straightforward from the engine bay. You’ll need to remove a small plastic cover behind the headlight assembly. The bulb is held in place by a spring clip—press it down and lift to release.
Tip: The Explorer’s headlight housing can be tight. Use a flashlight to see the clip mechanism clearly.
Chevrolet Tahoe / GMC Yukon (1999)
These models use an H13 bulb and have a twist-lock ring. You may need to remove the air intake duct for better access. Turn the ring counterclockwise to unlock, then pull the bulb out.
Note: Some owners report that the H13 bulb can be tricky to align. Make sure the tabs are properly seated before twisting the ring back into place.
Toyota 4Runner (1999)
The 4Runner uses a 9006 bulb and has a spring clip retention system. Access is easy, but the wiring harness can be stiff. Gently wiggle the connector while pulling to avoid damaging the wires.
Tip: Toyota’s connectors are often tight. Use a flathead screwdriver to gently pry the release tab if needed.
Jeep Grand Cherokee (1999)
This model uses a 9007 bulb and has a twist-lock ring. You may need to remove the battery or air filter box for better access. The headlight assembly is deeper, so take your time aligning the bulb.
Troubleshooting Common Issues
Even with careful steps, you might run into a few hiccups. Here’s how to handle common problems:
Bulb Won’t Turn On After Installation
- Check the electrical connection—make sure it’s fully seated.
- Verify the bulb is the correct type and properly aligned.
- Test the fuse in the fuse box (usually labeled “HEAD” or “LIGHT”).
- Try the bulb in the other headlight socket to rule out a bad bulb.
Bulb Keeps Burning Out Quickly
This could be due to:
- Touching the bulb with bare hands during installation.
- Voltage fluctuations or a failing alternator.
- Loose wiring or poor grounding.
- Using a bulb with higher wattage than recommended.
Solution: Always wear gloves, use OEM-spec bulbs, and have your electrical system checked if the problem persists.
Headlight Flickers or Fluctuates
This often indicates a loose connection or corroded contacts. Clean the connector with electrical contact cleaner and reseat it firmly. Applying a small amount of dielectric grease can also help prevent future corrosion.
Difficulty Removing the Old Bulb
If the bulb is stuck:
- Ensure the retaining clip or ring is fully released.
- Gently wiggle the bulb while pulling—don’t twist.
- Use needle-nose pliers (with cloth protection) to grip the base if necessary.
Warning: Never strike or pry the bulb glass—it can shatter and cause injury.
Tips for Long-Lasting Headlight Performance
To get the most out of your new headlight bulb, follow these best practices:
- Replace bulbs in pairs: Even if only one is out, the other is likely close to failing. Replacing both ensures even lighting and saves you a future repair.
- Use quality bulbs: While cheap bulbs may save a few dollars, premium brands (like Philips, Sylvania, or Osram) often last longer and provide better light output.
- Check alignment: Misaligned headlights can blind oncoming drivers or reduce your visibility. Use a wall or garage door to check beam pattern and adjust if needed.
- Inspect regularly: Make it a habit to check your headlights monthly. Look for cracks, moisture inside the lens, or dimming.
- Protect from moisture: If you notice condensation inside the headlight, it may have a seal leak. This can damage the bulb and wiring—consider resealing or replacing the assembly.
Conclusion
Changing a headlight on a 1999 SUV is a simple, cost-effective repair that anyone can do with basic tools and a little patience. By following this guide, you’ve learned how to safely remove the old bulb, install a new one, and troubleshoot common issues. Not only will you save money, but you’ll also gain confidence in maintaining your vehicle.
Remember: safety first, use the right bulb, handle components gently, and always test before finishing. With proper care, your new headlight will provide bright, reliable illumination for thousands of miles.
So the next time a headlight goes out, don’t panic—grab your tools, follow these steps, and get back on the road with confidence. Your 1999 SUV may be old, but with a little TLC, it’s still got plenty of life left.