

Changing a tire on an SUV might seem daunting, but with the right tools and knowledge, it’s a manageable task. This guide walks you through every step—from safety prep to reattaching the spare—so you can get back on the road confidently. Whether you’re on a highway shoulder or a quiet roadside, you’ll be ready.
Key Takeaways
- Safety comes first: Always pull over to a safe, flat area, turn on hazard lights, and use wheel wedges to prevent rolling.
- Use the right tools: A lug wrench, jack, and spare tire designed for your SUV are essential—don’t rely on compact spares for long trips.
- Loosen lug nuts before lifting: It’s easier to break them free when the tire is still on the ground.
- Lift the SUV correctly: Place the jack on the manufacturer-recommended lift point to avoid damage or instability.
- Check spare tire pressure regularly: A flat spare won’t help in an emergency—inspect it monthly.
- Know your spare type: Full-size, temporary (donut), or run-flat—each has different usage limits and speed restrictions.
- Call for help if unsure: If you’re on a busy road, in bad weather, or lack confidence, roadside assistance is a smart choice.
How to Change a Tire on an SUV
Getting a flat tire on your SUV can be stressful—especially if you’re on a busy highway, in bad weather, or far from help. But with the right preparation and know-how, changing a tire is a skill every SUV owner should master. Unlike smaller cars, SUVs are heavier, taller, and often have larger tires, which means the process requires a bit more care and the right tools. The good news? Once you know the steps, it’s straightforward and empowering.
In this guide, we’ll walk you through how to change a tire on an SUV safely and efficiently. You’ll learn what tools you need, how to prepare your vehicle, step-by-step instructions for removing the flat and installing the spare, and important safety tips to avoid accidents. Whether you drive a compact crossover like a Honda CR-V or a full-size SUV like a Chevrolet Tahoe, these steps apply to most models. By the end, you’ll feel confident handling a flat tire on your own—no matter where you are.
Why Changing a Tire on an SUV Is Different
SUVs are built for power, space, and off-road capability, but those features come with some unique challenges when it comes to tire changes. First, their weight—often 4,000 to 6,000 pounds or more—means you need a sturdy jack and proper lifting technique. Second, their higher ground clearance can make accessing the jack points trickier. And third, many SUVs come with larger wheels and tires, which can be heavier and harder to handle.
Visual guide about How to Change a Tire on an Suv
Image source: threetwohome.com
Additionally, some SUVs have full-size spare tires mounted underneath the vehicle or on the rear door, which adds another layer of complexity. You might need extra tools or strength to remove a under-mounted spare. And because SUVs are often used for long trips or rugged terrain, a flat tire can happen in remote areas where help isn’t nearby. That’s why knowing how to change a tire isn’t just convenient—it’s essential.
Tools and Equipment You’ll Need
Before you even think about jacking up your SUV, make sure you have the right tools. Most SUVs come with a basic tire-changing kit, but it’s smart to check and upgrade if needed. Here’s what you should have:
Visual guide about How to Change a Tire on an Suv
Image source: thedrive.com
- Lug wrench: This is used to loosen and tighten the lug nuts. Some SUVs come with a cross-shaped wrench for extra leverage.
- Hydraulic jack: SUVs are heavy, so a standard scissor jack might not be enough. A hydraulic jack or a heavy-duty scissor jack rated for your vehicle’s weight is ideal.
- Spare tire: Make sure it’s properly inflated and in good condition. Check the pressure monthly.
- Wheel wedges or blocks: These prevent the SUV from rolling while you work. Use them on the opposite side of the flat tire.
- Flashlight: If you’re changing a tire at night, visibility is crucial.
- Gloves: Protect your hands from dirt, grease, and sharp edges.
- Reflective triangles or flares: These increase your visibility to other drivers, especially on highways.
Some SUVs also include a tire iron with a built-in wrench or a jack handle extension. If your vehicle has a full-size spare mounted under the chassis, you may also need a crank tool (often stored with the jack) to lower it. Always consult your owner’s manual to confirm what’s included and where tools are stored.
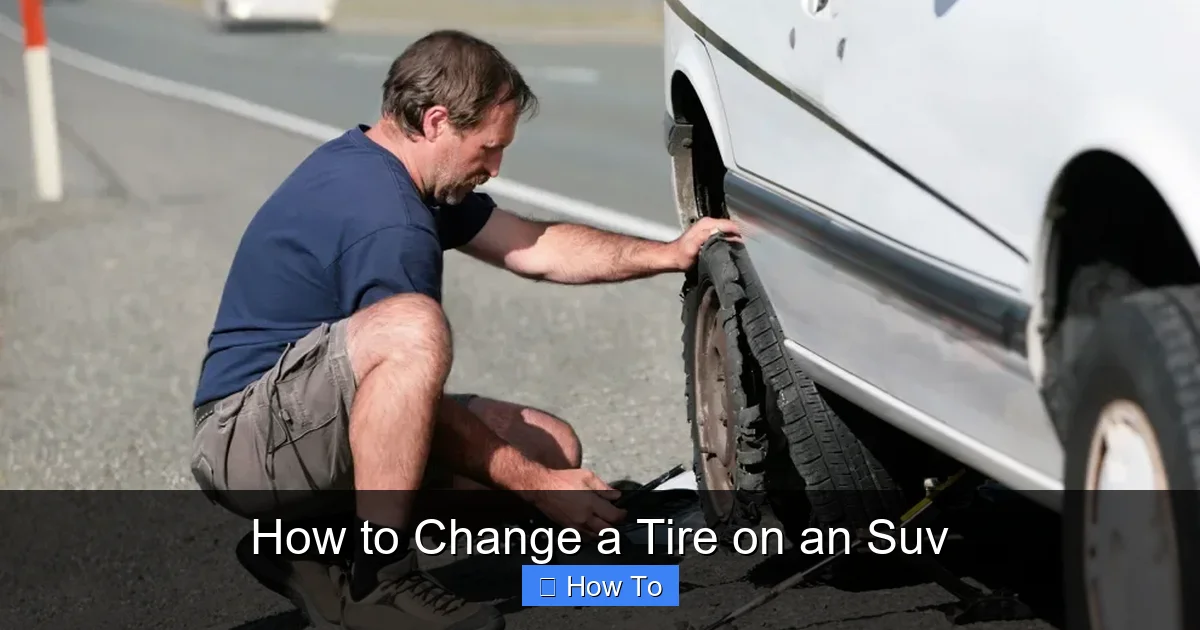
Step 1: Find a Safe Location
The first and most important step in changing a tire on an SUV is finding a safe place to stop. Pull over as far to the right (or left, depending on your country) as possible, onto a flat, stable surface like a shoulder or parking lot. Avoid soft ground, slopes, or curves—these increase the risk of the vehicle rolling or tipping.
Turn on Your Hazard Lights
As soon as you pull over, activate your hazard lights. This alerts other drivers that your vehicle is stopped and helps prevent accidents. If you’re on a highway or busy road, this is especially critical.
Apply the Parking Brake
Engage the parking brake to help keep the SUV from moving. This adds an extra layer of safety, especially if the ground isn’t perfectly level.
Use Wheel Wedges
Place wheel wedges or blocks in front of or behind the tires on the opposite side of the flat. For example, if the front right tire is flat, place wedges behind the rear left tire. This prevents the SUV from rolling forward or backward while you work.
Set Up Warning Devices
If you have reflective triangles or flares, place them at least 50 feet behind your vehicle (more on highways). This gives other drivers plenty of time to see you and slow down.
Step 2: Prepare the Vehicle and Tools
Once you’re safely stopped, it’s time to gather your tools and prepare the SUV for the tire change. This step ensures everything goes smoothly and reduces the risk of injury or damage.
Retrieve Your Tools and Spare Tire
Open the trunk or cargo area and locate your jack, lug wrench, and spare tire. If your spare is mounted under the vehicle, you’ll need the crank tool to lower it. Some SUVs have a release mechanism inside the cabin—check your owner’s manual for details.
Check the Spare Tire
Before you start, inspect the spare tire. Is it inflated? Does it have visible cracks, bulges, or wear? A flat or damaged spare won’t help you. If it’s a temporary “donut” spare, remember it’s only meant for short distances (usually under 50 miles) and low speeds (under 50 mph).
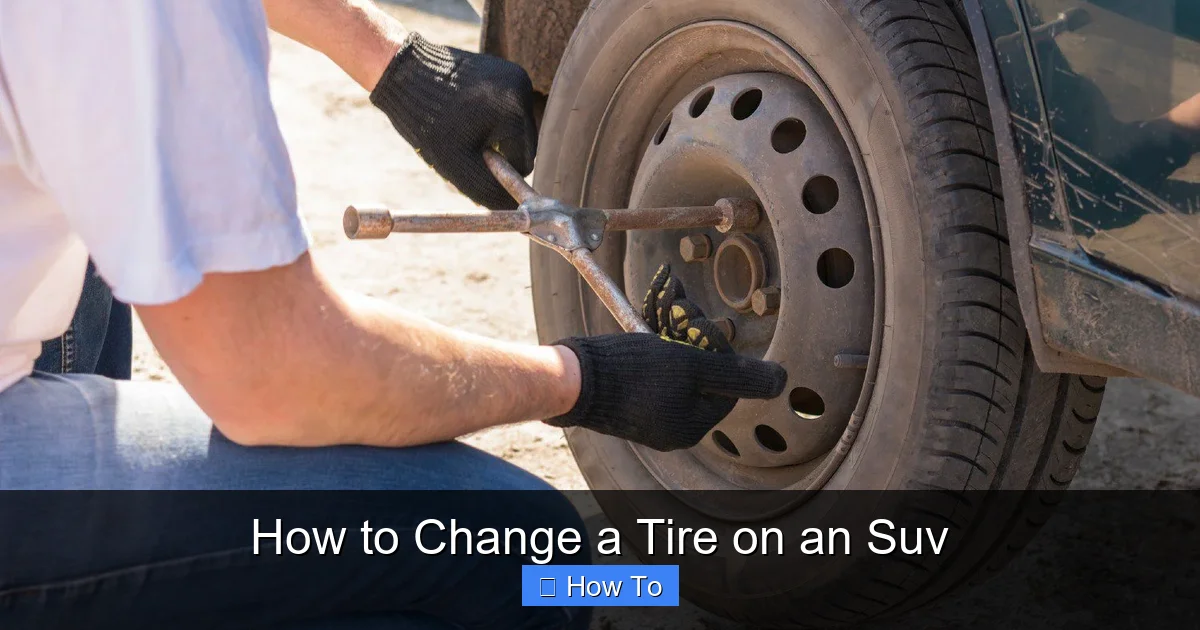
Loosen the Lug Nuts (Before Lifting)
This is a crucial step many people skip—and it can make the job much harder. Use the lug wrench to loosen the lug nuts on the flat tire, but don’t remove them yet. Turn them counterclockwise, but only break them free. Because the tire is still on the ground, it won’t spin, giving you better leverage.
Tip: If the lug nuts are tight, try standing on the wrench or using a pipe for extra leverage. Be careful not to slip.
Step 3: Lift the SUV with the Jack
Now it’s time to lift the SUV. This is where many people make mistakes—using the wrong jack point or lifting unevenly can damage your vehicle or cause it to fall.
Locate the Correct Jack Point
Never jack up your SUV on the body panels, suspension, or oil pan. These areas aren’t designed to support the vehicle’s weight. Instead, look for the manufacturer-recommended jack point. These are usually reinforced metal pads near the wheels, often marked by notches or arrows.
For most SUVs, the front jack points are near the front wheels, under the frame rails. The rear jack points are typically behind the rear wheels. Your owner’s manual will show exact locations.
Position the Jack
Place the jack securely under the correct lift point. Make sure it’s centered and stable. If you’re using a hydraulic jack, pump it slowly until the tire lifts just off the ground. For a scissor jack, turn the handle clockwise to raise it.
Warning: Never get under the vehicle while it’s jacked up. Even with a sturdy jack, accidents can happen.
Lift the Vehicle
Continue raising the jack until the flat tire is about 6 inches off the ground. This gives you enough room to remove the tire and install the spare. Don’t lift it too high—this can make the SUV unstable.
Step 4: Remove the Flat Tire
With the SUV safely lifted, you can now remove the flat tire.
Remove the Lug Nuts
Now that the tire is off the ground, fully unscrew the lug nuts you loosened earlier. Place them in a secure spot—like a hubcap or your pocket—so you don’t lose them.
Take Off the Flat Tire
Grip the tire firmly with both hands and pull it straight toward you. SUV tires can be heavy (30–50 pounds or more), so use your legs, not your back, to lift. If it’s stuck, gently kick the side of the tire to break it free.
Set the Flat Tire Aside
Place the flat tire flat on the ground, behind the SUV if possible. This prevents it from rolling away and acts as a small barrier.
Step 5: Install the Spare Tire
Now it’s time to put on the spare tire. Make sure it’s the correct size and type for your SUV.
Align the Spare Tire
Line up the holes in the spare tire with the wheel studs on the hub. Push the tire onto the studs until it’s snug against the hub.
Hand-Tighten the Lug Nuts
Place the lug nuts back onto the studs and tighten them by hand in a star or crisscross pattern. This ensures even pressure and prevents warping.
Step 6: Lower the SUV and Tighten the Lug Nuts
Once the spare is on, it’s time to lower the vehicle and fully secure the lug nuts.
Lower the Jack
Slowly lower the SUV by turning the jack handle counterclockwise (for a scissor jack) or releasing the hydraulic valve. Lower it until the spare tire touches the ground but doesn’t bear the full weight yet.
Tighten the Lug Nuts with the Wrench
Use the lug wrench to fully tighten the lug nuts in a star pattern. Apply steady pressure—don’t overtighten, but make sure they’re secure. Once the SUV is fully on the ground, give the lug nuts one final tighten.
Stow the Flat Tire and Tools
Place the flat tire, jack, and tools back in your SUV. If your spare is under-mounted, use the crank tool to raise it back into place.
Step 7: Check the Spare and Drive Safely
You’re almost done! But before you drive off, take a few important steps.
Check the Spare Tire Pressure
Use a tire pressure gauge to ensure the spare is properly inflated. If it’s low, drive to the nearest gas station to fill it.
Observe Speed and Distance Limits
If you’re using a temporary spare (donut), don’t exceed 50 mph or drive more than 50 miles. These spares are not designed for long-term use. Replace the flat tire as soon as possible.
Visit a Tire Shop
Even if the flat can be repaired, have it inspected by a professional. Driving on a damaged tire can lead to blowouts or further damage.
Troubleshooting Common Issues
Even with careful preparation, problems can arise. Here’s how to handle common issues:
Lug Nuts Are Stuck
If the lug nuts won’t budge, try spraying them with penetrating oil (like WD-40) and wait a few minutes. Use a longer wrench or a pipe for extra leverage. Never use excessive force—this can strip the nuts.
Jack Won’t Lift the SUV
Make sure the jack is on a solid, level surface. If it’s sinking into soft ground, place a wooden board or flat rock underneath. Also, confirm the jack is rated for your SUV’s weight.
Spare Tire Won’t Fit
Double-check that you have the correct spare. Some SUVs have different tire sizes for front and rear. If the spare doesn’t fit, call for roadside assistance.
Vehicle Feels Unstable
If the SUV wobbles or tilts while jacked up, stop immediately. Lower the vehicle and reposition the jack. Never work under an unstable vehicle.
When to Call for Help
Changing a tire on an SUV is doable for most people, but there are times when it’s safer to call for professional help. Consider calling roadside assistance if:
- You’re on a busy highway or in heavy traffic.
- The weather is bad (rain, snow, wind).
- You don’t have the right tools or a functional spare.
- You’re injured, unwell, or feel unsafe.
- The flat is on a rear tire and your spare is under-mounted—this can be difficult to access.
It’s always better to be safe than sorry. Roadside assistance can change your tire quickly and get you back on the road.
Prevention Tips: Avoiding Flat Tires
The best way to handle a flat tire is to avoid it altogether. Here are some tips to keep your SUV’s tires in good shape:
- Check tire pressure monthly: Underinflated tires wear unevenly and are more prone to blowouts.
- Inspect tread depth: Use the penny test—insert a penny into the tread with Lincoln’s head upside down. If you can see the top of his head, it’s time to replace the tire.
- Rotate tires regularly: Follow your manufacturer’s recommendation (usually every 5,000–7,000 miles).
- Avoid road hazards: Watch for potholes, debris, and curbs that can damage tires.
- Replace old tires: Even if they look fine, tires older than 6–10 years should be replaced due to rubber degradation.
Conclusion
Changing a tire on an SUV doesn’t have to be intimidating. With the right tools, preparation, and step-by-step approach, you can handle a flat tire safely and confidently. Remember: safety first—always pull over in a secure location, use wheel wedges, and wear reflective gear if needed. Loosen lug nuts before lifting, use the correct jack point, and tighten the spare securely.
While temporary spares are great for getting you to a repair shop, don’t rely on them for long trips. And if you’re ever unsure or in a dangerous situation, don’t hesitate to call for help. By mastering this skill, you’ll save time, money, and stress the next time you face a flat tire on the road.