
Changing the cabin filter in your 2013 BMW X3 SUV is a simple DIY task that improves air quality and HVAC performance. This guide walks you through the entire process using basic tools and clear instructions.
Key Takeaways
- Improved Air Quality: A clean cabin filter removes dust, pollen, and pollutants, ensuring fresher air inside your BMW X3.
- Easy DIY Job: You don’t need professional tools or mechanics—just a few basic items and about 20–30 minutes of your time.
- Cost Savings: Replacing the filter yourself can save you $50–$100 compared to dealership service fees.
- Regular Maintenance Matters: Replace the cabin filter every 15,000–20,000 miles or once a year to maintain optimal HVAC performance.
- Correct Filter Type: Use an OEM or high-quality aftermarket cabin air filter compatible with the 2013 BMW X3 (often labeled as “activated carbon” for better filtration).
- Access Location: The cabin filter is located behind the glove box—no need to remove the dashboard or interior panels.
- Safety First: Always disconnect the negative battery terminal if working near electrical components, though it’s not required for this job.
Introduction: Why Changing Your BMW X3’s Cabin Filter Matters
If you drive a 2013 BMW X3, you already know it’s a luxury SUV built for comfort, performance, and reliability. But even the most well-engineered vehicles need regular maintenance—and one often-overlooked component is the cabin air filter. This small but mighty filter plays a big role in keeping the air inside your car clean, fresh, and free from allergens, dust, and smog.
Over time, the cabin filter gets clogged with debris, reducing airflow through your HVAC system and allowing unpleasant odors and pollutants to enter the cabin. A dirty filter can also strain your blower motor and reduce heating and cooling efficiency. Fortunately, replacing it is one of the easiest and most cost-effective maintenance tasks you can do yourself.
In this comprehensive guide, we’ll walk you through how to change the cabin filter in your 2013 BMW X3 SUV—step by step, with clear instructions, helpful tips, and troubleshooting advice. Whether you’re a seasoned DIYer or a first-time car owner, you’ll find this process straightforward and rewarding. By the end, you’ll not only have cleaner air inside your vehicle but also the satisfaction of saving money and extending the life of your BMW’s climate control system.
What You’ll Need Before Starting
Visual guide about How to Change Bmw Suv X3 2013 Cabin Filter
Image source: i.ytimg.com
Before diving into the replacement process, it’s important to gather all the necessary tools and materials. This ensures a smooth, hassle-free experience and prevents mid-job interruptions.
Tools and Materials Checklist
- New cabin air filter: Make sure it’s compatible with the 2013 BMW X3. Look for filters labeled “for BMW X3 (F25) 2011–2017” or check your owner’s manual. Activated carbon filters offer superior odor and pollutant removal.
- Phillips-head screwdriver: Needed to remove screws holding the glove box in place.
- Flathead screwdriver (optional): Useful for gently prying open clips or tabs.
- Flashlight or work light: Helps illuminate the area behind the glove box.
- Gloves (optional): Keeps your hands clean, especially if the old filter is dirty.
- Shop vacuum or rag: For cleaning out any debris around the filter housing.
Where to Buy a Replacement Filter
You can purchase a new cabin filter from several sources:
– BMW dealership: Guaranteed OEM (Original Equipment Manufacturer) quality, but often more expensive.
– Auto parts stores: Brands like Mann, Bosch, Hengst, and Fram offer high-quality aftermarket options at lower prices.
– Online retailers: Amazon, RockAuto, and FCP Euro provide a wide selection with customer reviews and fast shipping.
When choosing a filter, prioritize those with activated carbon layers. These not only trap particles but also absorb odors from outside air—perfect for city driving or areas with heavy traffic.
Step-by-Step Guide: Replacing the Cabin Filter in Your 2013 BMW X3
Visual guide about How to Change Bmw Suv X3 2013 Cabin Filter
Image source: i.ytimg.com
Now that you’re prepared, let’s get started. The entire process takes about 20–30 minutes and requires no special mechanical skills. Follow these steps carefully to ensure a successful replacement.
Step 1: Prepare Your Vehicle
Start by parking your BMW X3 on a level surface and turning off the engine. Engage the parking brake for safety. While this job doesn’t require disconnecting the battery, it’s always a good habit to ensure the vehicle is fully powered down.
Next, open the front passenger door and locate the glove box. You’ll be working primarily on the passenger side, so make sure you have enough space to comfortably reach inside.
Step 2: Empty and Remove the Glove Box
The cabin filter is accessed through the glove box compartment. To reach it, you’ll need to remove the glove box entirely—but don’t worry, it’s designed for easy removal.
First, open the glove box and empty its contents. Remove any loose items, manuals, or storage trays. Then, look for two small stoppers or dampers on the sides of the glove box. These prevent the glove box from falling too quickly when opened.
Gently squeeze the sides of the glove box inward to release these dampers. You may need to wiggle it slightly. Once the dampers are disengaged, the glove box will drop down further than usual.
Now, locate the two Phillips-head screws on the left and right sides of the glove box frame—near the hinges. Use your screwdriver to remove both screws. Keep them in a safe place so you don’t lose them.
With the screws removed, carefully pull the glove box straight out. It should come free with minimal resistance. Set it aside on a clean surface.
Step 3: Locate the Cabin Filter Housing
With the glove box removed, you’ll now see a rectangular plastic cover on the side of the HVAC duct. This is the cabin filter housing. It’s usually black or gray and has a series of clips or tabs holding it in place.
Use your flashlight to get a better view. The housing is typically located near the center of the dashboard, just above the footwell on the passenger side.
Step 4: Open the Filter Housing Cover
The cover is secured with plastic clips or tabs. These are designed to snap in and out, so avoid using excessive force.
Start by gently pressing the tabs inward with your fingers or a flathead screwdriver. Work your way around the edges until the cover loosens. Once all clips are released, carefully pull the cover away from the housing.
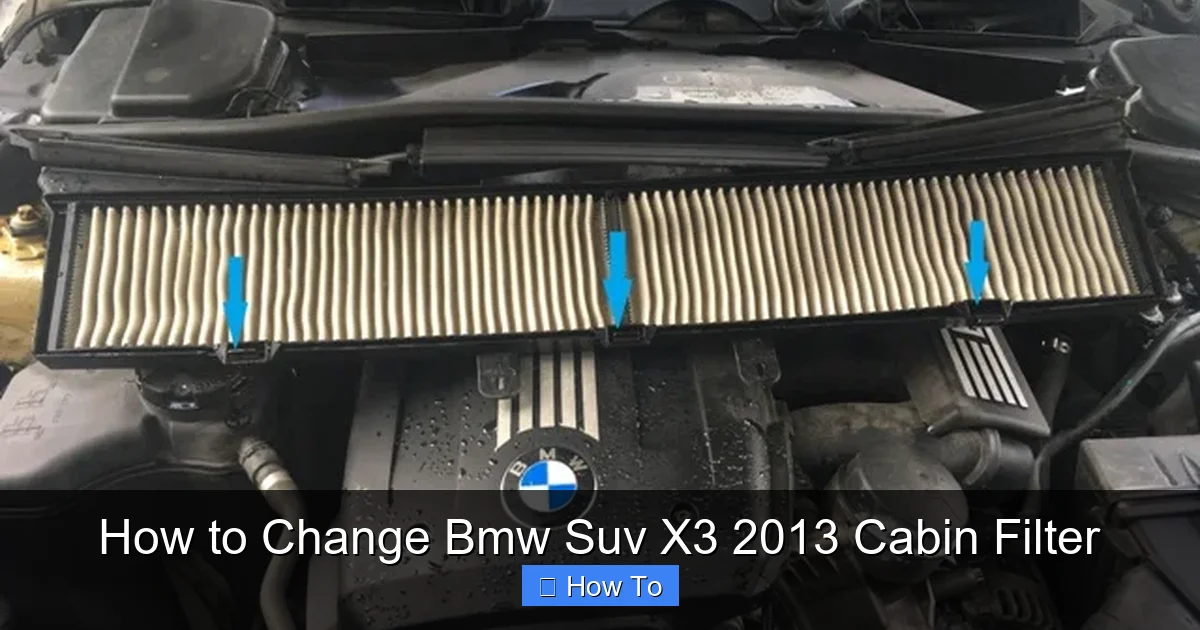
Set the cover aside. You should now see the old cabin filter inside—a rectangular pleated filter made of paper or synthetic material.
Step 5: Remove the Old Cabin Filter
Before removing the old filter, take a moment to note its orientation. Most filters have an arrow indicating airflow direction (usually pointing downward or toward the cabin). This ensures you install the new one correctly.
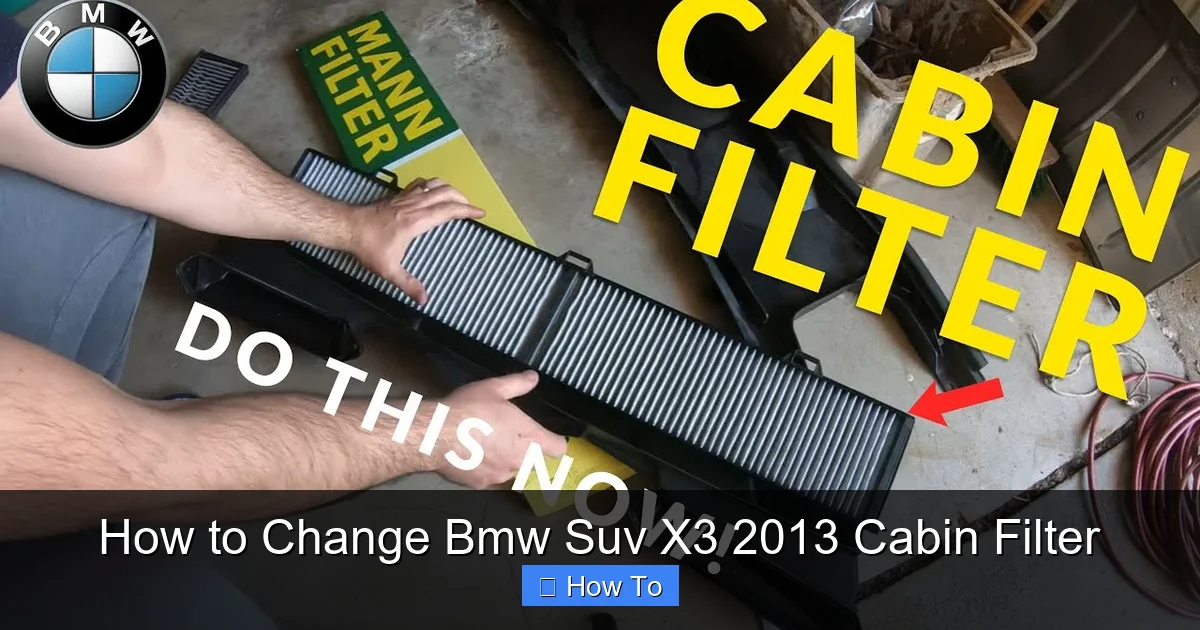
Grasp the old filter by its edges and pull it straight out. It may be slightly stuck due to dust buildup, so wiggle it gently if needed.
Inspect the old filter. If it’s dark, clogged, or smells musty, it’s definitely time for a replacement. A clean filter should be light in color and free of heavy debris.
Use a shop vacuum or a dry rag to clean out any loose dirt or leaves around the filter housing. This prevents contaminants from entering the HVAC system when you install the new filter.
Step 6: Install the New Cabin Filter
Take your new cabin filter and check the airflow arrow on its frame. Make sure it matches the direction of the old filter you just removed.
Slide the new filter into the housing, ensuring it sits flat and secure. The pleats should face the same direction as the old one. Push it in until it’s fully seated—there should be no gaps or misalignment.
Double-check that the filter is properly positioned. An incorrectly installed filter can restrict airflow or allow unfiltered air to bypass the system.
Step 7: Reattach the Filter Housing Cover
Once the new filter is in place, it’s time to close the housing. Align the cover with the housing and press it firmly until all clips snap into place. You should hear a series of clicks as each tab secures.
Give the cover a gentle tug to confirm it’s locked in. If it moves or feels loose, reopen it and check for misaligned clips.
Step 8: Reinstall the Glove Box
Now that the filter is replaced, reattach the glove box. Position it back into place and align the screw holes on both sides.
Insert the two Phillips-head screws and tighten them securely—but don’t overtighten, as this can strip the plastic threads.
Once the screws are in, re-engage the glove box dampers by pushing the sides inward and snapping them back into their original positions. Test the glove box by opening and closing it to ensure it moves smoothly.
Step 9: Test the HVAC System
Start your BMW X3 and turn on the climate control system. Set the fan to medium speed and switch between heat and A/C to verify proper airflow.
Listen for any unusual noises, such as rattling or reduced airflow, which could indicate a loose filter or housing. If everything sounds normal, you’ve successfully completed the replacement.
Tips for a Smooth Replacement Process
Even though this job is simple, a few extra tips can make it even easier:
- Work in daylight or use a bright light: The area behind the glove box can be dark, so good lighting helps you see clips and alignment.
- Take photos before disassembling: Snap a quick picture of the glove box and filter orientation before removing anything. This serves as a reference if you get confused.
- Replace annually or every 15,000–20,000 miles: Don’t wait until the filter is completely clogged. Regular replacement maintains performance and air quality.
- Check for recalls or service bulletins: Occasionally, BMW issues updates related to HVAC systems. Check your VIN on the BMW website for any relevant notices.
- Consider upgrading to a premium filter: If you live in a polluted area or suffer from allergies, an activated carbon filter offers better protection than standard paper filters.
Troubleshooting Common Issues
While replacing the cabin filter is straightforward, you might encounter a few hiccups. Here’s how to handle them:
Problem: Glove Box Won’t Come Off
If the glove box seems stuck, double-check that both dampers are fully disengaged. Sometimes they don’t release completely on the first try. Gently wiggle the glove box while pulling downward.
Problem: Filter Housing Cover Won’t Snap Shut
This usually means the new filter isn’t seated properly. Open the cover, remove the filter, and reinsert it, ensuring it’s flat and aligned. Also, check for debris blocking the housing.
Problem: Reduced Airflow After Replacement
If airflow seems weaker than before, the filter may be installed backward. Turn off the vehicle, remove the filter, and check the airflow arrow. Reinstall it correctly.
Problem: Strange Odors Persist
A new filter won’t eliminate odors caused by mold or bacteria in the evaporator core. If smells continue, consider having the HVAC system professionally cleaned or using an evaporator cleaner spray.
Conclusion: Breathe Easy with a Fresh Cabin Filter
Changing the cabin filter in your 2013 BMW X3 is a quick, affordable, and highly beneficial maintenance task. Not only does it improve the air quality inside your vehicle, but it also helps your HVAC system run more efficiently and extends the life of internal components.
By following this guide, you’ve taken a proactive step in caring for your BMW—saving money, avoiding dealership visits, and enjoying a healthier driving environment. Remember to replace the filter regularly, use high-quality parts, and keep your workspace clean and organized.
With just a screwdriver, a new filter, and 30 minutes of your time, you’ve made a meaningful difference in your car’s performance and comfort. So the next time you turn on the A/C or heater, you can breathe easy knowing your cabin air is as clean as it should be.