
This guide teaches you how to lift a SUV without a jack using safe, accessible alternatives like ramps, blocks, and leverage tools. Perfect for emergencies or off-road situations, these methods help you access undercarriage components when a traditional jack isn’t available.
Key Takeaways
- Safety is paramount: Always use wheel chocks, park on level ground, and wear protective gear when lifting a SUV without a jack.
- Use ramps for front-end lifting: Drive-on ramps are a safe, jack-free way to elevate the front of your SUV for tire changes or undercarriage access.
- Leverage with a pry bar and fulcrum: A sturdy pry bar and solid pivot point can lift one corner of your SUV when used correctly.
- Stacked wooden blocks work in a pinch: Dense, interlocked wood blocks can support weight temporarily—ideal for low-clearance lifts.
- Hydraulic bottle jacks are jack alternatives: While not traditional jacks, portable bottle jacks can lift SUVs safely without needing a factory jack.
- Never rely on unstable surfaces: Avoid using rocks, bricks, or cinder blocks alone—they can shift and cause serious injury.
- Practice before you need it: Test your lifting method in a safe environment so you’re prepared during real emergencies.
How to Lift a SUV Without a Jack: A Complete Guide
Have you ever found yourself stuck on the side of the road with a flat tire—only to realize your SUV’s jack is missing, broken, or buried under gear in the trunk? Or maybe you’re off-roading and need to clear mud from the undercarriage, but there’s no jack in sight. Don’t panic. You can still lift your SUV safely and effectively—even without a traditional jack.
In this comprehensive guide, you’ll learn how to lift a SUV without a jack using practical, real-world methods. Whether you’re dealing with an emergency, performing maintenance, or just want to be prepared, these techniques will help you get your vehicle off the ground using everyday tools and smart physics. We’ll cover everything from using ramps and wooden blocks to leveraging pry bars and portable hydraulic tools—all while keeping safety at the forefront.
By the end of this guide, you’ll know exactly what to do when a jack isn’t an option. You’ll also learn how to avoid common mistakes, choose the right tools, and ensure your SUV is stable and secure during the lift. Let’s get started.
Why You Might Need to Lift a SUV Without a Jack
SUVs are built for durability and off-road capability, but that doesn’t mean they’re immune to problems. Tires go flat, suspension components wear out, and undercarriage damage can occur—especially on rough terrain. When these issues arise, lifting the vehicle is often the first step.
But what if your jack is missing? Maybe it was lost during a move, damaged in a previous use, or never included with your vehicle. Some SUVs, especially older models or base trims, don’t come with a factory jack. Others have jacks that are too small or weak for the vehicle’s weight.
In other cases, you might be in a remote area where a jack isn’t practical—like on a muddy trail or uneven ground. Traditional jacks require a stable, level surface to work safely. If you’re on soft soil, gravel, or a slope, using a jack can be dangerous.
That’s where alternative lifting methods come in. Knowing how to lift a SUV without a jack gives you flexibility and peace of mind. It’s a valuable skill for any SUV owner, whether you’re a weekend adventurer or a daily commuter.
Safety First: Essential Precautions
Before we dive into the methods, let’s talk safety. Lifting a vehicle—especially a heavy SUV—without proper equipment can be extremely dangerous. A mistake can lead to serious injury or vehicle damage. Follow these essential safety rules every time:
- Park on level, solid ground: Never attempt to lift your SUV on a slope, soft soil, or uneven pavement. A level surface prevents rolling and shifting.
- Engage the parking brake: This locks the rear wheels and reduces the risk of movement.
- Use wheel chocks: Place sturdy chocks behind the wheels that will remain on the ground. This adds an extra layer of security.
- Wear protective gear: Gloves, safety glasses, and closed-toe shoes protect you from injury.
- Never get under an unsupported vehicle: Even if you’re using blocks or ramps, never crawl underneath unless the SUV is securely supported by jack stands or another reliable method.
- Work with a partner when possible: Having someone nearby can help in case of an emergency.
Remember: lifting a SUV without a jack is a temporary solution. Always use proper support (like jack stands) once the vehicle is lifted, and never rely on unstable materials like loose rocks or cinder blocks.
Method 1: Using Drive-On Ramps
One of the safest and easiest ways to lift a SUV without a jack is by using drive-on ramps. These are long, inclined platforms that you drive your front wheels onto, raising the front end of the vehicle.
What You’ll Need
- Pair of heavy-duty drive-on ramps (rated for SUV weight)
- Wheel chocks
- Flat, level surface
Step-by-Step Instructions
Step 1: Choose the Right Ramps
Not all ramps are created equal. Make sure your ramps are rated for your SUV’s weight. Most SUVs weigh between 4,000 and 6,000 pounds, so look for ramps with a capacity of at least 8,000 pounds (to allow a safety margin). Check the manufacturer’s specs before buying.
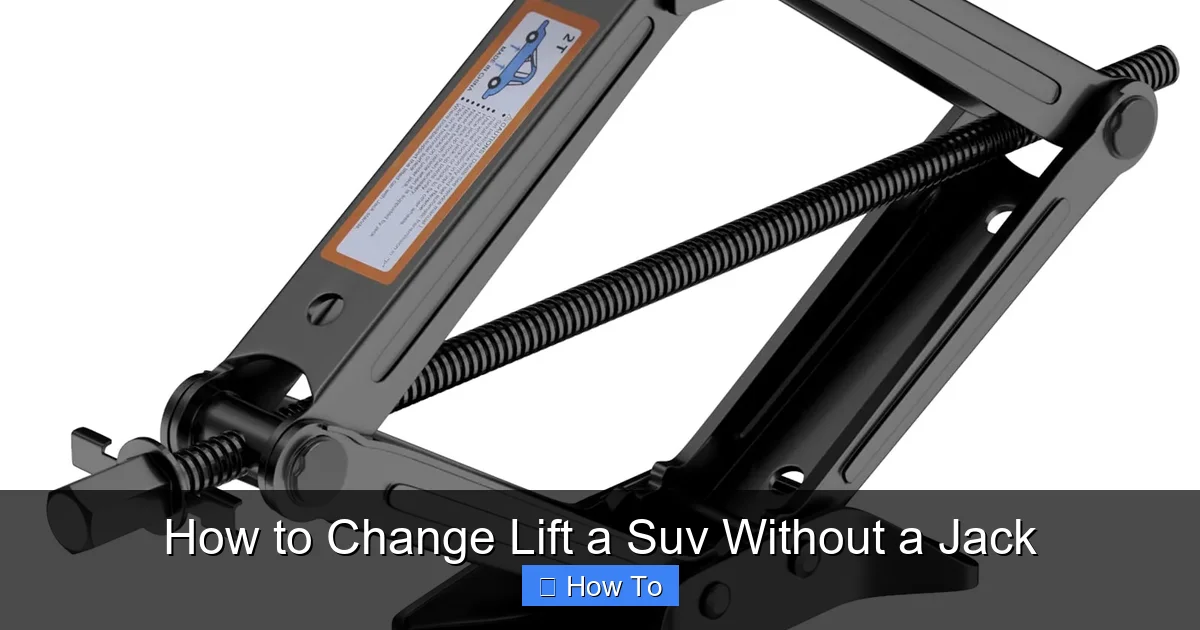
Visual guide about How to Change Lift a Suv Without a Jack
Image source: m.media-amazon.com
Visual guide about How to Change Lift a Suv Without a Jack
Image source: safety-lifting.com
Step 2: Position the Ramps
Place the ramps directly in front of the front wheels. Make sure they’re aligned with the tires and centered. Use a piece of tape or chalk to mark the spot if needed. The ramps should be on a flat, dry surface—avoid gravel or wet pavement.
Step 3: Secure the Rear Wheels
Place wheel chocks behind the rear tires to prevent the SUV from rolling backward. This is critical—ramps only lift the front, so the vehicle can still move.
Step 4: Drive Onto the Ramps
Slowly drive forward, keeping the steering wheel straight. Stop when the front wheels are fully on the ramps and the vehicle feels stable. Do not accelerate or brake abruptly.
Step 5: Turn Off the Engine and Engage the Parking Brake
Once the SUV is on the ramps, shift to park (or first gear for manual transmissions), turn off the engine, and set the parking brake.
Step 6: Add Extra Support (Optional)
For added safety, place jack stands or sturdy blocks under the frame near the front wheels. This ensures the SUV won’t fall if the ramps shift.
Tips for Success
- Practice in an empty parking lot first to get comfortable with the process.
- Use ramps with non-slip surfaces or rubber grips to prevent tire slippage.
- Never exceed the ramp’s weight limit—overloading can cause collapse.
- If your SUV has low ground clearance, choose ramps with a gentle incline.
When to Use This Method
Drive-on ramps are ideal for:
- Changing front tires
- Performing oil changes
- Inspecting the undercarriage
- Replacing brake components
They’re not recommended for lifting the rear of the vehicle unless you have rear ramps (less common). Also, avoid using ramps on slopes or in rainy conditions.
Method 2: Using a Pry Bar and Fulcrum
If you don’t have ramps, a pry bar and a solid pivot point can help you lift one corner of your SUV. This method uses leverage—the same principle behind a seesaw—to raise the vehicle with minimal force.
What You’ll Need
- Sturdy pry bar or crowbar (at least 18 inches long)
- Solid fulcrum (e.g., a large rock, concrete block, or wooden beam)
- Wooden blocks or jack stands (for support)
- Wheel chocks
Step-by-Step Instructions
Step 1: Choose a Lifting Point
Locate a strong part of the SUV’s frame or suspension near the wheel you want to lift. Avoid plastic panels, fuel lines, or brake lines. The ideal spot is a reinforced area like the control arm or subframe.
Step 2: Position the Fulcrum
Place the fulcrum (pivot point) on the ground, about 6–12 inches from the lifting point. Make sure it’s stable and won’t shift under pressure. A flat, heavy rock or a stack of wooden blocks works well.
Step 3: Insert the Pry Bar
Slide the pry bar under the SUV, resting one end on the fulcrum and the other under the lifting point. The bar should form a lever with the fulcrum as the pivot.
Step 4: Apply Downward Pressure
Stand on the long end of the pry bar or push down firmly with your body weight. The SUV should begin to rise slowly. Go slowly—rushing can cause the bar to slip or the fulcrum to collapse.
Step 5: Insert Support Blocks
As the SUV lifts, slide wooden blocks or jack stands under the frame. Once the desired height is reached, release the pry bar and let the SUV rest on the supports.
Step 6: Secure the Vehicle
Place wheel chocks on the opposite side and engage the parking brake. Double-check that the SUV is stable before working underneath.
Tips for Success
- Use a pry bar with a flat, wide end to avoid damaging the undercarriage.
- Never use a fulcrum made of weak materials like loose bricks or soft wood.
- If the SUV starts to shift, stop immediately and reposition the fulcrum.
- This method works best for lifting one corner—not the entire vehicle.
When to Use This Method
This technique is useful for:
- Emergency tire changes
- Clearing debris from wheel wells
- Lifting one side for suspension inspection
It’s not recommended for long-term work or heavy repairs. Always replace temporary supports with proper jack stands when possible.
Method 3: Using Stacked Wooden Blocks
Wooden blocks are a simple, low-tech way to lift a SUV without a jack. When stacked and interlocked, they can support significant weight—especially if you use dense, hardwood blocks.
What You’ll Need
- Multiple wooden blocks (2x4s or 4x4s, at least 6 inches thick)
- Flat, level surface
- Wheel chocks
- Measuring tape (optional)
Step-by-Step Instructions
Step 1: Choose the Right Wood
Use kiln-dried hardwood like oak or maple. Avoid softwoods like pine, which can compress under weight. The blocks should be at least 6 inches thick and free of cracks or splits.
Step 2: Build a Stable Stack
Stack the blocks in a pyramid or interlocking pattern. Each layer should be offset from the one below to distribute weight evenly. Aim for a height of 6–12 inches, depending on your needs.
Step 3: Position the Stack
Place the stack directly under the SUV’s frame or a reinforced lifting point. Make sure it’s centered and won’t shift when weight is applied.
Step 4: Drive or Rock Onto the Blocks
If lifting the front, slowly drive forward until the tire rests on the blocks. For side lifting, you may need to rock the vehicle gently or use a pry bar to nudge it onto the stack.
Step 5: Add Additional Support
Once the SUV is on the blocks, place jack stands or extra blocks on the opposite side for balance. Never rely on wood alone for long-term support.
Tips for Success
- Use at least 3–4 layers of blocks for stability.
- Sand the edges to prevent splinters.
- Store blocks in a dry place to prevent warping.
- Never use painted or treated wood—chemicals can be hazardous.
When to Use This Method
Wooden blocks are great for:
- Low-clearance lifts (e.g., changing a tire)
- Off-road recovery
- Temporary support during repairs
They’re not suitable for high lifts or heavy loads. Always monitor the blocks for signs of compression or cracking.
Method 4: Using a Hydraulic Bottle Jack (Jack Alternative)
While this method uses a jack, it’s worth mentioning because bottle jacks are portable, powerful, and don’t require the factory jack. They’re a great alternative when your SUV’s original jack is missing or inadequate.
What You’ll Need
- Hydraulic bottle jack (rated for SUV weight)
- Jack stands
- Wheel chocks
- Flat, level surface
Step-by-Step Instructions
Step 1: Choose the Right Jack
Bottle jacks come in various capacities. For SUVs, choose one rated for at least 3 tons (6,000 lbs). Check the label to ensure it meets your vehicle’s weight.
Step 2: Position the Jack
Place the jack under a strong lifting point—usually the frame rail or designated jack point near the wheel. Avoid suspension components or body panels.
Step 3: Pump the Jack
Use the handle to pump the jack slowly. The SUV will rise gradually. Stop when you have enough clearance.
Step 4: Insert Jack Stands
Once lifted, place jack stands under the frame for support. Lower the jack slightly so the weight rests on the stands—not the jack.
Step 5: Secure the Vehicle
Use wheel chocks and the parking brake. Never work under a vehicle supported only by a jack.
Tips for Success
- Store the bottle jack in your trunk for emergencies.
- Inspect the jack for leaks or damage before use.
- Use a rubber pad or wood block under the jack to prevent slipping.
When to Use This Method
Bottle jacks are ideal for:
- Full vehicle lifts
- Heavy repairs
- Off-road recovery
They’re more stable than pry bars or blocks and can lift higher. Just remember: always use jack stands for safety.
Troubleshooting Common Problems
Even with the best preparation, things can go wrong. Here’s how to handle common issues:
The SUV Won’t Lift
If your method isn’t working, check the following:
- Is the surface level? Adjust if needed.
- Are the tools rated for your SUV’s weight? Upgrade if necessary.
- Is the lifting point strong enough? Move to a reinforced area.
Sometimes, combining methods (e.g., pry bar + blocks) can help.
The Vehicle Shifts or Rocks
This is dangerous. Stop immediately and:
- Lower the SUV slowly.
- Reassess your setup.
- Add more support or chocks.
- Ensure all components are secure.
Never ignore instability—it can lead to collapse.
Tools Slip or Break
Use only high-quality, undamaged tools. Replace worn pry bars, cracked blocks, or leaking jacks. Always inspect equipment before use.
Not Enough Clearance
If you need more height:
- Add more blocks or ramps.
- Use a taller bottle jack.
- Combine methods (e.g., ramp + jack stand).
But never stack unstable materials like cinder blocks.
Final Tips for Success
Now that you know how to lift a SUV without a jack, here are a few final tips to keep in mind:
- Practice at home: Try each method in a safe, controlled environment before you need it in an emergency.
- Keep a toolkit in your SUV: Include a pry bar, wooden blocks, wheel chocks, and a bottle jack.
- Know your vehicle: Learn the strong lifting points and avoid weak areas.
- Stay calm under pressure: Panic leads to mistakes. Take your time and follow safety steps.
- When in doubt, call for help: If you’re unsure or unsafe, contact a tow truck or roadside assistance.
Conclusion
Lifting a SUV without a jack might sound impossible, but with the right knowledge and tools, it’s entirely doable. Whether you’re using ramps, pry bars, wooden blocks, or a bottle jack, these methods give you the flexibility to handle emergencies and perform maintenance—even when traditional equipment isn’t available.
Remember, safety always comes first. Never compromise on stability, and always use proper support once the vehicle is lifted. With practice and preparation, you’ll be ready for anything the road throws at you.
So the next time you’re stuck with a flat tire or need to inspect your undercarriage, don’t panic. You now know how to lift a SUV without a jack—safely, effectively, and with confidence.