
Replacing the lowbeam driver’s side headlight on a Mazda CX-7 SUV is a straightforward DIY task that saves time and money. With basic tools and careful attention to detail, you can complete the job in under 30 minutes without professional help.
Key Takeaways
- Turn off the engine and allow bulbs to cool before starting to avoid burns or electrical hazards.
- Use only Mazda-recommended or compatible H11 halogen bulbs to ensure proper fit and performance.
- Access the bulb housing through the engine bay—no need to remove the bumper or wheel well liner.
- Handle the new bulb with clean gloves or a cloth to prevent oil from your skin reducing its lifespan.
- Test the headlight immediately after installation to confirm proper function before reassembling components.
- Keep the old bulb as a backup in case of future failure during travel.
- Consult your owner’s manual for torque specs and warnings specific to your model year (2007–2012).
Introduction: Why Changing Your Mazda CX-7 Headlight Matters
If you’ve noticed your driver’s side lowbeam headlight flickering, dimming, or going completely dark, it’s not just an inconvenience—it’s a safety issue. Driving at night or in poor weather without full illumination puts you and others at risk. The good news? Replacing the lowbeam bulb on a Mazda CX-7 SUV is one of the easiest DIY maintenance tasks you can tackle, even if you’re not a car expert.
The Mazda CX-7, produced from 2007 to 2012, uses an H11 halogen bulb for its lowbeam function on the driver’s side. Unlike some vehicles that require removing bumpers or fenders, the CX-7 offers relatively easy access through the engine bay. With the right tools, a few safety precautions, and this detailed guide, you’ll have your headlight shining bright again in under half an hour—and save yourself a trip (and bill) to the mechanic.
In this guide, we’ll walk you through every step: from gathering supplies to testing your new bulb. We’ll also share pro tips, troubleshoot common problems, and explain why using the correct bulb matters. Whether you’re a first-time DIYer or a seasoned tinkerer, this guide ensures you’ll get the job done safely and correctly.
What You’ll Need Before Starting
Before diving in, make sure you have everything ready. Having the right tools and parts on hand prevents frustration and mid-task trips to the auto shop.
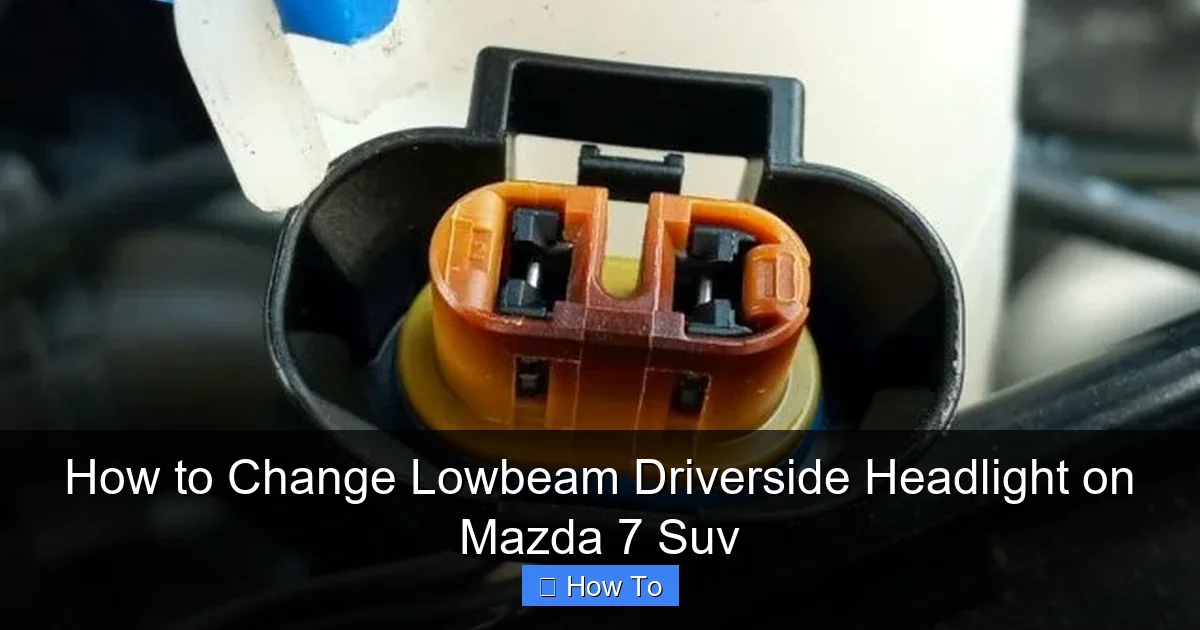
Visual guide about How to Change Lowbeam Driverside Headlight on Mazda 7 Suv
Image source: youcanic.com
Essential Tools and Supplies
- New H11 halogen bulb (confirm compatibility with your CX-7 model year—most use 12V, 55W)
- Clean lint-free cloth or disposable gloves (to handle the bulb without touching the glass)
- Socket wrench set (typically 10mm for battery terminal, though not always needed)
- Screwdriver (Phillips or flathead)—may be required for minor cover adjustments
- Safety glasses (protect your eyes from debris or accidental bulb breakage)
- Work light or flashlight (for better visibility in the engine bay)
- Owner’s manual (for reference on fuse locations or specific warnings)
Optional but Helpful Items
- Trim removal tool (to gently pry plastic clips without damage)
- Dielectric grease (to protect electrical connectors from moisture)
- Small container or magnetic tray (to hold screws and clips)
Pro tip: Buy your replacement bulb from a reputable auto parts store or directly from Mazda. Generic bulbs may fit, but OEM-quality bulbs last longer and provide consistent brightness. Avoid touching the glass part of the bulb—even a tiny amount of skin oil can create hot spots that shorten its life.
Safety First: Preparing Your Vehicle
Safety should always come first when working under the hood. The CX-7’s electrical system is low-voltage, but precautions prevent accidents and protect your vehicle.
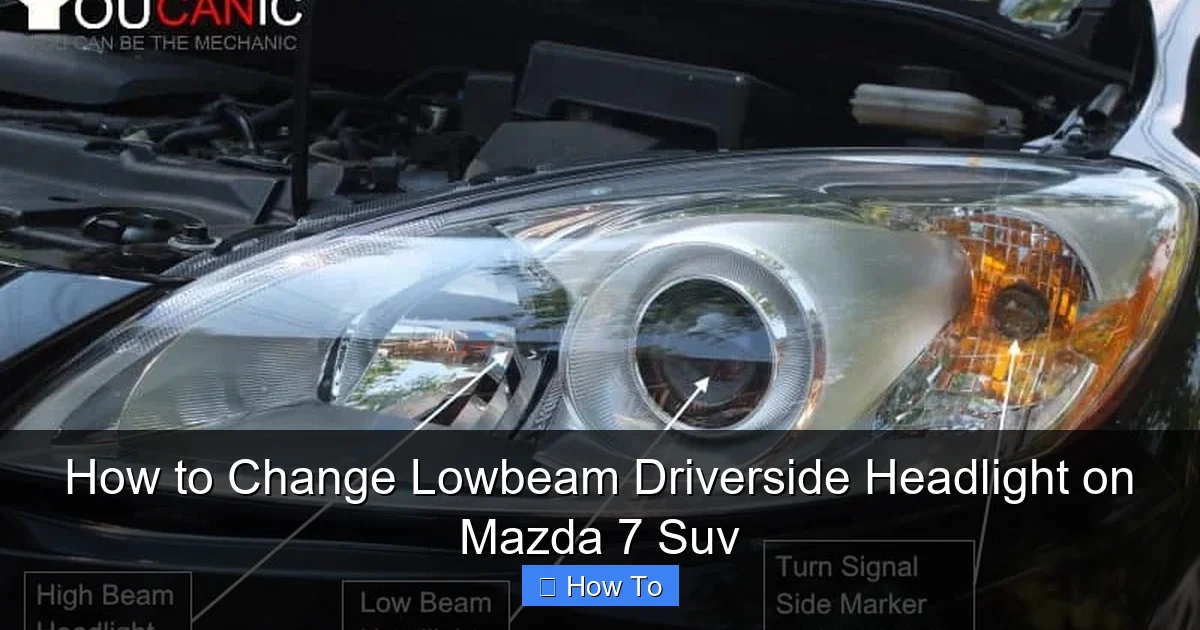
Visual guide about How to Change Lowbeam Driverside Headlight on Mazda 7 Suv
Image source: i.ytimg.com
Step 1: Park on a Level Surface and Engage the Parking Brake
Choose a flat, well-lit area like your driveway or garage. Turn off the engine completely and engage the parking brake. This prevents accidental movement and ensures the vehicle is stable while you work.
Step 2: Allow the Headlight to Cool
If you’ve been driving recently, wait at least 15–20 minutes before touching the headlight assembly. Halogen bulbs get extremely hot and can cause burns. Also, hot components are more fragile and prone to cracking if handled roughly.
Step 3: Disconnect the Negative Battery Terminal (Recommended)
While not always necessary, disconnecting the negative (-) terminal of the battery eliminates the risk of short circuits or accidental activation of the headlight. Use a 10mm socket wrench to loosen the clamp, then carefully lift the cable off the terminal. Tuck it aside so it doesn’t accidentally reconnect.
Note: Some owners skip this step since the headlight circuit is fused and low-risk, but if you’re unsure or working in tight spaces, it’s better to be safe.
Step 4: Open the Hood and Secure It
Pull the hood release inside the cabin, then go to the front and lift the hood. Use the prop rod to hold it securely. Never rely solely on the hydraulic strut—always double-check it’s locked in place.
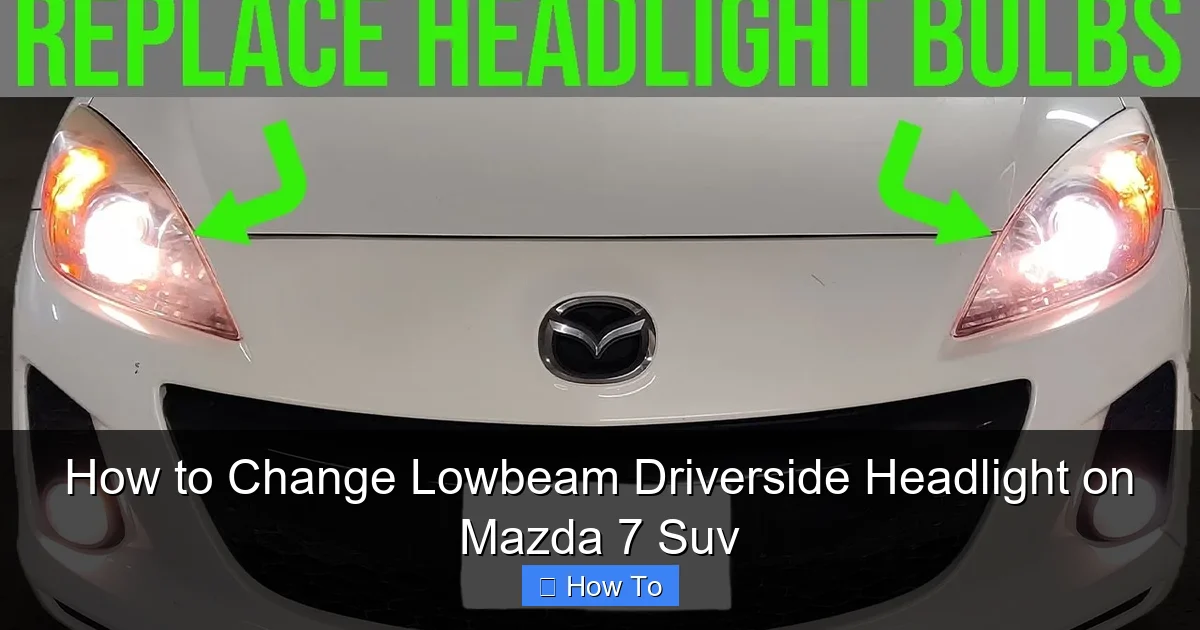
Locating the Driver’s Side Headlight Assembly
The Mazda CX-7 positions the headlight assemblies at the front corners of the vehicle. The driver’s side is on the left when standing behind the car (or the right if you’re in a right-hand-drive market—adjust accordingly).
Understanding the Headlight Housing
The CX-7 uses a sealed-beam-style housing with separate compartments for high beam, low beam, and turn signal/parking lights. The lowbeam bulb is located toward the outer edge of the housing, closest to the fender.
You’ll notice a rubber dust cover behind the headlight—this protects the bulb and wiring from moisture and debris. It’s held in place by a simple twist-lock mechanism or clips, depending on the model year.
Accessing the Bulb Compartment
No bumper removal is required! Simply reach into the engine bay from the front. On most CX-7 models, you can access the bulb by:
- Looking directly behind the headlight lens
- Finding the round or oval-shaped rubber boot covering the back of the bulb
- Gently pulling it straight back to expose the bulb holder
If space feels tight, you may need to move aside the air intake duct or coolant reservoir slightly—but avoid disconnecting any hoses unless absolutely necessary.
Removing the Old Lowbeam Bulb
Now that you’ve located the bulb, it’s time to remove the old one. Take your time—rushing can lead to broken clips or damaged wiring.
Step 1: Remove the Rubber Dust Cover
Grasp the rubber boot firmly and pull it straight backward. It should come off with gentle resistance. If it feels stuck, wiggle it slightly while pulling—never twist or yank aggressively.
Set the cover aside in a clean spot so dirt doesn’t get inside the housing when you reinstall it later.
Step 2: Disconnect the Electrical Connector
You’ll see a plastic plug with two or three wires attached to the base of the bulb. Press the small tab on the side of the connector and pull it straight off. Do not pull on the wires themselves—this can damage the terminals.
If the connector feels stiff, use a flathead screwdriver to gently pry the tab while pulling. Some models have a locking clip that must be depressed fully before removal.
Step 3: Release the Bulb Retaining Clip
Most CX-7 models use a metal spring clip to hold the bulb in place. This clip wraps around the flange of the bulb base.
- Use your fingers or needle-nose pliers to lift the clip upward or outward
- Once released, the clip will pivot away from the bulb
- Gently wiggle the bulb back and forth while pulling it straight out
Caution: The old bulb may be fragile, especially if it burned out suddenly. Wear gloves and safety glasses in case it shatters during removal.
Step 4: Inspect the Old Bulb and Housing
Before installing the new bulb, take a moment to inspect:
- Is the filament visibly broken or blackened? (Common signs of burnout)
- Is there moisture inside the housing? (Indicates a seal failure—address this after replacement)
- Are the contacts clean and free of corrosion?
If you see white powder or greenish buildup on the connector, clean it with electrical contact cleaner and a cotton swab.
Installing the New Lowbeam Bulb
With the old bulb removed, you’re ready for the main event. Proper installation ensures longevity and optimal performance.
Step 1: Prepare the New Bulb
Take your new H11 bulb out of its packaging. Never touch the glass with bare hands. The natural oils from your skin transfer to the bulb surface and create uneven heating, which can cause premature failure—sometimes within days.
Instead, handle the bulb by its plastic base or wrap it in a clean cloth. If you accidentally touch it, wipe it gently with isopropyl alcohol and a lint-free cloth.
Step 2: Align and Insert the Bulb
The H11 bulb has a specific orientation—it will only fit one way. Look for notches or tabs on the bulb base that match slots in the headlight housing.
- Hold the bulb with the wires facing downward (this matches the original position)
- Slide it straight into the socket until it seats fully
- Do not force it—if it doesn’t go in easily, check the alignment
Step 3: Secure the Retaining Clip
Once the bulb is seated, reattach the metal spring clip:
- Pivot the clip back over the bulb flange
- Press down firmly until it snaps into place
- Give it a gentle tug to confirm it’s secure
A loose clip can cause vibration damage or intermittent connections.
Step 4: Reconnect the Electrical Connector
Push the plastic plug back onto the bulb base until you hear or feel it click. Ensure it’s fully seated—partial connections can cause flickering or complete failure.
Optional: Apply a tiny dab of dielectric grease to the connector pins to prevent corrosion, especially if you live in a humid or salty climate.
Step 5: Reattach the Rubber Dust Cover
Slide the rubber boot back over the bulb housing until it’s snug. Make sure it’s fully seated to prevent water intrusion. A loose cover can lead to fogging or electrical shorts.
Testing and Final Checks
Before closing everything up, verify that your hard work paid off.
Step 1: Reconnect the Battery (If Disconnected)
Reattach the negative battery cable and tighten the clamp securely. This restores power to the vehicle’s electrical system.
Step 2: Turn On the Headlights
Start the engine (or turn the key to the “ON” position without starting) and activate the lowbeam headlights. Check that:
- The new bulb lights up immediately
- The beam pattern is even and aligned correctly
- There’s no flickering or dimness
If the light doesn’t come on, double-check the connector, clip, and bulb orientation. Also, verify the fuse (usually in the under-hood fuse box—refer to your manual).
Step 3: Adjust Beam Alignment (If Necessary)
Over time, headlight alignment can shift. If your new bulb seems too high or low, use the adjustment screws on the headlight assembly (typically located on the top or side). Turn them clockwise or counterclockwise to raise/lower or left/right the beam.
For best results, park 25 feet from a wall and measure the beam height against your vehicle’s specifications.
Troubleshooting Common Issues
Even with careful installation, problems can arise. Here’s how to handle the most frequent issues.
Headlight Still Doesn’t Work After Replacement
Check these possibilities:
- Blown fuse: Locate the headlight fuse in the under-hood fuse box (usually labeled “HEAD LH” or similar). Replace if burnt.
- Faulty relay: Swap the headlight relay with a known-good one (like the horn relay) to test.
- Wiring damage: Inspect the harness for frayed wires or loose connections near the bulb socket.
- Defective new bulb: Rare, but possible. Try the old bulb again—if it works, the new one may be DOA.
Bulb Burns Out Quickly
If your new bulb fails within weeks, consider:
- Voltage spikes: Faulty alternator or voltage regulator can overpower bulbs.
- Poor ground connection: Clean the ground point near the headlight assembly.
- Excessive vibration: Ensure the retaining clip is tight and the housing isn’t cracked.
Moisture Inside the Headlight
This indicates a compromised seal. While replacing the bulb won’t fix it, you should:
- Dry the interior with a hair dryer (low heat)
- Check the dust cover and housing gasket for cracks
- Apply silicone sealant around the edges if minor leaks exist
- Consider professional resealing if moisture persists
Maintenance Tips to Extend Bulb Life
A little prevention goes a long way. Follow these habits to keep your headlights shining bright:
- Clean lenses regularly: Use plastic polish to remove haze and improve light output.
- Avoid frequent on/off cycling: Halogen bulbs wear faster when switched rapidly.
- Replace in pairs: Even if only one bulb fails, consider replacing both to ensure even brightness.
- Store spare bulbs properly: Keep them in their original packaging in a cool, dry place.
Conclusion: You’ve Got This!
Changing the lowbeam driver’s side headlight on your Mazda CX-7 SUV is a simple, rewarding task that enhances your safety and saves money. With just a few tools and about 20–30 minutes of your time, you’ve tackled a common automotive repair like a pro.
Remember: always prioritize safety, use the correct H11 bulb, and handle components with care. If you encounter unexpected issues, don’t hesitate to consult your owner’s manual or seek professional help. But in most cases, this guide has equipped you with everything you need for a successful DIY fix.
Now go enjoy that bright, clear beam lighting up the road ahead—you earned it!