

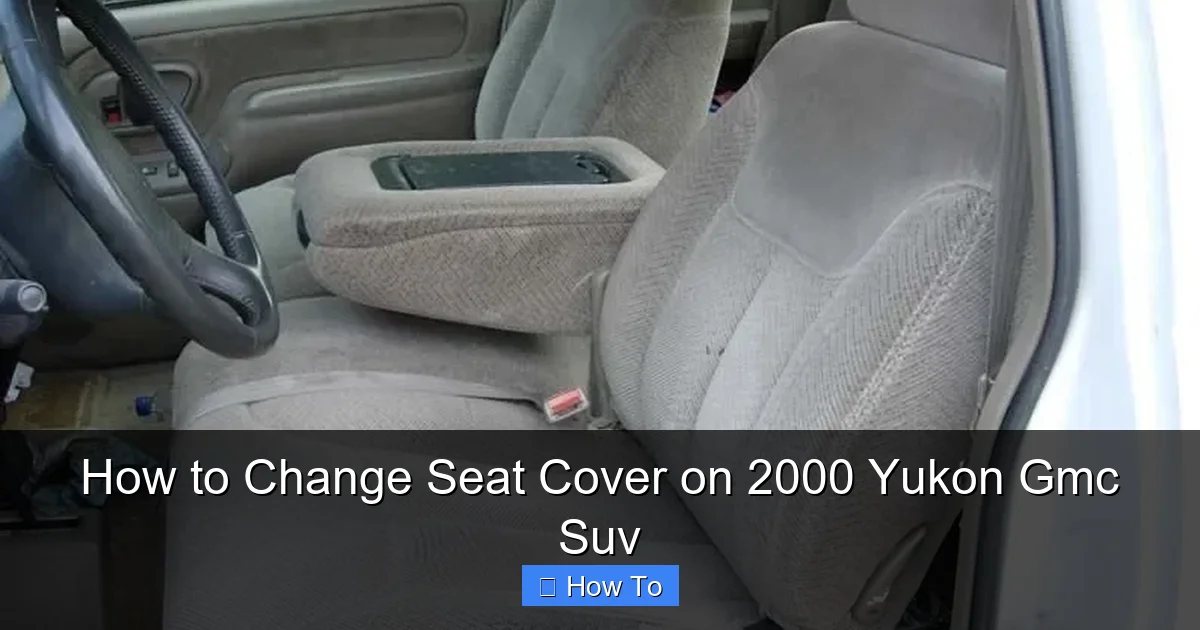
Changing the seat cover on your 2000 Yukon GMC SUV is a straightforward DIY project that can refresh your interior and improve comfort. This guide walks you through every step, from removing the seat to installing a new cover, using simple tools and clear instructions.
Key Takeaways
- Preparation is key: Gather all tools and materials before starting to avoid delays and frustration during the process.
- Remove the seat safely: Always disconnect the battery and follow proper steps to avoid damaging electrical connections or airbag systems.
- Use the right seat cover: Choose a high-quality, custom-fit cover designed specifically for the 2000 Yukon GMC to ensure a snug and professional look.
- Take photos during disassembly: Document each step with pictures to make reassembly easier and prevent mistakes.
- Work in a clean, well-lit area: A tidy workspace reduces the risk of losing small parts and helps you stay organized.
- Test everything before finishing: Reconnect the battery and test seat functions like power adjustments and heating to ensure proper installation.
- Be patient and methodical: Rushing can lead to errors—take your time to do the job right the first time.
How to Change Seat Cover on 2000 Yukon GMC SUV
If you’re driving a 2000 Yukon GMC SUV, you know it’s a rugged, reliable vehicle built for comfort and performance. But over time, the original seat covers can wear out—stained, torn, or just looking outdated. Replacing them isn’t just about aesthetics; it’s about restoring comfort and protecting your investment. The good news? You don’t need to visit a mechanic or upholstery shop. With the right tools, a little patience, and this detailed guide, you can change the seat cover on your 2000 Yukon GMC SUV yourself.
In this comprehensive how-to guide, you’ll learn everything from preparing your workspace to removing the seat, stripping off the old cover, and installing a brand-new one. Whether you’re upgrading to leather, adding waterproof fabric, or simply replacing worn cloth, this step-by-step process will help you get professional-looking results at a fraction of the cost. We’ll also cover safety tips, troubleshooting common issues, and how to choose the best seat cover for your needs.
So grab your tools, roll up your sleeves, and let’s get started on giving your Yukon’s interior a fresh new look.
What You’ll Need
Visual guide about How to Change Seat Cover on 2000 Yukon Gmc Suv
Image source: i0.wp.com
Before you begin, it’s important to gather all the necessary tools and materials. Having everything ready will save you time and prevent unnecessary trips to the hardware store mid-project.
Tools Required
- Socket wrench set (typically 10mm, 13mm, and 15mm sockets)
- Torx bit set (T30 or T40, depending on seat bolts)
- Flathead and Phillips screwdrivers
- Pliers (needle-nose and regular)
- Trim removal tool or plastic pry tool
- Wire cutters (only if removing old hog rings)
- Hog ring pliers (for installing new covers with hog rings)
- Drill (optional, for stubborn bolts)
- Work gloves (to protect your hands)
- Safety glasses
Materials Needed
- New seat cover (custom-fit for 2000 Yukon GMC)
- Hog rings and hog ring pliers (if not included with cover)
- Zip ties (alternative to hog rings, if preferred)
- Clean cloth or shop towels
- Isopropyl alcohol or interior cleaner (for cleaning seat foam)
- Vacuum cleaner (to remove debris from seat frame)
- Marker or painter’s tape (for labeling parts)
Optional but Helpful
- Camera or smartphone (to take reference photos)
- Work light (if working in a dim garage)
- Seat cover installation kit (some brands include tools)
- Spray adhesive (for securing fabric edges, if needed)
Safety First: Important Precautions
Visual guide about How to Change Seat Cover on 2000 Yukon Gmc Suv
Image source: lovelimova.com
Working on your vehicle’s interior, especially seats with electrical components, requires caution. The 2000 Yukon GMC may have power seats, heated seats, and side airbags integrated into the seat structure. Mishandling these systems can lead to injury or expensive repairs.
Disconnect the Battery
Before touching any electrical components, disconnect the negative terminal of your vehicle’s battery. This prevents accidental airbag deployment or short circuits. Use a wrench to loosen the clamp and carefully remove the cable. Wait at least 15 minutes to allow the airbag system to fully deactivate.
Handle Airbags with Care
The side airbags in the 2000 Yukon are typically located in the seat bolster (the side wing of the seat). Avoid prying or cutting near these areas. If your seat has an airbag warning label, treat the entire seat as a sensitive component. Never use sharp tools near the airbag module.
Work in a Safe Environment
Choose a flat, well-lit area to work—your garage or driveway is ideal. Keep children and pets away from the workspace. Wear gloves and safety glasses to protect against sharp edges, dust, and debris.
Step 1: Remove the Seat from the Vehicle
The first major step is removing the seat from the Yukon. This gives you full access to the seat frame and makes it easier to work on the cover.
Prepare the Seat
Start by moving the seat all the way forward and backward to access the bolts. If you have power seats, you may need to turn the ignition to the “on” position (without starting the engine) to move the seat. Once positioned, disconnect the battery as mentioned earlier.
Locate and Remove the Seat Bolts
There are typically four bolts securing each seat to the floor—two in the front and two in the rear. These are usually hidden under plastic covers or trim pieces. Use a flathead screwdriver or trim tool to gently pry off the covers.
Once exposed, use a socket wrench with the appropriate socket (often 15mm or Torx T40) to remove the bolts. Keep them in a labeled container so you don’t lose them. If a bolt is stuck, apply a penetrating oil like WD-40 and let it sit for 10–15 minutes before trying again.
Disconnect Electrical Connections
Lift the seat slightly to access the wiring underneath. You’ll see connectors for power adjustments, heating elements, and possibly the airbag system. Carefully unplug each connector by pressing the release tab and pulling them apart. Take a photo of the connections before disconnecting to help with reassembly.
Lift the Seat Out
With the bolts removed and wires disconnected, carefully lift the seat out of the vehicle. Seats are heavy—especially with the frame and mechanisms—so ask for help if needed. Place the seat on a clean, flat surface like a workbench or cardboard to avoid scratching it.
Step 2: Remove the Old Seat Cover
Now that the seat is out, it’s time to strip off the old cover. This step requires patience, as the cover is secured in multiple ways.
Inspect the Cover Attachment
Most 2000 Yukon seat covers are held on by a combination of:
- Hog rings (metal clips that clamp fabric to the frame)
- Elastic straps or hooks
- Plastic clips or J-hooks along the edges
- Staples or adhesive in some areas
Start by flipping the seat over and examining the underside. Look for hog rings—these are small metal rings that clamp the fabric to the seat frame. They’re usually found around the perimeter and under the seat cushion.
Remove Hog Rings
Use hog ring pliers to squeeze and remove each ring. If you don’t have pliers, needle-nose pliers can work, but it’s slower and harder. Work systematically around the seat, removing one ring at a time. Keep the old rings—you can reuse them if they’re in good condition.
Detach Elastic Straps and Clips
Look for elastic straps or plastic J-hooks that secure the fabric to the frame. These are often tucked under the seat or hidden in crevices. Gently pull them free. Some may be tied or stapled—cut ties carefully and remove staples with pliers.
Peel Back the Cover
Once all fasteners are removed, slowly peel the old cover away from the foam cushion. Be careful not to tear the foam underneath. If the cover is stuck, use a plastic pry tool to gently separate it. Avoid using metal tools that could damage the seat structure.
Clean the Seat Foam and Frame
With the old cover off, take the opportunity to clean the seat. Use a vacuum to remove dust, crumbs, and debris from the frame and foam. Wipe down the foam with a cloth dampened with isopropyl alcohol to remove any residue or odors. Let it dry completely before installing the new cover.
Step 3: Install the New Seat Cover
Now comes the fun part—putting on the new cover. A high-quality, custom-fit cover designed for the 2000 Yukon GMC will make this process much smoother.
Prepare the New Cover
Unpack the new seat cover and lay it out flat. Check for any defects or missing parts. Some covers come with instructions—read them carefully. If the cover includes hog rings or zip ties, have them ready.
Position the Cover
Start by draping the new cover over the seat foam. Align it carefully, making sure the seams, vents, and cutouts match the original design. For example, if your seat has a heating element, ensure the cover has a corresponding opening.
Begin attaching the cover from the center and work outward. This helps prevent wrinkles and ensures even tension.
Secure with Hog Rings or Zip Ties
Use hog ring pliers to attach the cover to the frame, starting with the main sections. Work your way around the seat, pulling the fabric taut but not overly tight. Over-tightening can cause tearing or uneven wear.
If you prefer, use heavy-duty zip ties instead of hog rings. They’re easier to install and remove, though they may not look as clean. Trim the excess ends with wire cutters.
Reattach Elastic Straps and Clips
Hook any elastic straps or plastic clips back into place. Make sure they’re snug but not stretched too far. These help keep the cover in place during use.
Tuck and Smooth the Fabric
Once the main areas are secured, tuck any loose fabric into the crevices between the seat sections. Use your hands or a blunt tool to push the fabric into tight spaces. Smooth out wrinkles and ensure the cover lies flat.
Step 4: Reinstall the Seat in the Vehicle
With the new cover installed, it’s time to put the seat back in the Yukon.
Reconnect Electrical Connections
Carefully plug in all the wiring harnesses you disconnected earlier. Match the connectors based on your reference photo. Push them in until they click securely.
Position the Seat
Lift the seat back into the vehicle and align it with the bolt holes. Lower it gently onto the floor brackets.
Reinstall the Bolts
Insert the seat bolts and tighten them with your socket wrench. Don’t overtighten—this can strip the threads or damage the floor pan. Replace any plastic covers you removed earlier.
Reconnect the Battery
Reattach the negative battery terminal and tighten the clamp. Turn the ignition to the “on” position and test all seat functions:
- Power adjustments (forward, backward, up, down, tilt)
- Heated seat elements (if equipped)
- Lumbar support (if applicable)
If everything works, you’re almost done. If not, double-check the connections and ensure nothing is pinched or disconnected.
Troubleshooting Common Issues
Even with careful work, you might run into a few hiccups. Here’s how to handle them.
Seat Cover Wrinkles or Bunching
This usually happens if the cover isn’t pulled tight enough or is misaligned. Turn the seat over and re-tension the fabric. Use hog rings or zip ties to secure loose areas. A little patience goes a long way.
Electrical Functions Not Working
If the power seat or heater doesn’t work, check the wiring connections. Make sure each plug is fully seated. Also, verify that the battery is reconnected and the fuse for the seat circuit isn’t blown.
Airbag Warning Light On
If the airbag light stays on after reassembly, the airbag connector may not be fully plugged in. Turn off the ignition, disconnect the battery, and recheck the airbag module connection. If the light persists, consult a professional—don’t ignore airbag issues.
Seat Feels Unstable
Loose bolts are the most common cause. Double-check that all four seat bolts are tightened securely. Also, ensure the seat is properly seated on the floor brackets.
Tips for a Professional Finish
Want your DIY job to look like it was done by a pro? Follow these expert tips.
Choose the Right Cover
Not all seat covers are created equal. Look for brands that specialize in GM vehicles and offer exact fits for the 2000 Yukon. Materials like neoprene, leather, or high-grade polyester offer durability and style.
Use a Seat Cover Installation Kit
Some aftermarket covers come with tools like hog ring pliers, extra rings, and instructions. These kits make the job easier and more reliable.
Take Your Time
Rushing leads to mistakes. Set aside a full afternoon for this project. If you get tired, take a break. A fresh mind works better.
Label Everything
Use painter’s tape and a marker to label connectors, bolts, and parts as you remove them. This makes reassembly much faster and less confusing.
Protect Your Work Area
Lay down cardboard or a drop cloth to protect your seat and floor from scratches and dirt. Keep tools organized in a tray or toolbox.
Conclusion
Changing the seat cover on your 2000 Yukon GMC SUV is a rewarding DIY project that can dramatically improve your vehicle’s interior. With the right tools, a bit of patience, and this step-by-step guide, you can achieve professional-quality results without spending hundreds at a shop.
From safely removing the seat and disconnecting electrical components to installing a new cover and testing all functions, each step is designed to help you succeed. Remember to prioritize safety, take photos, and choose a high-quality cover that fits your Yukon perfectly.
Not only will your seats look brand new, but you’ll also gain a sense of accomplishment and save money in the process. Whether you’re restoring an older Yukon or just upgrading for comfort, this project is well worth the effort.
So go ahead—give your 2000 Yukon the interior refresh it deserves. Your ride will thank you.