
Resetting the maintenance light on your Toyota RAV4 is a simple DIY task that takes just minutes. Whether you’ve just changed your oil or completed scheduled service, this guide walks you through the process for every RAV4 generation—no special tools required.
If you’ve just changed the oil in your Toyota RAV4 or had it serviced at a shop, you’ve probably noticed that little “Maintenance Required” light still glowing on your dashboard. It’s annoying—like a persistent reminder that won’t go away, even though you’ve done everything right. Don’t worry; you’re not alone. Thousands of RAV4 owners face this same issue every year. The good news? Resetting that maintenance light is easier than you think—and you don’t need to visit a dealership or pay a mechanic to do it.
The Toyota RAV4 has been a favorite among compact SUV drivers since its debut in the mid-1990s. Known for its reliability, fuel efficiency, and all-weather capability, the RAV4 has evolved through multiple generations, each with slight differences in design and technology. One consistent feature across all models is the maintenance reminder system—a helpful tool designed to prompt you when it’s time for routine service. But once that service is complete, the system needs to be reset manually. That’s where many owners get stuck.
In this comprehensive guide, we’ll walk you through exactly how to reset the maintenance light on your Toyota RAV4, no matter which model year you drive. Whether you’re behind the wheel of a classic 1998 RAV4 or a brand-new 2024 hybrid, we’ve got you covered. We’ll break down the steps by generation, explain why the light comes on in the first place, and share pro tips to avoid common mistakes. By the end of this article, you’ll be able to reset that light like a seasoned Toyota technician—all from the comfort of your driveway.
Key Takeaways
- Know your RAV4 generation: Reset procedures vary slightly between 1996–2000, 2001–2005, 2006–2012, 2013–2018, and 2019–present models.
- Use the trip meter button: Most RAV4s rely on the odometer/trip button to cycle through settings and initiate the reset sequence.
- Turn the ignition to “ON” but don’t start the engine: This powers the dashboard without engaging the motor—critical for accessing maintenance modes.
- Complete the reset within 10 seconds: Timing matters; if you take too long, the system may exit the reset mode.
- Verify the light is off: After resetting, confirm the maintenance light no longer appears when you start the car.
- Don’t ignore regular maintenance: Resetting the light doesn’t replace actual service—stay on top of oil changes, tire rotations, and inspections.
- Consult your owner’s manual: When in doubt, your vehicle’s manual provides model-specific guidance and safety tips.
📑 Table of Contents
- Why Does the Maintenance Light Come On?
- Tools You’ll Need (Spoiler: It’s Just Your Hands!)
- How to Reset the Maintenance Light on a 1996–2000 Toyota RAV4
- How to Reset the Maintenance Light on a 2001–2005 Toyota RAV4
- How to Reset the Maintenance Light on a 2006–2012 Toyota RAV4
- How to Reset the Maintenance Light on a 2013–2018 Toyota RAV4
- How to Reset the Maintenance Light on a 2019–Present Toyota RAV4
- When to Seek Professional Help
- Final Thoughts: Keep Your RAV4 Running Smoothly
Why Does the Maintenance Light Come On?
Before we dive into the reset process, it’s important to understand why that little light appears in the first place. The maintenance light—often labeled “MAINT REQD” or “SERVICE”—is part of Toyota’s Intelligent Maintenance System. This system tracks your driving habits, mileage, and time since the last service to determine when your RAV4 needs attention.
Unlike older vehicles that rely solely on mileage, modern Toyotas use a combination of factors. For example, if you frequently drive in stop-and-go traffic, tow heavy loads, or operate in extreme temperatures, your engine may need oil changes more often than the standard 5,000–10,000-mile interval. The system accounts for these variables and triggers the maintenance light accordingly.
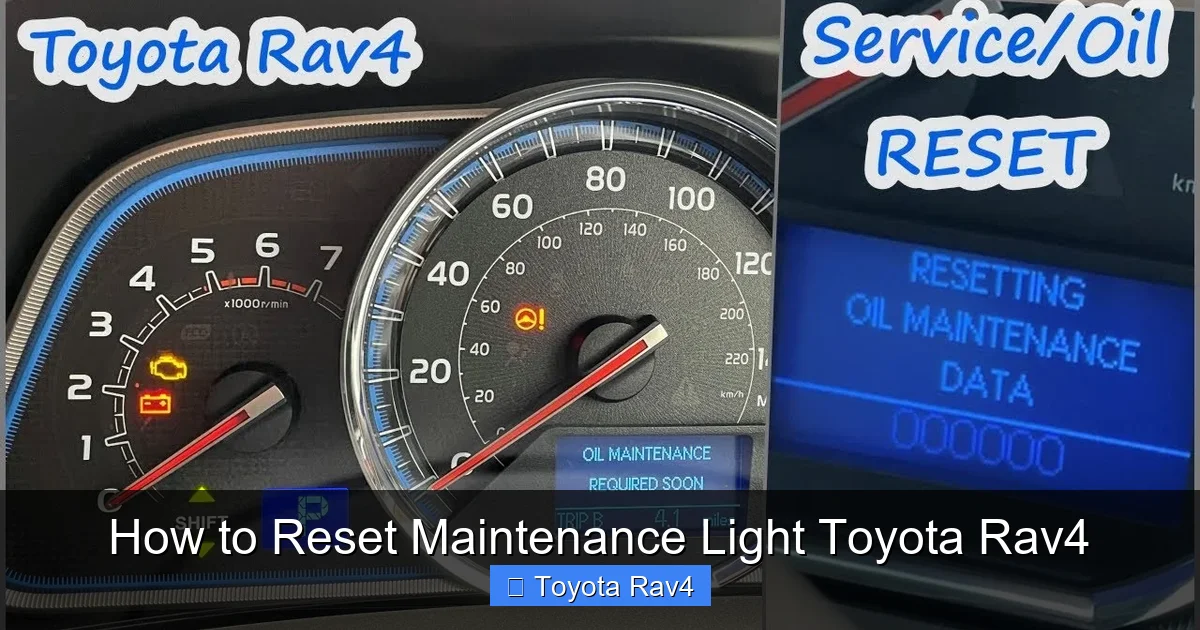
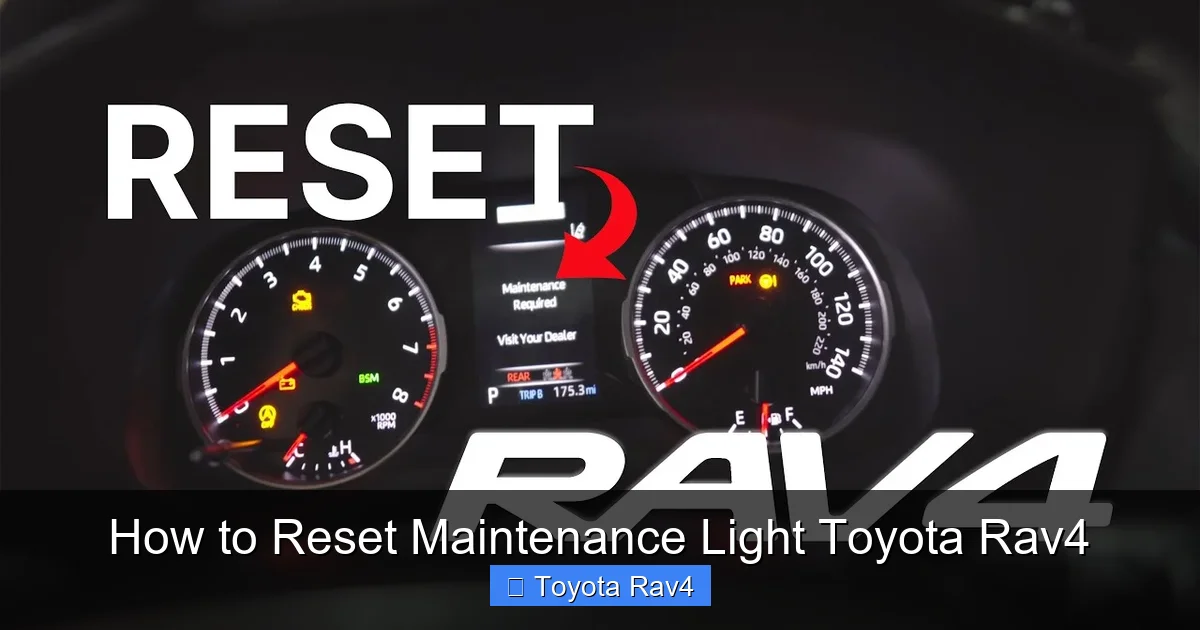
When the light comes on, it’s not an emergency—it’s a friendly nudge from your vehicle saying, “Hey, it’s time for a check-up.” This could mean an oil change, tire rotation, brake inspection, or other routine service. Once the service is completed, the light should be reset to clear the reminder and start a new cycle.
Ignoring the maintenance light isn’t dangerous in the short term, but over time, skipping regular service can lead to reduced performance, lower fuel economy, and even costly repairs. That’s why it’s crucial to address the underlying service need—and then reset the light to keep your dashboard clean and your mind at ease.
Tools You’ll Need (Spoiler: It’s Just Your Hands!)
Visual guide about How to Reset Maintenance Light Toyota Rav4
Image source: i.ytimg.com
One of the best things about resetting the maintenance light on a Toyota RAV4 is that you don’t need any special tools. No scanners, no computers, no trips to the dealer. All you need is your key, your hands, and about two minutes of your time.
That said, there are a few things to keep in mind before you begin:
- Make sure the vehicle is off: You’ll be turning the ignition to the “ON” position, but you should not start the engine during the reset process.
- Ensure the trip meter is accessible: Most RAV4 models use the trip meter button (usually located on the instrument cluster) to navigate the reset menu.
- Have your owner’s manual handy: While this guide covers all major models, your specific RAV4 might have slight variations. The manual is your best backup.
- Work in a safe, well-lit area: You’ll be interacting with the dashboard, so make sure you’re parked on level ground with the parking brake engaged.
With those basics covered, you’re ready to reset that light and get back to enjoying your RAV4 without that pesky reminder staring you in the face.
How to Reset the Maintenance Light on a 1996–2000 Toyota RAV4
The first-generation Toyota RAV4 (1996–2000) is a classic—simple, reliable, and built to last. These early models use a basic maintenance reminder system that’s straightforward to reset. Here’s how to do it:
Step-by-Step Guide
- Turn the ignition to “ON”: Insert your key and turn it to the “ON” position. You’ll see the dashboard lights illuminate, but do not start the engine.
- Press and hold the trip meter button: Locate the trip meter button on your instrument cluster (usually near the speedometer). Press and hold it down.
- Turn the ignition to “OFF” while holding the button: While still holding the trip button, turn the key back to the “OFF” position.
- Turn the ignition back to “ON”: Release the trip button, then immediately turn the key back to “ON.”
- Watch for the light to flash: The maintenance light should begin to flash, indicating the system is in reset mode.
- Press the trip button again: Within 10 seconds, press the trip button one more time. The light should turn off completely.
- Turn off the ignition: Once the light is off, you can turn the key to “OFF” and remove it.
Tips for Success
- If the light doesn’t flash, try repeating the process. Timing is critical—make sure you’re turning the key quickly between steps.
- Some older RAV4s may require you to cycle the trip button multiple times. Be patient and follow the sequence carefully.
- If the light still won’t reset, check your owner’s manual or consider visiting a Toyota service center—there may be a deeper issue with the system.
This method works for most first-gen RAV4s, including both 2WD and 4WD models. It’s a simple process that takes less than a minute once you get the hang of it.
How to Reset the Maintenance Light on a 2001–2005 Toyota RAV4
The second-generation RAV4 (2001–2005) introduced a more refined interior and updated electronics, but the maintenance reset procedure remains similar to the first generation. However, there are a few key differences to note.
Step-by-Step Guide
- Turn the ignition to “ON”: Do not start the engine. Just turn the key so the dashboard lights up.
- Press and hold the trip meter button: Find the trip button on your instrument cluster and hold it down.
- Turn the ignition to “OFF” while holding the button: Keep the button pressed as you turn the key back to “OFF.”
- Turn the ignition back to “ON”: Release the trip button, then immediately turn the key to “ON” again.
- Watch for the odometer to change: The odometer display should begin to count up rapidly (e.g., 000000, 000001, 000002, etc.).
- Press the trip button when the count reaches “000000”: As soon as the odometer resets to zero, press the trip button once. The maintenance light should turn off.
- Turn off the ignition: Once the light is off, you can safely turn the key to “OFF.”
Common Issues and Fixes
- If the odometer doesn’t count up, try repeating the process. Make sure you’re holding the trip button long enough during the “OFF” to “ON” transition.
- Some 2001–2005 RAV4s have a “Trip A” and “Trip B” button. Use the one that controls the main trip meter (usually labeled “Trip A”).
- If the light still won’t reset, ensure your battery is fully charged. A weak battery can interfere with the reset sequence.
This method is reliable for most second-gen RAV4s, including both manual and automatic transmissions. It’s a great way to keep your dashboard clean after an oil change or service.
How to Reset the Maintenance Light on a 2006–2012 Toyota RAV4
The third-generation RAV4 (2006–2012) brought a larger body, more power, and updated technology. This generation also introduced a slightly different reset procedure, especially for models with the multi-information display (MID).
Step-by-Step Guide
- Turn the ignition to “ON”: Do not start the engine. Just turn the key to power the dashboard.
- Press the trip meter button to select “Trip A”: Use the button to cycle through the trip options until “Trip A” is displayed.
- Turn the ignition to “OFF”: Turn the key back to “OFF” while “Trip A” is showing.
- Press and hold the trip meter button: While the ignition is off, press and hold the trip button.
- Turn the ignition back to “ON” while holding the button: Keep the button pressed as you turn the key to “ON.”
- Wait for the maintenance light to flash: The “MAINT REQD” light should begin to flash, indicating the system is ready to reset.
- Release the button and press it again within 5 seconds: Let go of the button, then press it once more. The light should turn off.
- Turn off the ignition: Once the light is off, you can turn the key to “OFF.”
Alternative Method for Models with MID
Some 2006–2012 RAV4s come equipped with a multi-information display that allows you to reset the maintenance light through the menu system:
- Turn the ignition to “ON.”
- Press the “DISP” or “INFO” button to access the menu.
- Navigate to “Maintenance” or “Service” using the arrow buttons.
- Select “Reset” and confirm by pressing “OK” or “Enter.”
- The light should turn off automatically.
Pro Tips
- If you have a hybrid RAV4 (2010–2012), the process is the same—just make sure the hybrid system is in “Ready” mode (ignition on, engine off).
- Always double-check that “Trip A” is selected before starting the reset. Using “Trip B” won’t trigger the reset sequence.
- If the light doesn’t turn off, try disconnecting the battery for 10 minutes to reset the system, then repeat the steps.
This generation is known for its reliability, and resetting the maintenance light is just one more way to keep your RAV4 running smoothly.
How to Reset the Maintenance Light on a 2013–2018 Toyota RAV4
The fourth-generation RAV4 (2013–2018) features a modern design, improved fuel economy, and advanced infotainment systems. Resetting the maintenance light on these models is a bit more streamlined, thanks to the updated dashboard interface.
Step-by-Step Guide
- Turn the ignition to “ON”: Do not start the engine. Just turn the key to power the dashboard.
- Press the trip meter button to select “Trip A”: Use the button to cycle until “Trip A” appears on the display.
- Turn the ignition to “OFF”: Turn the key back to “OFF” while “Trip A” is showing.
- Press and hold the trip meter button: While the ignition is off, press and hold the trip button.
- Turn the ignition back to “ON” while holding the button: Keep the button pressed as you turn the key to “ON.”
- Wait for the odometer to count up: The odometer should begin to count rapidly (similar to the 2001–2005 method).
- Press the trip button when the count reaches “000000”: As soon as the odometer resets to zero, press the trip button once. The maintenance light should turn off.
- Turn off the ignition: Once the light is off, you can safely turn the key to “OFF.”
Using the Multi-Information Display (MID)
Many 2013–2018 RAV4s come with a color MID that allows for easier navigation:
- Turn the ignition to “ON.”
- Press the “DISP” button to access the menu.
- Use the arrow keys to navigate to “Settings” or “Vehicle Settings.”
- Select “Maintenance” or “Service Reminder.”
- Choose “Reset” and confirm.
- The light should disappear from the dashboard.
Common Mistakes to Avoid
- Don’t start the engine during the reset—this will interrupt the process.
- Make sure you’re using “Trip A,” not “Trip B.”
- If the odometer doesn’t count up, try repeating the steps with a fully charged battery.
This generation is user-friendly, and the reset process is designed to be intuitive. With a little practice, you’ll have it down in no time.
How to Reset the Maintenance Light on a 2019–Present Toyota RAV4
The fifth-generation RAV4 (2019–present) is the most advanced yet, with Toyota Safety Sense 2.0, hybrid options, and a digital instrument cluster on higher trims. Resetting the maintenance light is easier than ever, thanks to the intuitive touchscreen and menu system.
Step-by-Step Guide (Using the Touchscreen)
- Turn the ignition to “ON”: Do not start the engine. Just power up the dashboard.
- Tap the “Menu” button on the steering wheel or touchscreen: Navigate to the “Settings” or “Vehicle” menu.
- Select “Maintenance” or “Service”: Look for the maintenance reminder option.
- Choose “Reset” or “Clear”: Confirm the action when prompted.
- The maintenance light should turn off: You’ll see a confirmation message on the screen.
- Turn off the ignition: Once complete, you can turn the key to “OFF.”
Alternative Method (Using Trip Button)
If your RAV4 doesn’t have a touchscreen or you prefer the manual method:
- Turn the ignition to “ON.”
- Press the trip meter button to select “Trip A.”
- Turn the ignition to “OFF.”
- Press and hold the trip button.
- Turn the ignition back to “ON” while holding the button.
- Wait for the odometer to count up.
- Press the trip button when it reaches “000000.”
- The light should turn off.
Hybrid-Specific Notes
For RAV4 Hybrid models (2019–present), the process is identical. Just ensure the hybrid system is in “Ready” mode (ignition on, engine off) before starting.
Pro Tips
- The touchscreen method is the fastest and most reliable for newer models.
- If the light doesn’t reset, check for software updates at your local Toyota dealer.
- Always keep your service records—resetting the light doesn’t replace actual maintenance.
When to Seek Professional Help
While resetting the maintenance light is usually a simple DIY task, there are times when you might need professional assistance:
- The light won’t turn off after multiple attempts: This could indicate a faulty sensor or wiring issue.
- The dashboard shows error codes: If other warning lights appear (like the check engine light), have your vehicle inspected.
- You’re uncomfortable performing the reset: If you’re unsure or nervous, a Toyota service technician can do it quickly and safely.
- Your RAV4 is under warranty: Some dealerships recommend having service performed and reset by certified technicians to maintain warranty coverage.
Remember, resetting the light is just one part of vehicle care. Regular oil changes, tire rotations, brake checks, and fluid top-offs are essential for keeping your RAV4 in top condition.
Final Thoughts: Keep Your RAV4 Running Smoothly
Resetting the maintenance light on your Toyota RAV4 is a quick and easy way to keep your dashboard clean and your mind at ease. Whether you drive a vintage 1996 model or a brand-new 2024 hybrid, the process is straightforward and doesn’t require any special tools or expertise.
By following the steps outlined in this guide, you can confidently reset the light after every service—saving time, money, and unnecessary trips to the dealership. But remember: resetting the light doesn’t replace the need for regular maintenance. Stay on top of your service schedule, use high-quality oil and parts, and listen to your vehicle. A well-maintained RAV4 will reward you with years of reliable, enjoyable driving.
So the next time that “MAINT REQD” light pops up, don’t panic. Grab your keys, follow the steps, and reset it like a pro. Your RAV4—and your peace of mind—will thank you.
Frequently Asked Questions
How often should I reset the maintenance light on my Toyota RAV4?
You should reset the maintenance light every time you complete an oil change or scheduled service. This ensures the system starts a new reminder cycle based on your driving habits and mileage.
Can I reset the maintenance light without turning the ignition on?
No, you must turn the ignition to the “ON” position (without starting the engine) to power the dashboard and access the reset sequence. The system won’t respond if the ignition is off.
What if the maintenance light comes back on immediately after resetting?
If the light returns right away, it may indicate a deeper issue—such as a faulty sensor, low oil level, or incomplete service. Check your oil level and consult a technician if the problem persists.
Does resetting the maintenance light affect my warranty?
No, resetting the light yourself does not void your warranty. However, always keep records of your service work, and consider having major maintenance performed by a certified Toyota technician.
Can I reset the maintenance light on a RAV4 Hybrid?
Yes, the process is the same for hybrid and gasoline models. Just ensure the hybrid system is in “Ready” mode (ignition on, engine off) before starting the reset.
What if I don’t have a trip meter button?
All Toyota RAV4 models come equipped with a trip meter button. If yours seems missing or unresponsive, check your owner’s manual or consult a technician—it may be labeled differently or located near the steering column.