
Turning off the maintenance light on your Toyota RAV4 is easier than you think—no mechanic required. Whether you’ve just completed an oil change or routine service, this guide walks you through the process for multiple model years using the dashboard controls. Save time and money by resetting the light yourself in under five minutes.
Key Takeaways
- Maintenance lights are reminders, not warnings: They indicate scheduled service intervals, not immediate mechanical issues.
- Reset procedures vary by model year: 2006–2012, 2013–2018, and 2019+ RAV4s use different methods.
- Use the trip meter and power button: Most models rely on these dashboard controls to reset the light.
- Turn the ignition to “ON” but don’t start the engine: This is a critical step in the reset process.
- Double-check your owner’s manual: Always confirm the correct steps for your specific RAV4 trim and year.
- Light may return if service wasn’t completed: Ensure maintenance was done before resetting to avoid confusion.
- Professional help is optional: While dealerships can reset it, DIY is fast, free, and reliable.
📑 Table of Contents
Why Does the Maintenance Light Come On?
So, you’re driving your Toyota RAV4, enjoying the smooth ride and quiet cabin, when suddenly—bam—a little wrench icon or “MAINT REQD” message pops up on your dashboard. Your first thought might be, “Uh-oh, something’s wrong with my car.” But take a deep breath. In most cases, this light isn’t signaling a breakdown—it’s just your RAV4 politely reminding you that it’s time for routine maintenance.
The maintenance light, often labeled as “MAINT REQD,” “SERVICE,” or a wrench symbol, is part of Toyota’s Scheduled Maintenance Reminder System. This system tracks your vehicle’s mileage and time since the last service. Once you hit a preset interval—usually every 5,000 to 10,000 miles, depending on your driving habits and model year—the light illuminates to prompt you to schedule an oil change, tire rotation, or other routine checks.
It’s important to understand that this light is not the same as a check engine light or other warning indicators. Those signal potential mechanical problems that need immediate attention. The maintenance light, on the other hand, is purely informational. Think of it like your phone’s low battery alert—it’s not broken, it just needs a little attention.
How the System Works
Toyota’s maintenance reminder system uses a combination of mileage and time to determine when service is due. For example, if you drive mostly in city traffic with frequent stops and starts, your engine oil may degrade faster than someone who drives long highway distances. Toyota accounts for this by setting service intervals based on both distance and calendar time—typically every 6 months or 5,000 miles, whichever comes first.
Once the threshold is reached, the system triggers the light. It doesn’t monitor oil quality directly (that’s what oil analysis tools are for), but it assumes that after a certain amount of use, your fluids and filters need refreshing. This proactive approach helps extend the life of your RAV4 by encouraging regular upkeep.
Common Triggers for the Maintenance Light
- Oil change due: The most common reason—engine oil and filter need replacing.
- Tire rotation: Helps ensure even tire wear and better fuel efficiency.
- Air filter replacement: A dirty air filter can reduce engine performance.
- Brake inspection: Especially important for safety and long-term brake health.
- Fluid top-offs: Coolant, brake fluid, and transmission fluid levels may need checking.
Even if your RAV4 is running perfectly, the light will still come on when the interval hits. That’s why it’s crucial to reset it after service—otherwise, you’ll keep seeing that annoying reminder every time you start the car.
When Should You Reset the Maintenance Light?
You should reset the maintenance light only after you’ve completed the recommended service. Resetting it prematurely—before changing the oil or performing maintenance—defeats the purpose of the reminder system. It’s like silencing a smoke alarm without checking for fire.
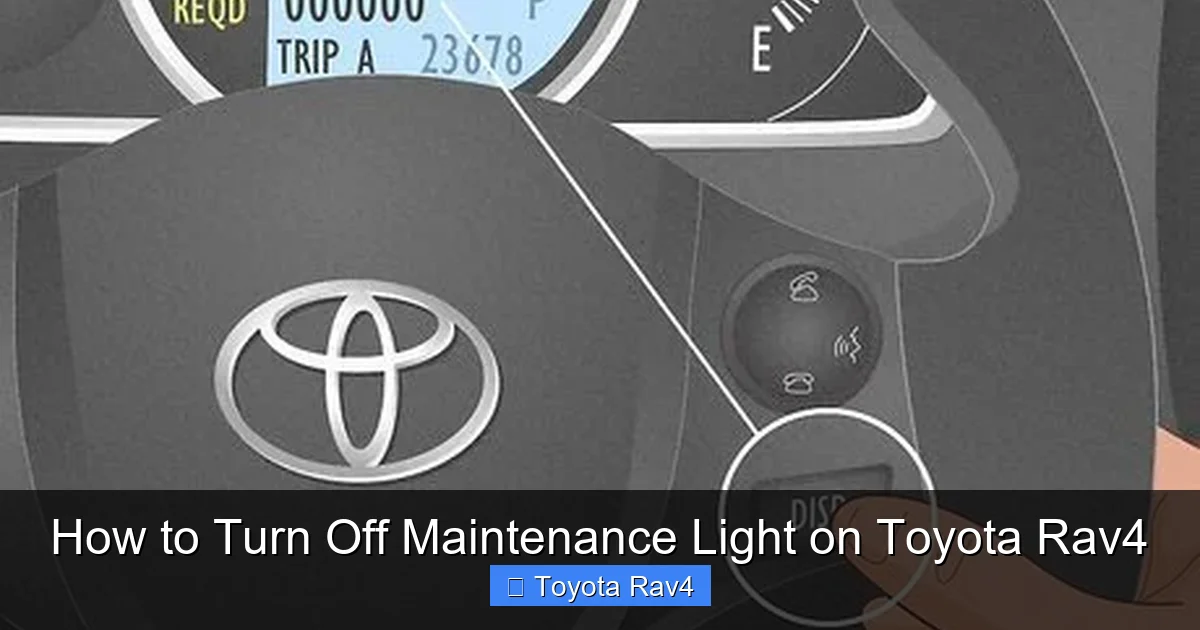
Visual guide about How to Turn Off Maintenance Light on Toyota Rav4
Image source: i.ytimg.com
Let’s say you just took your RAV4 to the dealership or your trusted local mechanic for an oil change. Once they’ve drained the old oil, replaced the filter, and filled it with fresh synthetic blend, they may offer to reset the light for you. But if they don’t—or if you prefer to do it yourself—you can easily handle it at home with just a few button presses.
Signs You’ve Completed the Right Service
- The oil has been changed and the filter replaced.
- Tires have been rotated (if applicable).
- Fluids are at proper levels.
- No warning lights (other than maintenance) are on.
- The service receipt or log confirms the work was done.
Resetting the light without performing maintenance can lead to confusion later. Imagine driving 8,000 miles on old oil because you reset the light after a tire rotation. That’s not just risky—it could void your warranty or lead to costly engine repairs down the road.
What If You’re Doing the Service Yourself?
Many RAV4 owners prefer to handle basic maintenance at home. If you’ve just changed your own oil using high-quality Toyota-recommended oil and a genuine filter, you’re in the clear to reset the light. Just make sure you’ve tightened the drain plug properly, reinstalled the filter correctly, and disposed of the old oil responsibly.
After the job is done and you’ve started the engine to check for leaks, you can proceed with the reset. It’s a satisfying feeling—knowing you’ve taken care of your vehicle and silenced that persistent reminder all by yourself.
Step-by-Step Guide: How to Turn Off the Maintenance Light
Now for the main event: how to turn off the maintenance light on your Toyota RAV4. The good news? It’s a simple process that takes less than five minutes. The bad news? The exact steps vary slightly depending on your RAV4’s model year. But don’t worry—we’ve broken it down by generation so you can find the right method for your vehicle.
Before we dive in, a quick note: always turn the ignition to “ON” but do not start the engine unless instructed. This powers up the dashboard electronics without engaging the starter motor. You’ll know you’re in the right mode when the gauges light up and the warning symbols appear, but the engine remains off.
For 2006–2012 Toyota RAV4 Models
If you drive a first- or second-generation RAV4 (2006–2012), here’s how to reset the maintenance light:
- Turn the ignition to the “ON” position (do not start the engine).
- Press the “TRIP” button on the instrument cluster until the odometer displays “Trip A” or “Trip B.”
- Turn the ignition back to “OFF.”
- While holding the “TRIP” button, turn the ignition back to “ON.”
- Continue holding the “TRIP” button until the odometer starts counting down from 100,000 to 0. This may take 10–15 seconds.
- Once it reaches 0, release the button. The maintenance light should be off.
- Turn the ignition to “OFF” and then start the engine to confirm the light is gone.
Pro Tip: If the odometer doesn’t count down, try repeating the process. Sometimes it takes a second attempt, especially if the button wasn’t held long enough.
For 2013–2018 Toyota RAV4 Models
The third-generation RAV4 (2013–2018) uses a slightly different method, involving the trip meter and power button:
- Turn the ignition to “ON” (engine off).
- Press the “TRIP” button to display “Trip A” on the odometer.
- Turn the ignition to “OFF.”
- While holding the “TRIP” button, turn the ignition back to “ON.”
- Keep holding the “TRIP” button until the maintenance light starts flashing, then stays on solid.
- Release the button and immediately press and hold it again.
- Hold until the light turns off (usually within 10–20 seconds).
- Turn the ignition off and restart the engine to verify the light is gone.
Note: On some 2013–2018 models, you may need to press the “DISP” or “INFO” button instead of “TRIP.” Check your owner’s manual if the above doesn’t work.
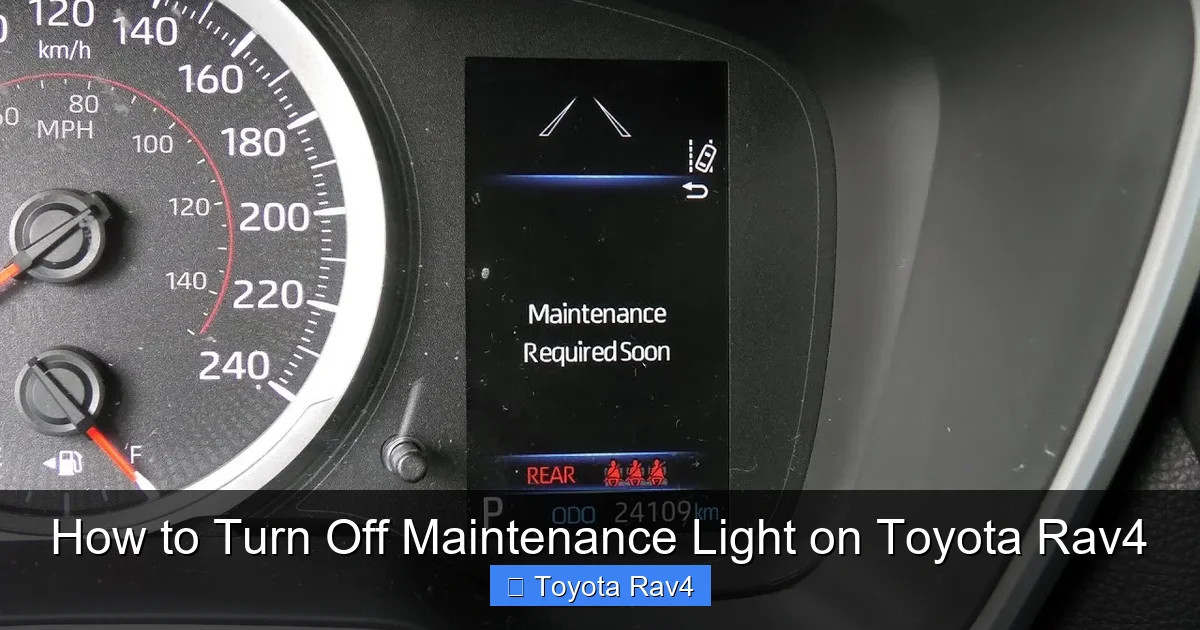
For 2019 and Newer Toyota RAV4 Models
The fourth-generation RAV4 (2019 and newer) features a more modern infotainment system and digital instrument cluster. Here’s how to reset the light:
- Turn the ignition to “ON” (engine off).
- Use the steering wheel controls to navigate to the “Settings” menu on the multi-information display (MID).
- Scroll to “Vehicle Settings” and select it.
- Choose “Maintenance” or “Service Info.”
- Select “Reset” or “Clear Maintenance Data.”
- Confirm the reset when prompted.
- Turn the ignition off and restart the engine. The light should be off.
Bonus Tip: Some newer RAV4s with Toyota Safety Sense 2.0 may require you to press and hold the “DISP” button on the steering wheel for 5 seconds after turning the ignition on. This bypasses the menu and directly resets the light.
Troubleshooting Common Issues
Sometimes, the reset doesn’t work on the first try. Here’s what to do:
- Light comes back on immediately: You may not have completed the full sequence. Try again, making sure to hold buttons for the full duration.
- Odometer doesn’t respond: Ensure the ignition is fully in “ON” mode. If the dashboard lights are dim, the battery may be weak.
- Menu options missing: On newer models, software updates can change menu layouts. Check for Toyota software updates at your dealership.
- Light resets but returns after driving: This could mean the system detected incomplete service. Double-check that all maintenance was performed.
Can a Mechanic or Dealership Reset the Light for You?
Absolutely. If you’ve had your RAV4 serviced at a Toyota dealership or certified mechanic, they can reset the maintenance light as part of the service. In fact, many service centers do this automatically after completing an oil change or inspection.
However, there’s no need to pay extra for this simple task. Most dealerships won’t charge you to reset the light, but some independent shops might include it in their service fee. Either way, knowing how to do it yourself gives you peace of mind and saves a trip back to the shop.
When to Seek Professional Help
While resetting the light is straightforward, there are a few situations where professional assistance is wise:
- You’re unsure if the maintenance was completed correctly.
- The light won’t turn off after multiple attempts.
- Other warning lights are also on (e.g., check engine, oil pressure).
- Your RAV4 is under warranty and you want to avoid any DIY risks.
In these cases, a certified Toyota technician can diagnose any underlying issues and ensure the reset is done properly.
Tips to Avoid Future Maintenance Light Surprises
Now that you know how to turn off the maintenance light on your Toyota RAV4, let’s talk prevention. A little planning can go a long way in keeping your dashboard clean and your vehicle running smoothly.
Keep a Maintenance Log
Use a notebook, app, or digital calendar to track when you last changed the oil, rotated tires, or replaced filters. Note the mileage and date each time. This helps you stay ahead of the reminder system and ensures you don’t miss important services.
Use High-Quality Fluids and Parts
Stick to Toyota-recommended oil (usually 0W-20 or 5W-30 synthetic) and genuine or OEM-equivalent filters. Cheap alternatives may not last as long, causing the light to come on prematurely or leading to engine wear.
Don’t Ignore the Light
Even though it’s not an emergency, delaying maintenance can reduce fuel efficiency, increase emissions, and shorten engine life. Treat the light as a friendly nudge—not a suggestion.
Reset Immediately After Service
The sooner you reset the light, the less likely you are to forget whether you’ve done the work. Make it part of your post-service routine.
Check Your Owner’s Manual
Every RAV4 model year has slight variations in the reset procedure. Your owner’s manual is the most reliable source for exact instructions. Keep it in the glove box for quick reference.
Conclusion
Turning off the maintenance light on your Toyota RAV4 is a simple, empowering task that every owner should know. Whether you drive a 2006 model with analog controls or a 2023 hybrid with a digital display, the process is quick, free, and doesn’t require special tools. By following the steps outlined in this guide, you can silence that persistent reminder and keep your RAV4 in top condition.
Remember: the maintenance light is your friend. It’s there to help you protect your investment, improve performance, and avoid costly repairs. Don’t fear it—embrace it. And the next time it pops up, you’ll know exactly what to do.
Frequently Asked Questions
How often does the maintenance light come on in a Toyota RAV4?
The maintenance light typically comes on every 5,000 to 10,000 miles, depending on your driving habits and model year. It may also trigger after 6 months, even if you haven’t reached the mileage threshold.
Can I drive my RAV4 with the maintenance light on?
Yes, you can drive safely with the maintenance light on, but it’s best to schedule service soon. The light is a reminder, not a warning of immediate danger.
Will the maintenance light reset itself after an oil change?
No, the light will not reset automatically. You must manually reset it using the dashboard controls, even after a professional oil change.
What if the maintenance light won’t turn off after resetting?
Try the reset procedure again, ensuring you follow each step precisely. If it still won’t turn off, there may be an issue with the vehicle’s computer or sensor—consult a technician.
Does the maintenance light affect my warranty?
No, the light itself doesn’t affect your warranty. However, failing to perform scheduled maintenance as recommended by Toyota could void certain warranty claims.
Can I reset the maintenance light without turning on the ignition?
No, you must turn the ignition to “ON” (without starting the engine) to power the dashboard electronics and access the reset function.