
Resetting the maintenance light on your Toyota RAV4 is a simple process that ensures your vehicle’s service reminders stay accurate. Whether you’ve just changed the oil or completed routine maintenance, this guide walks you through the reset procedure for various RAV4 generations—no special tools required.
Key Takeaways
- Know Your Model Year: Reset procedures differ slightly between RAV4 generations, so identifying your vehicle’s year is the first step.
- Use the Trip Meter Button: Most RAV4 models use the trip odometer button to navigate the reset sequence—no scan tools needed.
- Turn Ignition On (Not Engine): You only need to turn the key to the “ON” position or press the start button without pressing the brake.
- Follow the Correct Sequence: Timing and button presses matter—rushing can cause the reset to fail.
- Confirm the Reset: After completing the steps, verify the maintenance light turns off and stays off after restarting the vehicle.
- Regular Maintenance Matters: Resetting the light doesn’t replace actual service—always follow Toyota’s recommended maintenance schedule.
- When to Seek Help: If the light won’t reset or comes back immediately, there may be an underlying issue requiring professional diagnosis.
📑 Table of Contents
- Why the Maintenance Light Matters in Your Toyota RAV4
- Understanding the Toyota RAV4 Maintenance Light System
- How to Reset the Maintenance Light on a Toyota RAV4: Step-by-Step Guide
- Common Mistakes to Avoid When Resetting the Maintenance Light
- When to Reset the Maintenance Light: Best Practices
- DIY vs. Professional Reset: What’s the Best Option?
- Maintaining Your Toyota RAV4 Beyond the Reset
- Conclusion: Stay on Top of Your RAV4’s Health
Why the Maintenance Light Matters in Your Toyota RAV4
The maintenance light in your Toyota RAV4 isn’t just a nagging reminder—it’s a vital part of your vehicle’s health monitoring system. Designed to alert you when it’s time for routine service like oil changes, tire rotations, or brake inspections, this light helps keep your SUV running efficiently and safely. Ignoring it can lead to reduced fuel economy, engine wear, or even costly repairs down the road.
Toyota engineers the RAV4 with a sophisticated maintenance reminder system that tracks mileage, driving conditions, and time intervals. Depending on your model year, this system may be called “Maintenance Required,” “Oil Change,” or “Service Required.” While it’s not a warning of immediate danger like the check engine light, it’s a gentle nudge to stay on top of your vehicle’s care. Resetting it after service ensures you don’t miss the next scheduled maintenance window.
Many RAV4 owners assume they need to visit a dealership or use expensive diagnostic tools to reset this light. The good news? Most models allow you to do it yourself in under two minutes. Whether you drive a 2006 RAV4 with a traditional key or a 2023 hybrid with a push-button start, the process is straightforward once you know the right steps. This guide will walk you through everything you need to know, model by model, so you can reset the maintenance light with confidence.
Understanding the Toyota RAV4 Maintenance Light System
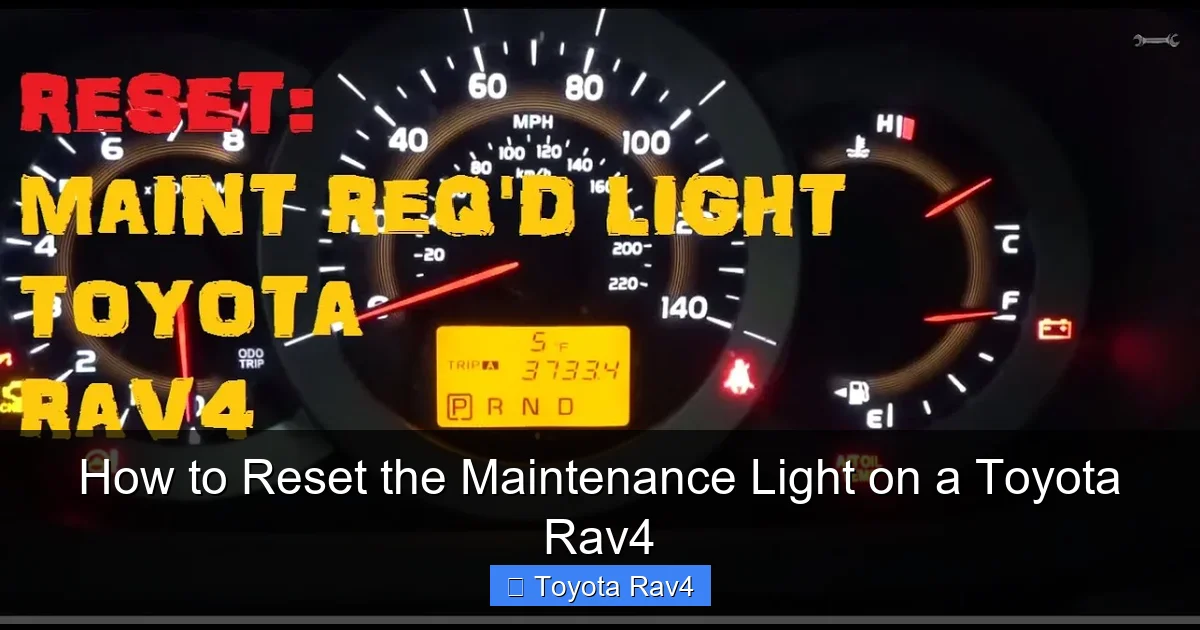
Visual guide about How to Reset the Maintenance Light on a Toyota Rav4
Image source: i.ytimg.com
Before diving into the reset process, it’s helpful to understand how Toyota’s maintenance reminder system works. Unlike older vehicles that rely solely on mileage, modern RAV4 models use a combination of factors to determine when service is due. These include engine runtime, driving habits, temperature, and oil quality—especially in models equipped with synthetic oil and advanced engine management systems.
The maintenance light typically illuminates every 5,000 to 10,000 miles, depending on your driving conditions and the type of oil used. For example, if you frequently drive in stop-and-go traffic, extreme temperatures, or dusty environments, your RAV4 may trigger the light sooner. Toyota recommends following the maintenance schedule outlined in your owner’s manual, which often includes more frequent service under “severe” driving conditions.
It’s important to note that the maintenance light is not the same as the check engine light. The check engine light indicates a potential mechanical or emissions issue that requires immediate attention. The maintenance light, on the other hand, is a proactive reminder—like a digital nudge from your car saying, “Hey, it’s time for a tune-up!” Resetting it after service ensures your vehicle continues to track the next interval accurately.
How the System Tracks Service Intervals
Toyota’s maintenance system uses data from the vehicle’s onboard computer to calculate when service is needed. Sensors monitor engine revolutions, coolant temperature, and oil degradation (in some models) to estimate oil life. This adaptive approach means the light may come on earlier or later than a fixed mileage interval, depending on how you drive.
For example, if you take mostly short trips where the engine doesn’t fully warm up, the system may detect increased fuel dilution in the oil and trigger the maintenance light sooner. Conversely, highway driving with consistent speeds may extend the interval slightly. This smart tracking helps ensure your engine stays protected under real-world conditions.
Why Resetting Is Necessary
After you’ve completed an oil change or other scheduled service, the maintenance light must be reset to restart the countdown. If you don’t reset it, the light will remain on, even though your vehicle is up to date. This can be confusing and may cause you to overlook future service needs.
Resetting the light is a simple acknowledgment to your RAV4’s computer that service has been performed. It’s like hitting the “snooze” button on a reminder—only this time, you’re telling the system to start fresh. Doing this yourself saves time and money, especially if you perform your own oil changes or use independent mechanics.
How to Reset the Maintenance Light on a Toyota RAV4: Step-by-Step Guide
Now that you understand why the maintenance light exists, let’s get into the practical part: how to reset it. The process varies slightly depending on your RAV4’s model year, but the core steps remain consistent. Below, we’ll cover the most common procedures for different generations, starting with the most recent models.
For 2019–2023 Toyota RAV4 (Including Hybrid Models)
If you drive a newer RAV4—whether gas or hybrid—the reset process uses the multi-information display (MID) and steering wheel controls. Here’s how to do it:
1. Turn the ignition to the “ON” position. Do not start the engine. If your RAV4 has a push-button start, press the “Start” button once without pressing the brake pedal.
2. Use the steering wheel controls to navigate to the “Settings” menu on the MID. This is usually located on the left side of the steering wheel.
3. Scroll to “Vehicle Settings” and press the “OK” button.
4. Select “Maintenance” and then choose “Reset.”
5. Confirm the reset when prompted. The maintenance light should turn off.
6. Turn off the ignition and restart the vehicle to verify the light stays off.
This method is user-friendly and doesn’t require any special tools. The MID makes it easy to navigate through menus, and the system confirms the reset with a message. If the light doesn’t turn off, double-check that you’ve completed all steps in order.
For 2013–2018 Toyota RAV4
The 2013–2018 RAV4 models use a slightly different approach, relying on the trip meter button and dashboard display. Follow these steps:
1. Turn the ignition to the “ON” position (do not start the engine).
2. Press and hold the trip meter button (usually located on the instrument cluster).
3. While holding the button, turn the ignition off and then back to “ON.” Keep holding the trip button.
4. Continue holding until the maintenance light begins to flash, then release the button.
5. The light should reset and turn off. Turn off the ignition and restart to confirm.
Timing is key here. If you release the button too early, the reset won’t complete. Some owners find it helpful to count to 10 slowly while holding the button after turning the ignition back on.
For 2006–2012 Toyota RAV4
Older RAV4 models use a more mechanical reset process involving the odometer and ignition cycling. Here’s how it works:
1. Turn the ignition to the “ON” position.
2. Press and hold the trip meter button until the odometer display changes to show the trip mileage.
3. Turn the ignition off.
4. While holding the trip button, turn the ignition back to “ON.”
5. Continue holding the button until the maintenance light flashes and then turns off.
6. Release the button and turn off the ignition. Restart the vehicle to confirm the reset.
This method relies on the physical trip button and doesn’t involve digital menus. It’s a bit more hands-on but equally effective. If the light doesn’t reset, try repeating the process, ensuring you hold the button long enough.
For 2001–2005 Toyota RAV4
The earliest RAV4 models with maintenance lights use a simple ignition and button sequence:
1. Turn the ignition to “ON.”
2. Press and hold the trip meter button.
3. Turn the ignition off while still holding the button.
4. Turn the ignition back to “ON” while continuing to hold the button.
5. Hold until the maintenance light blinks and then turns off.
6. Release the button and restart the vehicle.
These older models may take a few seconds longer for the light to respond. Patience is key—don’t rush the process.
Common Mistakes to Avoid When Resetting the Maintenance Light
Even though resetting the maintenance light is simple, many RAV4 owners run into issues due to small mistakes. Avoiding these common pitfalls will save you time and frustration.
Starting the Engine Too Soon
One of the most frequent errors is starting the engine before completing the reset sequence. The ignition must be in the “ON” position—not “START”—during the entire process. Starting the engine interrupts the reset and may require you to begin again.
For push-button models, remember: press the start button once (without the brake) to turn on the electronics, but don’t press it twice to start the engine.
Releasing the Button Too Early
Timing is critical, especially in older models. If you release the trip button before the light flashes or turns off, the reset won’t register. Hold the button steadily until you see confirmation on the dashboard.
A good rule of thumb: count to 10 slowly after turning the ignition back on while holding the button. This gives the system enough time to process the reset.
Using the Wrong Button
Some RAV4 models have multiple buttons on the instrument cluster. Make sure you’re using the trip meter button—not the odometer reset or info button. The trip button is typically labeled “TRIP” or has a small icon of a car with a line under it.
If you’re unsure, consult your owner’s manual or look for the button that cycles through trip A, trip B, and total mileage.
Ignoring the Confirmation
After completing the reset, always restart your vehicle to confirm the light stays off. If it comes back on immediately, the reset may not have been successful, or there could be an underlying issue.
In rare cases, a persistent maintenance light may indicate a problem with the vehicle’s computer or sensor. If the light won’t reset after multiple attempts, consider visiting a Toyota service center.
When to Reset the Maintenance Light: Best Practices
Resetting the maintenance light should always follow actual service. It’s not just about turning off a light—it’s about maintaining accurate records for your vehicle’s health.
After Every Oil Change
The most common reason to reset the light is after an oil change. Whether you do it yourself or go to a shop, resetting the light ensures your RAV4 knows the oil is fresh and starts tracking the next interval.
If you change your own oil, reset the light immediately after replacing the filter and topping off the oil. This keeps your maintenance log accurate.
After Tire Rotation or Brake Service
Some RAV4 models track additional services like tire rotations or brake inspections. If your vehicle includes these reminders, reset the light after completing the service.
Even if your model doesn’t track these specifically, it’s a good habit to reset the light after any major maintenance to keep everything synchronized.
Before Long Trips
If you’re planning a road trip, check your maintenance light before you go. If it’s on, consider servicing your RAV4 beforehand. Resetting the light after service gives you peace of mind and ensures your vehicle is in top condition for the journey.
When Buying or Selling a Used RAV4
If you’re purchasing a used RAV4, ask the seller when the last service was performed and whether the maintenance light was reset. A light that’s been on for thousands of miles could indicate neglected maintenance.
When selling your own RAV4, reset the light after your final service to show the next owner that the vehicle is up to date.
DIY vs. Professional Reset: What’s the Best Option?
Many RAV4 owners wonder whether they should reset the maintenance light themselves or let a technician do it. The answer is simple: DIY is usually the best choice.
Benefits of Doing It Yourself
Resetting the light at home saves time and money. You don’t need to schedule an appointment or pay a service fee for a task that takes less than two minutes. It also gives you more control over your vehicle’s maintenance schedule.
Plus, learning how to reset the light empowers you to take better care of your RAV4. It’s a small skill that makes car ownership easier and more rewarding.
When to Visit a Dealer or Mechanic
There are a few situations where professional help may be needed:
– The light won’t reset after multiple attempts.
– The maintenance light comes back on immediately after resetting.
– You’re unsure which reset procedure applies to your model.
– Your RAV4 has a check engine light or other warning lights on.
In these cases, a certified Toyota technician can diagnose the issue using specialized tools and ensure everything is working correctly.
Using Aftermarket Scan Tools
Some owners use OBD2 scanners to reset maintenance lights. While these tools can work, they’re often overkill for this simple task. Most RAV4 models don’t require a scanner, and the built-in reset procedure is faster and free.
Save the scanner for more complex diagnostics, like reading trouble codes or checking sensor data.
Maintaining Your Toyota RAV4 Beyond the Reset
Resetting the maintenance light is just one part of keeping your RAV4 in great shape. To get the most out of your SUV, follow these additional tips:
Follow the Maintenance Schedule
Your owner’s manual outlines a detailed maintenance schedule based on mileage and time. Stick to it, especially for critical services like oil changes, brake inspections, and coolant flushes.
Toyota recommends oil changes every 5,000 to 10,000 miles, depending on driving conditions. Use high-quality synthetic oil for better engine protection.
Check Fluid Levels Regularly
Even between services, check your oil, coolant, brake fluid, and windshield washer fluid. Low levels can lead to engine damage or reduced performance.
Keep a small toolkit in your RAV4 with a flashlight and basic tools for quick checks.
Inspect Tires and Brakes
Tire pressure affects fuel economy and safety. Check it monthly and adjust as needed. Rotate tires every 5,000 to 7,500 miles to ensure even wear.
Listen for squeaking or grinding when braking—these sounds may indicate worn brake pads.
Keep Records
Maintain a log of all services, including dates, mileage, and work performed. This helps track your RAV4’s history and increases resale value.
Use a notebook, app, or online service tracker to stay organized.
Drive Smart
Your driving habits impact your RAV4’s longevity. Avoid rapid acceleration, hard braking, and excessive idling. These behaviors increase wear and trigger the maintenance light sooner.
Plan routes to minimize stop-and-go traffic when possible, and allow your engine to warm up gently in cold weather.
Conclusion: Stay on Top of Your RAV4’s Health
Resetting the maintenance light on your Toyota RAV4 is a simple but important task that ensures your vehicle’s service reminders stay accurate. Whether you drive a brand-new hybrid or a trusty 2006 model, the process is quick, free, and completely doable at home.
By following the correct steps for your model year, avoiding common mistakes, and staying consistent with maintenance, you’ll keep your RAV4 running smoothly for years to come. Remember, the light is there to help—not hassle—you. Reset it after every service, and your SUV will thank you with reliable performance, better fuel economy, and fewer surprises down the road.
Taking care of your RAV4 doesn’t have to be complicated. With a little knowledge and attention, you can handle routine maintenance like a pro. So the next time that little light pops up, don’t stress—just grab your keys, follow this guide, and reset it with confidence.
Frequently Asked Questions
How often should I reset the maintenance light on my Toyota RAV4?
You should reset the maintenance light every time you complete an oil change or scheduled service. This ensures the system accurately tracks the next service interval. Most RAV4 owners reset it every 5,000 to 10,000 miles.
Can I reset the maintenance light myself, or do I need a mechanic?
Yes, you can reset it yourself on most RAV4 models using the trip button or steering wheel controls. No special tools or mechanic visit is required unless the light won’t reset or comes back on immediately.
Why won’t my Toyota RAV4 maintenance light turn off after resetting?
If the light won’t turn off, you may have released the button too early, used the wrong procedure, or there could be an underlying issue. Try the reset again, and if it persists, consult a Toyota technician.
Does resetting the maintenance light affect my warranty?
No, resetting the maintenance light does not affect your warranty. It’s a standard procedure recommended by Toyota to keep service records accurate. Just ensure actual maintenance is performed as scheduled.
What’s the difference between the maintenance light and the check engine light?
The maintenance light reminds you of scheduled service like oil changes, while the check engine light indicates a potential mechanical or emissions problem. The check engine light requires immediate attention.
Do I need to reset the light if I only changed the oil filter?
If you only replaced the oil filter without changing the oil, you may not need to reset the light. However, if you performed a full oil change, always reset the light to maintain accurate tracking.