
Clearing the maintenance light on your Toyota RAV4 is a simple DIY task that takes just minutes. Whether you’ve completed an oil change or routine service, resetting the light ensures your vehicle’s dashboard accurately reflects your car’s condition.
Key Takeaways
- Know your model year: Reset procedures vary slightly between RAV4 generations, so identify your vehicle’s year first.
- Use the trip meter button: Most RAV4 models rely on the odometer/trip button to navigate the reset process.
- Turn the ignition on (not start): You don’t need to start the engine—just turn the key to the “ON” position.
- Follow the sequence carefully: Timing and button presses matter; rushing can cause you to miss the reset window.
- Confirm the reset: The maintenance light should disappear after completing the steps correctly.
- When to seek help: If the light won’t reset, there may be an underlying issue requiring professional diagnosis.
- Keep records: Always log your maintenance to stay on top of future service needs.
📑 Table of Contents
Why Does the Maintenance Light Come On?
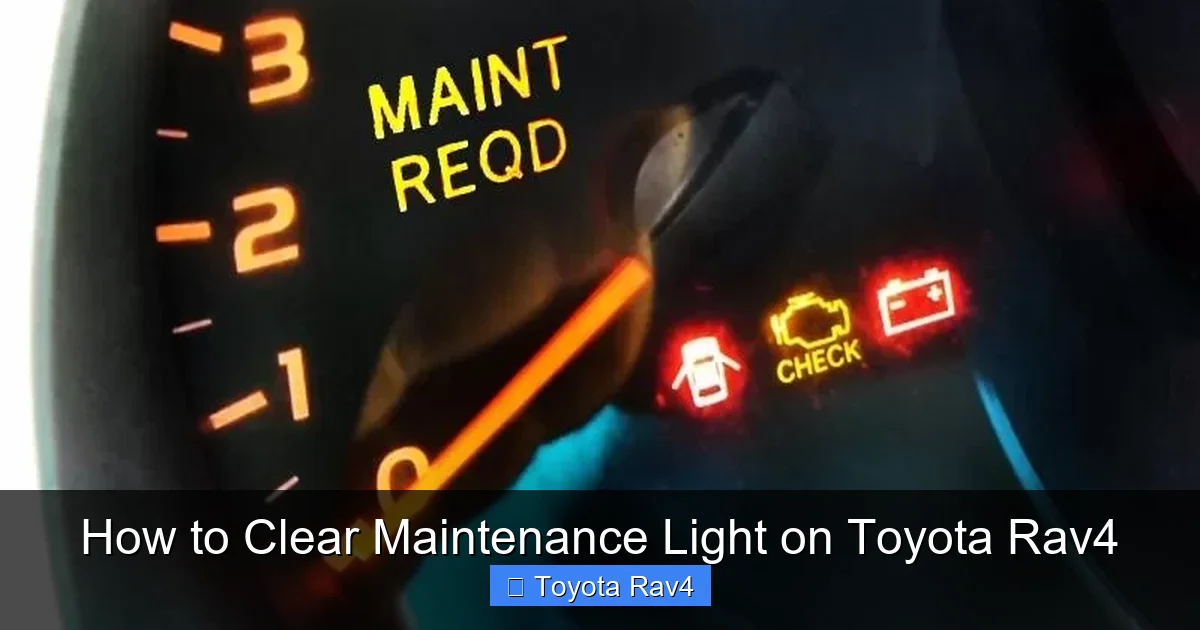
The maintenance light on your Toyota RAV4 isn’t a warning of danger—it’s a friendly reminder. Toyota designed this feature to help owners stay on track with routine service, like oil changes, tire rotations, and brake inspections. Think of it as your car’s way of saying, “Hey, it’s time for a little TLC!”
This light, often labeled “MAINT REQD” or “SERVICE,” appears based on mileage intervals or time elapsed since the last reset. It’s part of Toyota’s Maintenance Reminder System, which tracks driving conditions and usage patterns. Unlike a check engine light, which signals a potential mechanical issue, the maintenance light is purely informational. Still, ignoring it can lead to missed services, which might affect your RAV4’s performance and longevity.
How the System Works
Toyota’s system uses a combination of mileage and time to trigger the reminder. For example, it may activate after 5,000 miles or six months—whichever comes first. Some newer models even adjust intervals based on driving habits, such as frequent short trips or towing, which can increase wear and tear.
Once the light appears, it will stay on until manually reset. That’s why resetting it after each service is crucial. If you don’t, you’ll keep seeing the reminder even after completing the required maintenance. Fortunately, the process is straightforward and doesn’t require special tools or a trip to the dealership.
Tools You’ll Need
Good news: You don’t need any fancy equipment to clear the maintenance light on your Toyota RAV4. All you need is your vehicle, your hands, and about two minutes of your time. However, having a few things nearby can make the process smoother.
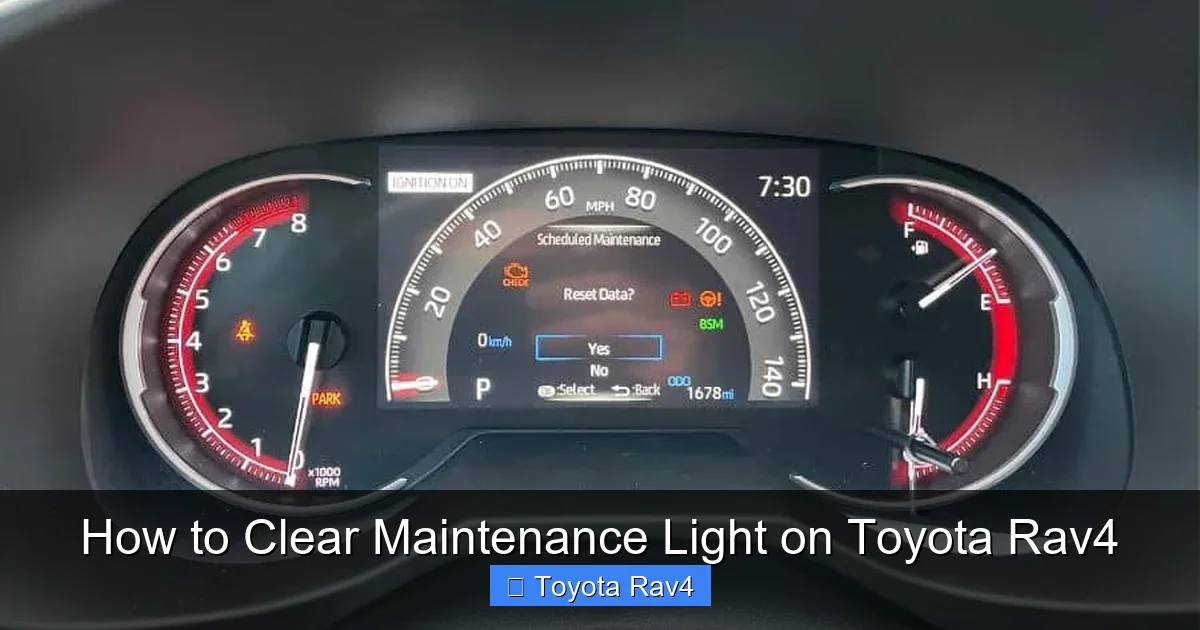
Visual guide about How to Clear Maintenance Light on Toyota Rav4
Image source: towingless.com
Basic Requirements
- Ignition key or key fob: You’ll need to turn the ignition to the “ON” position.
- Access to the dashboard: Make sure you can reach the trip meter button (usually near the speedometer).
- A quiet environment: Distractions can cause you to miss a step, so find a calm spot to work.
Optional but Helpful
- Owner’s manual: If you’re unsure about your RAV4’s specific reset procedure, the manual is your best friend.
- Smartphone timer: Some steps require holding buttons for a set time—a timer can help you stay accurate.
- Notebook or app: Jot down the date and mileage when you reset the light to track future services.
Remember, you don’t need to disconnect the battery or use an OBD2 scanner. Toyota made this process user-friendly so owners can handle it themselves. That said, if you’re uncomfortable or the light won’t reset, a quick visit to a trusted mechanic can save you time and stress.
Step-by-Step Guide for 2013–2018 Toyota RAV4
If you own a Toyota RAV4 from 2013 to 2018, you’re in luck—the reset process is one of the simplest. These models use a trip meter button to navigate the dashboard menu. Follow these steps carefully to clear the maintenance light.
Step 1: Turn the Ignition to “ON”
Insert your key into the ignition and turn it to the “ON” position. You’ll see the dashboard lights up, but don’t start the engine. If you have a push-button start, press the “Start” button twice without pressing the brake pedal. This powers the electronics without cranking the motor.
Step 2: Locate the Trip Meter Button
Look at your instrument cluster. You’ll see a small button near the speedometer labeled “Trip” or “Odo/Trip.” This button toggles between trip A, trip B, and odometer readings. It’s also your key to resetting the maintenance light.
Step 3: Navigate to Trip A
Press the trip meter button repeatedly until “Trip A” appears on the display. This is important because the reset function only works when Trip A is active. If you see “Trip B” or the total odometer, keep pressing until you land on Trip A.
Step 4: Turn Off the Ignition
Once Trip A is displayed, turn the ignition back to the “OFF” position. Don’t remove the key yet—just switch it off. This prepares the system for the reset sequence.
Step 5: Press and Hold the Trip Button
With the ignition off, press and hold the trip meter button. Keep it held down as you turn the ignition back to “ON.” You’ll see the maintenance light flash or stay on—this is normal.
Step 6: Wait for the Light to Reset
Continue holding the trip button for about 5–10 seconds. The maintenance light will begin to blink, then turn off completely. Once it’s off, release the button. The system has been reset, and your RAV4 will now track the next service interval.
Step 7: Confirm the Reset
Turn the ignition off and then back on to verify the light is gone. If it’s still on, repeat the steps carefully. Sometimes, a missed step or timing issue can prevent the reset. Don’t worry—it’s not uncommon to need a second try.
Pro Tip: If the light resets but comes back on immediately, double-check that you completed the required maintenance. The system won’t stay off if the service wasn’t performed.
Step-by-Step Guide for 2019–2024 Toyota RAV4
Newer RAV4 models (2019 and later) feature updated infotainment systems and slightly different reset procedures. While the core idea remains the same, the steps involve the multi-information display (MID) and steering wheel controls. Here’s how to clear the maintenance light on these vehicles.
Step 1: Turn the Ignition to “ON”
As with older models, start by turning the ignition to “ON” without starting the engine. For push-button start, press the “Start” button twice without touching the brake.
Step 2: Access the Multi-Information Display
Use the arrow buttons on your steering wheel to navigate to the “Settings” menu on the MID. This screen shows trip data, fuel economy, and maintenance info. Scroll until you find the “Vehicle Settings” or “Maintenance” option.
Step 3: Select “Maintenance Reset”
Highlight the “Maintenance Reset” or “Oil Maintenance” option and press the “OK” or “Enter” button. You’ll see a prompt asking if you want to reset the maintenance light.
Step 4: Confirm the Reset
Press “Yes” or “OK” to confirm. The system will process the request, and the maintenance light should disappear from the dashboard. If prompted, enter the current mileage to set the next service interval.
Step 5: Exit the Menu
Once the reset is complete, exit the settings menu. Turn the ignition off and then back on to ensure the light stays off. Your RAV4 is now ready for the next service cycle.
Note: Some 2021–2024 models may require you to press and hold the “Trip” button on the instrument cluster instead of using the steering wheel. Check your owner’s manual if the menu method doesn’t work.
Troubleshooting Common Issues
Even with clear instructions, things don’t always go as planned. If you’re having trouble clearing the maintenance light on your Toyota RAV4, don’t panic. Here are some common issues and how to fix them.
The Light Won’t Turn Off
If the maintenance light remains on after following the steps, you may have missed a detail. Double-check that you:
- Turned the ignition to “ON” without starting the engine.
- Selected the correct trip mode (Trip A for older models).
- Held the button for the full duration (5–10 seconds).
- Completed the required maintenance before resetting.
Try the process again, paying close attention to timing. If it still doesn’t work, consult your owner’s manual or visit a Toyota service center.
The Light Resets but Comes Back On
This usually means the system detected an incomplete service. For example, if you changed the oil but forgot to replace the filter, the light may return. Ensure all recommended maintenance tasks were completed. If everything was done correctly, there could be a sensor issue requiring professional diagnosis.
No Response from the Dashboard
If pressing the trip button does nothing, check your fuses. A blown fuse can disable dashboard functions. Refer to your owner’s manual for fuse locations and ratings. If fuses are fine, the issue might be electrical and should be inspected by a technician.
Model-Specific Confusion
With so many RAV4 generations, it’s easy to mix up procedures. Always confirm your model year before starting. If you’re unsure, visit Toyota’s official website or contact customer support for guidance.
Remember: Resetting the maintenance light doesn’t replace actual maintenance. It’s just a way to tell your car, “I’ve done the work—now remind me next time.”
When to Visit a Professional
While most RAV4 owners can reset the maintenance light at home, there are times when professional help is the best option. If you’ve tried the steps multiple times and the light won’t clear, it’s worth getting a second opinion.
Underlying Mechanical Issues
Sometimes, the maintenance light appears due to a real problem—like low oil pressure or a faulty sensor. If the light flashes or is accompanied by other warning signs (e.g., strange noises, reduced performance), don’t ignore it. A mechanic can run diagnostics to rule out serious issues.
Complex Reset Procedures
Hybrid RAV4 models or vehicles with advanced driver-assistance systems (ADAS) may require specialized tools to reset. In these cases, a dealership or certified technician can ensure the job is done correctly.
Warranty Considerations
If your RAV4 is still under warranty, tampering with the system could void coverage. Always check your warranty terms before attempting DIY resets. When in doubt, let the pros handle it.
Even if you’re confident in your skills, there’s no shame in asking for help. Regular maintenance keeps your RAV4 running smoothly, and professionals have the tools and expertise to get it right.
Maintaining Your RAV4 Beyond the Light
Clearing the maintenance light is just one part of vehicle care. To keep your Toyota RAV4 in top shape, follow a consistent maintenance schedule. Here’s what you should focus on.
Regular Oil Changes
Toyota recommends oil changes every 5,000 to 10,000 miles, depending on driving conditions. Use the recommended oil type (usually 0W-20 synthetic) and replace the filter each time. Keeping clean oil in your engine reduces wear and improves fuel efficiency.
Tire Care
Rotate your tires every 5,000 to 7,500 miles to ensure even wear. Check tire pressure monthly and adjust as needed. Properly inflated tires improve safety, handling, and gas mileage.
Brake Inspections
Have your brakes checked during every service visit. Worn pads or rotors can compromise stopping power and lead to costly repairs. Listen for squeaking or grinding noises—they’re early warning signs.
Fluid Levels
Regularly check and top off fluids, including coolant, brake fluid, transmission fluid, and windshield washer fluid. Low levels can cause overheating, poor performance, or system failures.
Battery Health
Test your battery annually, especially before winter. A weak battery can leave you stranded, and extreme temperatures accelerate wear. Clean terminals and ensure connections are tight.
By staying proactive, you’ll extend your RAV4’s life and avoid unexpected breakdowns. Plus, a well-maintained vehicle holds its value better when it’s time to sell or trade in.
Conclusion
Clearing the maintenance light on your Toyota RAV4 is a quick and easy task that every owner should know. Whether you drive a 2013 model or a brand-new 2024, the process is designed to be user-friendly. With just a few button presses, you can reset the reminder and get back to enjoying your ride.
Remember, the light is there to help you—not hassle you. By resetting it after each service, you ensure your RAV4’s dashboard accurately reflects its condition. And by following a regular maintenance schedule, you’ll keep your vehicle running smoothly for years to come. So the next time that little light pops up, don’t stress. Grab your keys, follow the steps, and reset it like a pro.
Frequently Asked Questions
How often should I reset the maintenance light on my Toyota RAV4?
You should reset the maintenance light after every scheduled service, such as an oil change or tire rotation. This ensures the next reminder appears at the correct interval.
Can I reset the maintenance light without completing the service?
Technically, yes—but it’s not recommended. Resetting the light without performing maintenance can lead to missed services and potential damage to your vehicle.
Why won’t my maintenance light turn off after resetting?
This could be due to an incomplete reset process, a sensor issue, or unperformed maintenance. Double-check your steps or consult a mechanic if the problem persists.
Do I need a special tool to reset the maintenance light?
No. Most Toyota RAV4 models allow you to reset the light using the trip meter button or steering wheel controls. No OBD2 scanner or special equipment is needed.
Will resetting the maintenance light affect my warranty?
No, as long as you’ve completed the required maintenance. However, if your vehicle is under warranty, check the terms to ensure DIY resets are allowed.
What if my RAV4 has a hybrid system?
Hybrid RAV4 models may require slightly different procedures. Consult your owner’s manual or visit a Toyota service center for guidance specific to hybrid vehicles.