
This guide walks you through how to adf light strip to rear of suv with clear, easy-to-follow steps. You’ll learn about tools, wiring, mounting, and safety to achieve a sleek, functional upgrade.
Key Takeaways
- Choose the right LED light strip: Look for waterproof, flexible strips with strong adhesive backing and compatible voltage (12V for most SUVs).
- Plan your installation path: Decide where the lights will go—tailgate, bumper, or underbody—and measure the area to ensure proper fit.
- Use proper wiring techniques: Connect to the SUV’s reverse lights or running lights using a relay and fuse for safety and reliability.
- Secure the strip firmly: Clean the surface, use zip ties or mounting clips for extra hold, and avoid areas with heat or moving parts.
- Test before finalizing: Power on the lights before sealing everything to catch wiring or placement issues early.
- Follow local laws: Ensure your light color and brightness comply with traffic regulations to avoid fines.
- Maintain regularly: Check connections and clean the strips periodically to keep them working and looking great.
Introduction: Why Add an ADF Light Strip to Your SUV?
Adding an ADF (Auxiliary Driving Function) light strip to the rear of your SUV isn’t just about style—it’s about safety, visibility, and personalization. Whether you’re off-roading at night, backing up in a dimly lit driveway, or simply want your vehicle to stand out, rear-mounted LED light strips can make a big difference. These strips provide extra illumination, improve rear visibility, and can even serve as auxiliary brake or reverse lights when wired correctly.
In this comprehensive guide, you’ll learn how to adf light strip to rear of suv the right way. We’ll cover everything from choosing the best LED strip for your needs, gathering the right tools, planning the installation, wiring it safely, and troubleshooting common issues. By the end, you’ll have a professional-looking, functional lighting upgrade that enhances both the look and performance of your SUV.
This guide is designed for DIY enthusiasts of all skill levels. You don’t need to be an expert mechanic—just follow the steps carefully, take your time, and prioritize safety. Let’s get started!
What Is an ADF Light Strip?
Visual guide about How to Adf Light Strip to Rear of Suv
Image source: m.media-amazon.com
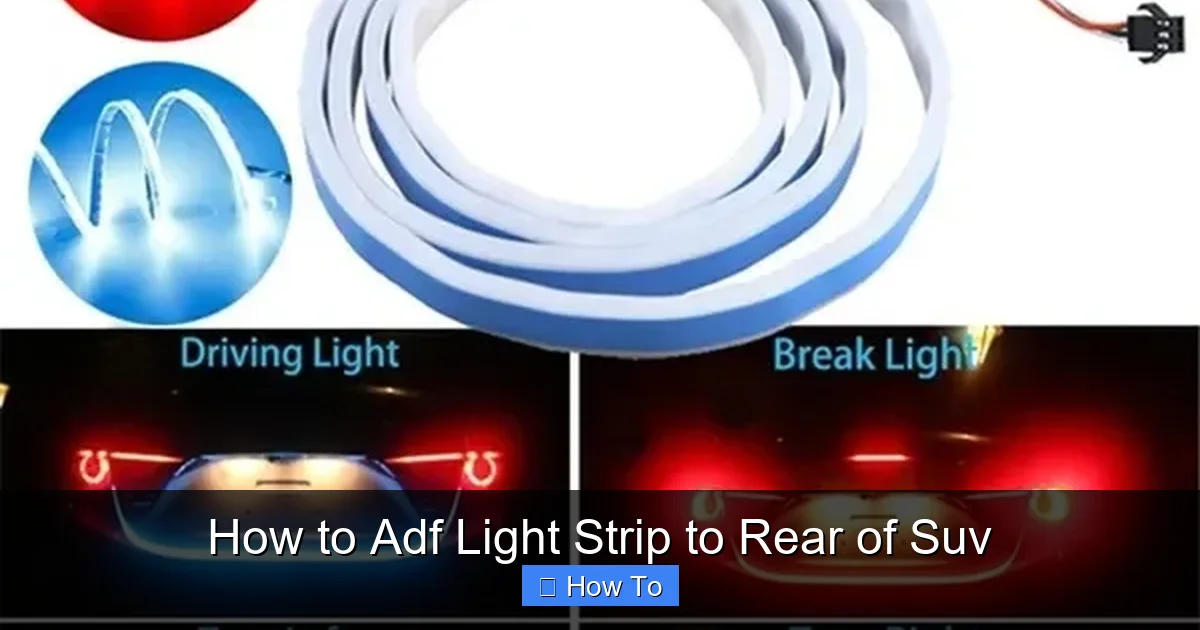
Before diving into the installation, it’s important to understand what an ADF light strip is and how it differs from regular LED lights. ADF stands for Auxiliary Driving Function, which refers to lighting systems that support or enhance the vehicle’s standard lighting functions. These aren’t just decorative—they’re designed to improve visibility and safety.
An ADF light strip typically consists of a flexible, waterproof LED strip that can be mounted on the rear bumper, tailgate, or underbody of your SUV. They often come in white, red, or amber colors, depending on their intended use:
– White strips are ideal for reverse lighting—they illuminate the ground behind your vehicle when you shift into reverse.
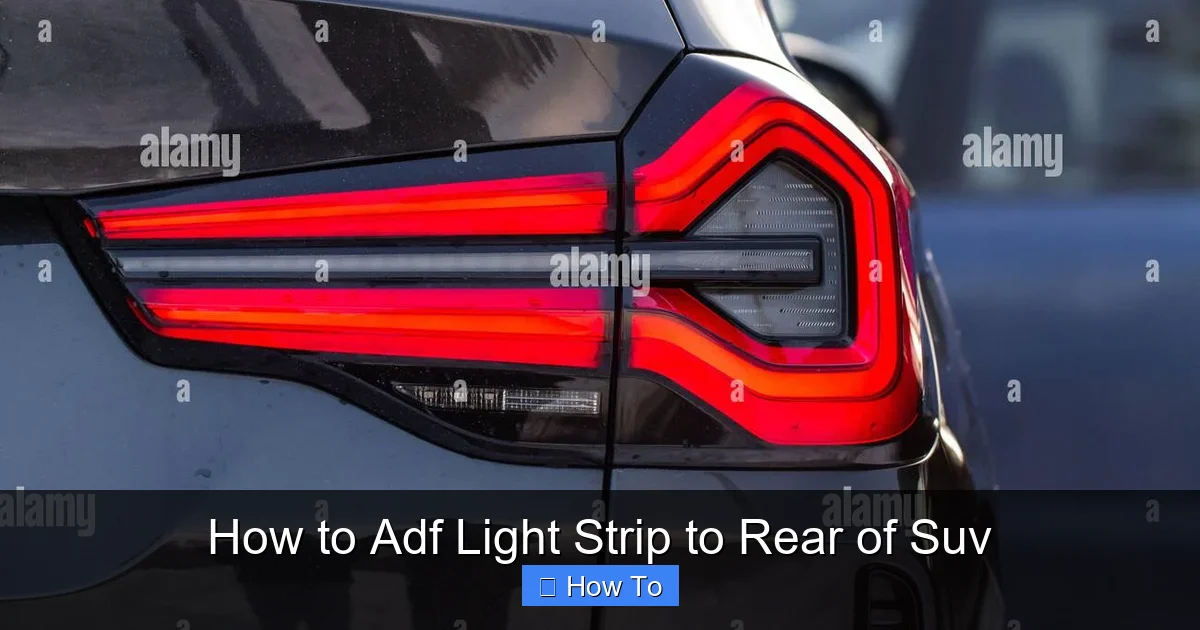
– Red strips can double as auxiliary brake lights, lighting up brighter when you press the brake pedal.
– Amber strips are great for turn signals or hazard lighting, especially in off-road or emergency situations.
These strips are usually low-profile, energy-efficient, and easy to install. Many come with adhesive backing, but for long-term durability, additional mounting hardware is recommended.
Tools and Materials You’ll Need
Visual guide about How to Adf Light Strip to Rear of Suv
Image source: c8.alamy.com
Before you begin, gather all the necessary tools and materials. Having everything ready will make the process smoother and reduce the chance of mistakes.
Essential Tools
- LED light strip kit: Choose a high-quality, waterproof (IP67 or higher) strip with at least 12V compatibility.
- Wire strippers: For safely removing insulation from wires.
- Crimping tool and connectors: To join wires securely.
- Electrical tape or heat shrink tubing: For insulating connections.
- Drill and drill bits: For creating access holes if needed.
- Screwdrivers (Phillips and flathead): For removing panels or brackets.
- Zip ties and mounting clips: To secure the strip and wires.
- Multimeter: To test voltage and continuity.
- Fuse tap and inline fuse: For safe power connection.
- Relay (optional but recommended): Helps manage power load and protects your SUV’s electrical system.
Optional but Helpful
- Trim removal tools: Prevent damage when prying off interior panels.
- Heat gun: For shrinking heat tubing.
- Silicone sealant: To waterproof drilled holes.
- Wire loom or conduit: Protects wires from abrasion.
Safety Gear
- Gloves: Protect your hands from sharp edges.
- Safety glasses: Prevent debris from getting in your eyes.
- Work light: Ensures good visibility during installation.
Choosing the Right LED Light Strip
Not all LED strips are created equal. Picking the right one is crucial for performance, longevity, and safety.
Key Features to Look For
- Waterproof rating: Look for IP67 or IP68. This ensures the strip can handle rain, snow, and car washes.
- Brightness (measured in lumens): Higher lumens mean brighter light. For rear use, 500–1000 lumens is usually sufficient.
- Flexibility: The strip should bend easily to fit curved surfaces like bumpers or tailgates.
- Adhesive quality: Strong 3M adhesive backing is ideal, but always reinforce with clips or zip ties.
- Color options: Choose based on function—white for reverse, red for brake, amber for turn signals.
- Cuttable design: Many strips can be cut to length at marked points, allowing a custom fit.
Recommended Length and Placement
Measure the area where you plan to install the strip. Common placements include:
– Along the bottom edge of the tailgate
– Under the rear bumper
– On either side of the license plate
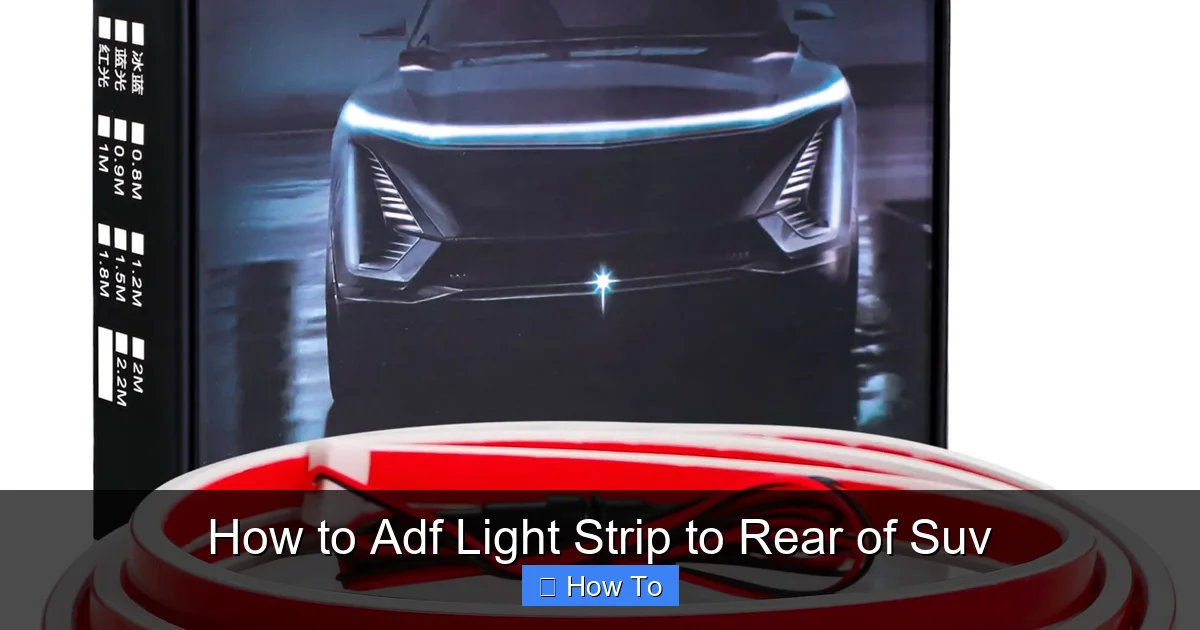
For most SUVs, a 24-inch to 36-inch strip works well. If you want full coverage, consider two shorter strips instead of one long one—this improves flexibility and reduces strain on the adhesive.
Planning the Installation
A successful install starts with smart planning. Rushing this step can lead to poor placement, wiring issues, or even damage to your SUV.
Step 1: Decide on Function
Ask yourself: What do you want the light strip to do?
– Reverse lights: Wire to the reverse light circuit so they turn on when you shift into reverse.
– Brake lights: Connect to the brake light wire so they brighten when you press the pedal.
– Running lights: Turn on with the headlights for constant visibility.
– Turn signals: Sync with the turn signal circuit (requires a special controller).
Most people choose reverse or brake lighting for rear strips, as they enhance safety without causing distraction.
Step 2: Choose the Mounting Location
Consider these factors:
– Visibility: The strip should be seen by drivers behind you, but not blind them.
– Protection: Avoid areas exposed to excessive heat (like near exhaust) or moving parts (like suspension).
– Accessibility: Make sure you can reach the area for wiring and maintenance.
Popular spots include:
– The underside of the tailgate (great for reverse lighting)
– The rear bumper (ideal for underglow or accent lighting)
– Above or below the license plate (subtle but effective)
Step 3: Measure and Mark
Use a tape measure to determine the exact length needed. Mark the start and end points with painter’s tape. This helps you visualize the final look and ensures even placement.
Step 4: Plan the Wiring Route
Trace the path from the light strip to the power source. You’ll likely need to run wires through the vehicle’s interior or underbody. Look for existing grommets or holes in the firewall or trunk area to pass wires safely.
Avoid sharp edges, hot surfaces, and areas with high vibration. Use wire loom or conduit to protect the wires.
Step-by-Step Installation Guide
Now that you’ve planned everything, it’s time to install the ADF light strip. Follow these steps carefully.
Step 1: Disconnect the Battery
Safety first! Disconnect the negative terminal of your SUV’s battery to prevent electrical shorts or shocks while working.
Step 2: Remove Interior Panels (If Needed)
To run wires neatly, you may need to remove trunk liners, tailgate panels, or rear trim. Use a trim removal tool to avoid damaging clips or surfaces.
Step 3: Mount the Light Strip
- Clean the mounting surface with isopropyl alcohol to remove dirt, grease, and wax.
- Peel off the adhesive backing and press the strip firmly into place.
- Use zip ties or mounting clips every 6–8 inches to secure the strip, especially at the ends and curves.
- If drilling is needed for clips, use a small bit and seal the hole with silicone to prevent water intrusion.
Step 4: Run the Wires
- Route the wires from the strip to the desired power source (e.g., reverse light wire).
- Use existing wire channels or grommets to pass through the body.
- Secure wires with zip ties every 12 inches to prevent sagging or snagging.
- Wrap exposed wires in electrical tape or heat shrink tubing.
Step 5: Connect to Power
This is the most critical step. Incorrect wiring can damage your SUV’s electrical system or cause the lights to fail.
Option A: Connect to Reverse Lights (Recommended for White Strips)
- Locate the reverse light wire in the rear light harness. Use a multimeter to confirm it’s live only when in reverse.
- Tap into the wire using a fuse tap or T-tap connector.
- Connect the positive wire from the LED strip to this wire.
- Ground the negative wire to a clean metal surface on the chassis (sand the area first for better contact).
- Install an inline fuse (5A–10A) near the power source to protect the circuit.
Option B: Connect to Brake Lights (For Red Strips)
- Find the brake light wire (usually red or green).
- Use a relay if the strip draws more than 5 amps to avoid overloading the brake circuit.
- Wire the relay so the strip activates when the brake pedal is pressed.
- Always fuse the power line.
Option C: Connect to Running Lights
- Tap into the tail light or parking light wire.
- This will turn the strip on whenever the headlights are on.
- Use a relay if needed.
Step 6: Test the Lights
Before reassembling everything, reconnect the battery and test the lights.
– Shift into reverse to check reverse lighting.
– Press the brake pedal to test brake activation.
– Turn on the headlights for running lights.
If the lights don’t turn on, double-check connections, fuses, and grounding.
Step 7: Secure and Reassemble
- Once everything works, secure all wires with zip ties and loom.
- Reinstall any removed panels or trim.
- Tuck excess wire neatly out of sight.
Troubleshooting Common Issues
Even with careful planning, problems can arise. Here’s how to fix the most common ones.
Lights Don’t Turn On
- Check the fuse—replace if blown.
- Test the power source with a multimeter to ensure it’s live.
- Verify ground connection—clean and tighten if necessary.
- Inspect wire connections for looseness or corrosion.
Lights Flicker or Dim
- This often indicates a poor ground. Re-sand and reattach the ground wire.
- Check for voltage drop—use thicker wire if the run is long.
- Ensure the power source can handle the load (use a relay if needed).
Adhesive Fails
- Clean the surface thoroughly before applying.
- Use additional mounting clips or brackets.
- Avoid mounting on textured or uneven surfaces.
Water Damage
- Ensure the strip is rated IP67 or higher.
- Seal all connections with silicone or heat shrink tubing.
- Avoid placing strips in areas that collect water.
Overheating
- LED strips can get warm—ensure proper ventilation.
- Don’t coil excess strip tightly; cut it to size instead.
- Use a heat sink or aluminum channel if mounting in enclosed spaces.
Legal and Safety Considerations
Before hitting the road, make sure your installation complies with local laws.
Color Restrictions
– Red lights: Only allowed on the rear and must not flash (unless for brake lights).
– White lights: Can face rearward only if used for reverse lighting.
– Amber lights: Often permitted for turn signals or hazard use.
Avoid blue, green, or flashing lights unless explicitly allowed (e.g., for emergency vehicles).
Brightness and Distraction
– Lights should be bright enough to be seen, but not so bright they blind other drivers.
– Avoid pulsing or strobe effects unless for emergency use.
Inspection and Registration
Some states require vehicle inspections that include lighting. Check your local DMV rules to avoid fines or failed inspections.
Maintenance Tips
To keep your ADF light strip working well for years:
- Clean the strip monthly with a damp cloth to remove dirt and grime.
- Check connections and mounts every few months.
- Inspect for cracks, discoloration, or moisture inside the strip.
- Replace any damaged sections promptly.
Conclusion
Adding an ADF light strip to the rear of your SUV is a rewarding DIY project that boosts safety, visibility, and style. By following this guide on how to adf light strip to rear of suv, you’ve learned how to choose the right strip, plan the installation, wire it safely, and troubleshoot issues. With the right tools and attention to detail, you can achieve a clean, professional result that enhances your driving experience.
Remember to prioritize safety, follow local laws, and test everything before finalizing the install. Whether you’re lighting up the trail or just improving nighttime visibility, your SUV will look and perform better with this simple upgrade. Happy installing!