

Opening your Toyota RAV4 key fob doesn’t have to be tricky. Whether you need to replace the battery, clean internal components, or troubleshoot a malfunction, this guide walks you through the process safely and efficiently—no special tools required.
If you’ve ever found yourself staring at your Toyota RAV4 key fob, wondering how to pop it open to change the battery or inspect its inner workings, you’re not alone. These sleek, compact devices are essential for modern vehicle access, offering keyless entry, remote start, and panic alarms—all in one handheld unit. But despite their high-tech appearance, most Toyota RAV4 key fobs are designed to be user-serviceable, especially when it comes to replacing the battery. The good news? You don’t need to be a mechanic or carry a toolkit to get the job done.
Opening a Toyota RAV4 key fob might seem intimidating at first, especially if you’re worried about cracking the plastic casing or damaging delicate internal circuits. But with the right approach, it’s actually a straightforward process that takes just a few minutes. Whether you’re driving a 2010 RAV4 or a brand-new 2024 model, the basic principles remain similar. The key is understanding the design differences between model years and knowing which steps apply to your specific fob. In this comprehensive guide, we’ll walk you through everything you need to know—from identifying your key fob type to safely opening it, replacing the battery, and reassembling it without a hitch.
We’ll also cover common mistakes to avoid, tools that make the job easier, and troubleshooting tips if your fob stops responding after reassembly. By the end of this article, you’ll feel confident handling your RAV4 key fob like a pro. So grab your fob, find a well-lit workspace, and let’s get started.
Key Takeaways
- Know your key fob model: Toyota RAV4 key fobs vary by year and trim, so identifying your specific type is the first step to opening it correctly.
- Use the right tools: A small flathead screwdriver or a plastic prying tool helps avoid scratches and damage during disassembly.
- Remove the mechanical key first: Most RAV4 key fobs have a hidden physical key that must be extracted before opening the casing.
- Handle the battery carefully: Use non-conductive tools and avoid touching the battery terminals to prevent static discharge or short circuits.
- Reassemble in reverse order: Take photos during disassembly to ensure proper alignment when putting the fob back together.
- Test functionality after reassembly: Always test lock, unlock, and panic buttons to confirm everything works before relying on the fob.
- Seek professional help if unsure: If the fob cracks or components appear damaged, consult a Toyota dealer or locksmith to avoid further issues.
📑 Table of Contents
Understanding Your Toyota RAV4 Key Fob
Before you even think about prying open your key fob, it’s important to understand what you’re working with. Toyota has released several versions of the RAV4 key fob over the years, and while they share similar functions, their designs can vary significantly. Knowing your specific model helps ensure you use the correct method to open it without causing damage.
Identifying Your Key Fob Model
Toyota RAV4 key fobs generally fall into three main categories based on model years:
– **Pre-2013 Models:** These typically feature a rectangular fob with a sliding mechanical key. The key is released by pressing a small button on the side, and the fob opens by sliding the two halves apart.
– **2013–2018 Models:** These often have a more rounded, compact design with a flip-out mechanical key. The key is stored inside the fob and flips out when needed.
– **2019–Present Models:** The latest RAV4s come with advanced smart key fobs that may include proximity sensors, push-button start compatibility, and a more seamless, buttonless design. Some even have a hidden key release mechanism.
To identify your fob, look at the back or side for a small button or release latch. If you see a tiny button near the keyring loop, it likely contains a hidden mechanical key. Newer models may have a small indentation or seam where the two halves meet. You can also check your owner’s manual or visit Toyota’s official website and enter your VIN to find the exact key fob model for your vehicle.
Common Features and Functions
Regardless of the model, most Toyota RAV4 key fobs include the following buttons:
– **Lock:** Secures all doors and activates the alarm system.
– **Unlock:** Opens the driver’s door (or all doors, depending on settings).
– **Trunk Release:** Opens the rear cargo area (on models with power liftgate).
– **Panic Alarm:** Triggers the vehicle’s horn and lights for emergency situations.
– **Remote Start (on select trims):** Allows you to start the engine from a distance using a sequence of button presses.
Some newer fobs also support passive entry—meaning you can unlock the car simply by touching the door handle while the fob is in your pocket or bag. These smart fobs often have a more complex internal layout, so extra care is needed when opening them.
Why You Might Need to Open the Key Fob
There are several reasons you might need to open your Toyota RAV4 key fob:
– **Battery Replacement:** The most common reason. Most key fob batteries last 2–4 years, and when they die, the fob stops working.
– **Cleaning:** Dust, dirt, or moisture can accumulate inside the fob, affecting button responsiveness.
– **Button Repair:** If a button becomes sticky or unresponsive, opening the fob allows you to clean or reposition the contact pads.
– **Water Damage:** If your fob gets wet, opening it to dry the interior can prevent corrosion.
– **Upgrades or Modifications:** Some owners replace the casing with a custom design or add signal boosters.
Understanding why you’re opening the fob helps you prepare the right tools and take the necessary precautions.
Tools You’ll Need to Open the Key Fob
Visual guide about How to Open Toyota Rav4 Key Fob
Image source: m.media-amazon.com
You don’t need a full toolbox to open your Toyota RAV4 key fob, but having the right tools makes the process much smoother and reduces the risk of damage. Here’s what we recommend:
Essential Tools
– **Small Flathead Screwdriver (1.5–2mm):** Ideal for prying open the fob casing. A precision screwdriver set works well.
– **Plastic Prying Tool or Guitar Pick:** These are gentler on plastic and help avoid scratches or cracks.
– **Tweezers:** Useful for handling small components like the battery or contact springs.
– **Soft Cloth or Microfiber Towel:** Protects the fob surface and provides a clean workspace.
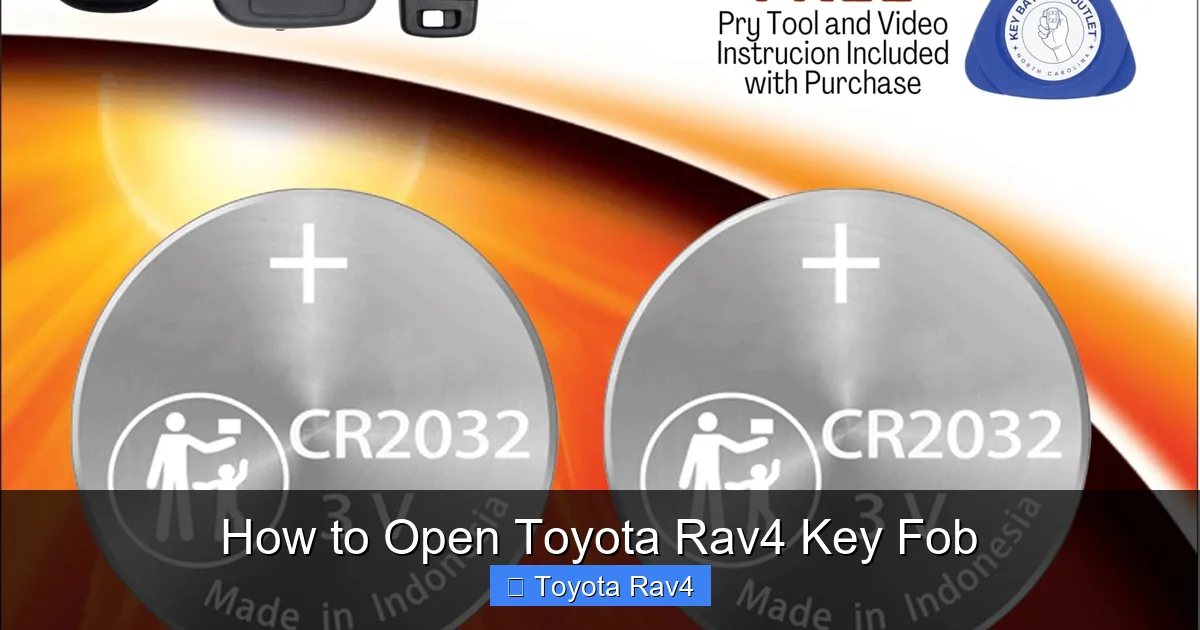
– **Replacement Battery (CR2032):** Most Toyota RAV4 key fobs use this common coin cell battery.
Optional but Helpful Tools
– **Flashlight:** Helps you see small components and seams clearly.
– **Magnifying Glass:** Useful for inspecting tiny contact points or solder joints.
– **Isopropyl Alcohol and Cotton Swabs:** For cleaning internal components.
– **Digital Camera or Phone:** Take photos during disassembly to remember how parts fit together.
What NOT to Use
Avoid using sharp metal tools like knives, large screwdrivers, or pliers. These can easily crack the plastic casing or damage the internal circuitry. Also, never use excessive force—most fobs are designed to open with gentle pressure.
Step-by-Step Guide to Opening Your Toyota RAV4 Key Fob
Now that you’ve identified your fob and gathered your tools, it’s time to open it. Follow these step-by-step instructions based on your key fob type. Always work on a flat, well-lit surface to avoid losing small parts.
Step 1: Remove the Mechanical Key
Most Toyota RAV4 key fobs have a hidden mechanical key stored inside. This key is used as a backup to manually unlock the door if the battery dies or the fob fails.
– **For Flip-Out Keys (2013–2018):** Look for a small button on the side of the fob, usually near the keyring loop. Press and hold the button, then pull the key out gently.
– **For Sliding Keys (Pre-2013):** Slide the keyring loop to the side to reveal a release button. Press it and slide the key out.
– **For Smart Keys (2019+):** Some models have a hidden key release. Look for a small indentation on the side. Insert a flathead screwdriver and gently twist to pop out the key.
Once the key is removed, set it aside in a safe place.
Step 2: Locate the Seam and Prying Points
The key fob casing is held together by clips along the edges. Look for a thin seam running around the perimeter of the fob. This is where the two halves meet.
– Use your fingernail or a plastic tool to feel for the seam.
– Avoid areas with buttons or the antenna (usually near the top), as these are more fragile.
Step 3: Gently Pry Open the Casing
This is the most delicate part of the process. Apply gentle, even pressure to avoid cracking the plastic.
– Insert the tip of your flathead screwdriver or plastic prying tool into the seam, preferably near the bottom or side.
– Slowly work your way around the fob, gently twisting the tool to separate the clips.
– Do not force it—if it doesn’t open easily, check for missed clips or a hidden release mechanism.
Step 4: Separate the Two Halves
Once all clips are released, carefully lift the top half of the fob. You’ll see the internal circuit board, battery, and button contacts.
– Hold both halves firmly to avoid dropping components.
– If the circuit board is attached to one half, note its orientation before removing it.
Step 5: Remove the Battery
The battery is usually held in place by a small metal clip or plastic bracket.
– Use tweezers or a non-conductive tool to gently lift the battery out.
– Note the orientation of the battery (positive side up or down) so you can replace it correctly.
– Dispose of the old battery responsibly—most hardware stores accept used batteries for recycling.
Step 6: Inspect and Clean (Optional)
With the fob open, take a moment to inspect the interior.
– Use a cotton swab dipped in isopropyl alcohol to clean the contact points under the buttons.
– Check for corrosion, dirt, or moisture.
– If the circuit board looks dirty, gently wipe it with a dry cloth.
Step 7: Replace the Battery
Insert the new CR2032 battery with the correct orientation (usually positive side up).
– Press it gently into place until it clicks.
– Ensure it’s secure and doesn’t wobble.
Step 8: Reassemble the Fob
Putting the fob back together is the reverse of opening it.
– Align the two halves carefully, making sure the circuit board and buttons are properly seated.
– Press the halves together firmly until you hear or feel the clips snap into place.
– Reinsert the mechanical key.
Step 9: Test the Fob
Before you put the fob back in your pocket, test all functions:
– Press the lock and unlock buttons to ensure they respond.
– Try the panic button and trunk release (if applicable).
– If your vehicle has remote start, test that feature as well.
If any button doesn’t work, reopen the fob and check the alignment of the contact pads.
Troubleshooting Common Issues
Even with careful handling, things can go wrong. Here are some common problems and how to fix them.
Fob Won’t Open
– **Cause:** Stuck clips or dried adhesive.
– **Solution:** Apply a small amount of isopropyl alcohol to the seam and let it sit for a minute. Then gently pry again. Avoid excessive force.
Buttons Don’t Work After Reassembly
– **Cause:** Misaligned contact pads or loose circuit board.
– **Solution:** Open the fob and check that the rubber button contacts are aligned with the circuit board. Press them down gently.
Battery Drains Quickly
– **Cause:** Defective battery, moisture, or a short circuit.
– **Solution:** Replace the battery with a high-quality brand (like Panasonic or Duracell). If the problem persists, inspect for corrosion or damage.
Fob Cracked During Opening
– **Cause:** Too much force or using the wrong tool.
– **Solution:** Small cracks can sometimes be repaired with plastic glue, but for safety and functionality, consider replacing the fob. Contact a Toyota dealer for a genuine replacement.
Mechanical Key Stuck
– **Cause:** Dirt or misalignment in the key slot.
– **Solution:** Clean the slot with compressed air or a cotton swab. Avoid forcing the key—gentle wiggling usually helps.
Tips for Maintaining Your Key Fob
To extend the life of your Toyota RAV4 key fob and avoid frequent openings, follow these maintenance tips:
– **Keep It Clean:** Wipe the exterior with a damp cloth regularly to remove dirt and oils.
– **Avoid Water Exposure:** Don’t leave your fob in wet environments like gym bags or pockets during rain.
– **Replace Batteries Promptly:** Don’t wait until the fob stops working—replace the battery every 2–3 years as a preventive measure.
– **Use a Protective Case:** Silicone or leather key fob covers can prevent scratches and absorb impact.
– **Store Properly:** Keep the fob away from magnets, extreme heat, or direct sunlight, which can damage the electronics.
When to Seek Professional Help
While most key fob issues can be resolved at home, there are times when it’s best to consult a professional.
– **If the fob is physically damaged:** Cracks, broken buttons, or water damage may require professional repair or replacement.
– **If the fob still doesn’t work after battery replacement:** The internal circuitry may be faulty.
– **If you’re uncomfortable with DIY repairs:** A Toyota service center or locksmith can safely open and service your fob.
– **For programming issues:** If your fob needs to be synced with your vehicle, a dealer or certified technician is required.
Conclusion
Opening your Toyota RAV4 key fob is a simple task that can save you time and money—especially when it comes to battery replacement. With the right tools, a little patience, and attention to detail, you can safely access the internal components, clean or repair the fob, and get back to using it reliably. Whether you’re driving an older RAV4 or the latest hybrid model, the principles remain the same: identify your fob type, remove the mechanical key, gently pry open the casing, and reassemble with care.
Remember, the key to success is gentleness and preparation. Take photos, use the right tools, and don’t rush the process. And if something doesn’t feel right, don’t hesitate to seek help from a professional. Your key fob is a small but vital part of your vehicle’s security and convenience system—treat it with care, and it will serve you well for years to come.
Frequently Asked Questions
What type of battery does a Toyota RAV4 key fob use?
Most Toyota RAV4 key fobs use a CR2032 3-volt coin cell battery. This is a common, widely available battery found at hardware stores, pharmacies, and online retailers.
Can I open my RAV4 key fob without a screwdriver?
Yes, you can use a plastic prying tool, a guitar pick, or even a credit card to gently separate the casing. The goal is to avoid metal tools that can scratch or crack the plastic.
How often should I replace my key fob battery?
It’s recommended to replace the battery every 2–3 years, or when you notice reduced range or delayed response from the fob. Some models have a low-battery warning light on the dashboard.
Will opening the key fob void my warranty?
Opening the fob for battery replacement or cleaning typically does not void your vehicle warranty. However, if you damage the fob during the process, repairs or replacements may not be covered.
My key fob still doesn’t work after replacing the battery. What now?
Check that the battery is inserted correctly and that the contact points are clean. If it still doesn’t work, the fob may need reprogramming or has internal damage—consult a Toyota dealer.
Can I use a generic key fob for my RAV4?
While generic fobs exist, they often lack full functionality and may not integrate properly with your vehicle’s security system. For best results, use a genuine Toyota key fob programmed by a dealer or certified locksmith.