

Resetting the maintenance required light on your Toyota RAV4 is quick and easy—no mechanic needed. Whether you’ve just changed your oil or completed routine service, this guide walks you through the exact steps for every RAV4 generation, so you can keep your dashboard clean and your mind at ease.
If you’ve just changed the oil in your Toyota RAV4 or completed a routine service, you might be staring at that little “Maintenance Required” light on your dashboard, wondering how to make it go away. Don’t worry—you’re not alone. That persistent yellow or orange light can be annoying, especially when you know you’ve already taken care of the maintenance. The good news? Resetting it is usually a simple DIY task that takes less than two minutes and requires no special tools.
The “Maintenance Required” light—sometimes labeled “MAINT REQD” or “OIL”—is part of Toyota’s scheduled maintenance reminder system. It’s designed to alert you when it’s time for regular service, typically every 5,000 to 10,000 miles, depending on your driving habits and oil type. Once you’ve serviced your vehicle, the system doesn’t automatically know—so it’s up to you to tell it that the job’s done. That’s where the reset comes in.
In this guide, we’ll walk you through the exact steps to reset the maintenance required light on your Toyota RAV4, no matter which generation you drive. Whether you own a rugged early-2000s model or a sleek 2023 hybrid, we’ve got you covered. We’ll break it down by model year, explain common pitfalls, and share pro tips to ensure you get it right the first time. By the end, you’ll be able to confidently reset that light and keep your RAV4 running smoothly—without paying a technician for a two-minute job.
Key Takeaways
- Know Your Model Year: Reset procedures vary between RAV4 generations (2001–2005, 2006–2012, 2013–2018, and 2019+), so always check your vehicle’s year first.
- Use the Trip Meter Button: Most RAV4 models use the trip meter reset button on the instrument cluster to initiate the reset process.
- Turn Ignition On (Not Engine): You only need to turn the key to the “ON” position—don’t start the engine—unless otherwise specified.
- Follow Exact Timing: Holding buttons for the correct duration (usually 5–10 seconds) is critical; too short or too long can prevent a successful reset.
- Confirm the Light Goes Off: After resetting, ensure the maintenance required light disappears from the dashboard to confirm success.
- Reset After Every Service: Always reset the light after oil changes or scheduled maintenance to maintain accurate tracking.
- Consult Owner’s Manual: When in doubt, refer to your RAV4’s owner’s manual for model-specific instructions or warnings.
📑 Table of Contents
Understanding the Maintenance Required Light
Before diving into the reset process, it’s helpful to understand what that little light actually means. The “Maintenance Required” indicator on your Toyota RAV4 isn’t a warning of immediate danger—like a check engine light might be. Instead, it’s a gentle nudge from your vehicle’s onboard computer reminding you that it’s time for routine service.
This system is based on mileage intervals. Most RAV4 models are programmed to trigger the light every 5,000 miles, though some newer models with synthetic oil may go up to 10,000 miles. The light doesn’t monitor oil quality or engine health in real time; it simply counts miles since the last reset. That’s why it’s so important to reset it after every oil change or service—otherwise, it’ll keep blinking even if your car is in perfect condition.
It’s also worth noting that this light is different from the “Check Engine” light. The maintenance light is preventive, while the check engine light indicates a potential mechanical issue that needs immediate attention. Don’t confuse the two! If your check engine light is on, resetting the maintenance light won’t fix the underlying problem.
One common misconception is that the maintenance light means your oil is dirty or low. While low oil can trigger other warnings, the maintenance light is purely a mileage-based reminder. Even if your oil looks clean, the system will still illuminate the light at the preset interval. That’s why resetting it after service is so crucial—it keeps your maintenance schedule accurate and prevents unnecessary anxiety.
Tools and Preparation Needed
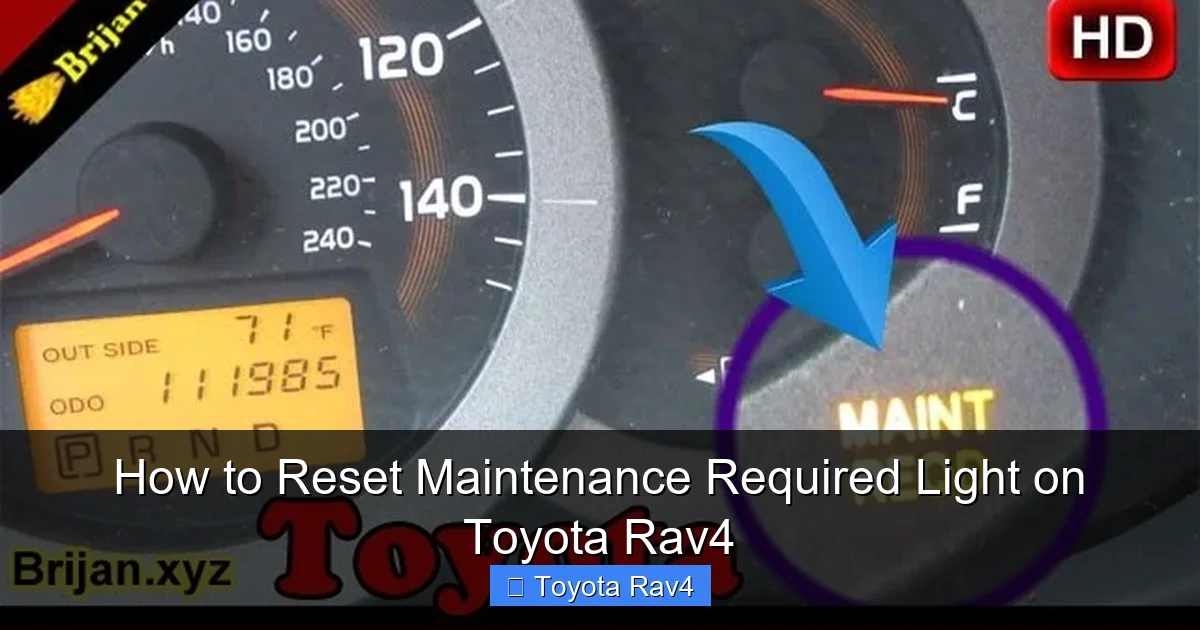
Visual guide about How to Reset Maintenance Required Light on Toyota Rav4
Image source: i.ytimg.com
The beauty of resetting the maintenance required light on a Toyota RAV4 is that you don’t need any special tools. No scan tools, no computers, no trips to the dealership. All you need is your key and about 60 seconds of your time.
Here’s what you’ll need:
– Your vehicle key (or key fob)
– Access to the driver’s seat and ignition
– A few seconds of patience
That’s it! No wrenches, no diagnostic equipment. The process is entirely manual and relies on the buttons and switches already built into your dashboard.
Before you begin, make sure your vehicle is parked on a level surface and the engine is off. You don’t need to start the car—just turn the ignition to the “ON” position. This powers up the dashboard electronics without engaging the engine, which is exactly what you want.
Also, take a quick look at your instrument cluster. Locate the trip meter button—usually a small knob or button near the speedometer labeled “TRIP” or “ODO/TRIP.” This is your main tool for the reset. On some models, it might be on the steering column stalk, but most RAV4s have it on the dashboard.
Finally, double-check that you’ve actually completed the required maintenance. Resetting the light without servicing your vehicle defeats the purpose and could lead to missed oil changes down the road. If you’re unsure, consult your service records or ask your mechanic to confirm.
Step-by-Step Reset Instructions by Model Year
The exact steps to reset the maintenance required light vary slightly depending on your RAV4’s generation. Toyota has updated its dashboard design and electronics over the years, so what works for a 2003 model might not work for a 2020. Below, we’ve broken it down by major model years to ensure you get the right instructions.
2001–2005 Toyota RAV4 (Second Generation)
For early 2000s RAV4 models, the reset process is straightforward but requires precise timing.
1. Turn the ignition to the “ON” position (do not start the engine).
2. Press and hold the trip meter reset button on the instrument cluster.
3. While holding the button, turn the ignition to “OFF.”
4. Continue holding the button for about 5 seconds after turning the key off.
5. Turn the ignition back to “ON” while still holding the button.
6. Keep holding until the maintenance required light begins to flash, then release.
7. The light should turn off, indicating a successful reset.
Tip: If the light doesn’t flash, try repeating the process. Timing is critical—don’t release the button too early.
2006–2012 Toyota RAV4 (Third Generation)
This generation introduced a slightly different method, but it’s still simple.
1. Turn the ignition to “ON.”
2. Press the trip meter button repeatedly until the odometer displays “Trip A” or “Trip B.”
3. Turn the ignition to “OFF.”
4. Press and hold the trip meter button.
5. Turn the ignition back to “ON” while holding the button.
6. Continue holding for about 10 seconds until the maintenance light flashes and then turns off.
7. Release the button.
Note: Some 2009–2012 models may require you to hold the button until the odometer resets to zero, then release.
2013–2018 Toyota RAV4 (Fourth Generation)
The fourth-gen RAV4 uses a more standardized method that’s consistent across most Toyota models.
1. Turn the ignition to “ON.”
2. Press the trip meter button to display “Trip A.”
3. Turn the ignition to “OFF.”
4. Press and hold the trip meter button.
5. Turn the ignition back to “ON” while holding the button.
6. Keep holding until the maintenance required light flashes (usually after 5–7 seconds).
7. Once it flashes, release the button. The light should turn off.
Pro Tip: If the light doesn’t flash, try turning the ignition off and on again before repeating. Sometimes the system needs a reset cycle.
2019–Present Toyota RAV4 (Fifth Generation)
The latest RAV4 models, including the hybrid versions, use a digital display and may require a slightly different approach.
1. Turn the ignition to “ON.”
2. Use the steering wheel controls to navigate to the “Settings” menu on the multi-information display (MID).
3. Scroll to “Vehicle Settings” > “Maintenance” > “Reset.”
4. Confirm the reset when prompted.
5. The maintenance required light should turn off.
Alternatively, if your RAV4 has a physical trip button:
1. Turn ignition to “ON.”
2. Press and hold the trip meter button for 10–15 seconds.
3. The light should flash and then turn off.
Note: On some 2021+ models, the reset may only be possible through the touchscreen or MID. Check your owner’s manual if the button method doesn’t work.
Troubleshooting Common Issues
Even with clear instructions, things don’t always go as planned. Here are some common problems and how to fix them.
The Light Won’t Turn Off
If you’ve followed the steps correctly but the light remains on, try repeating the process. Timing is crucial—holding the button too briefly or too long can prevent the reset. Also, ensure the ignition is fully in the “ON” position (dashboard lights should be on) but the engine is not running.
The Light Flashes But Doesn’t Turn Off
A flashing light usually means the system is in reset mode but hasn’t completed the cycle. Hold the button a little longer—up to 15 seconds on newer models. If it still doesn’t work, turn the ignition off, wait 30 seconds, and try again.
No Trip Button or Digital Menu
Some older RAV4s or base trims may lack a trip button or digital display. In rare cases, you may need to disconnect the battery for 10 minutes to reset the system. However, this should be a last resort, as it can reset other settings like radio presets and clock.
Hybrid Models Behave Differently
Toyota RAV4 Hybrid models (2019+) often require the digital menu method. If the button method fails, use the steering wheel controls to access the maintenance reset option in the MID.
Check for Other Warning Lights
If the maintenance light won’t reset and other warning lights (like check engine or oil pressure) are on, there may be an actual issue. In that case, have your vehicle inspected by a professional.
Tips for Maintaining Your RAV4
Resetting the maintenance light is just one part of keeping your RAV4 in top shape. Here are a few extra tips to extend the life of your vehicle and avoid unnecessary repairs.
Stick to the Maintenance Schedule
Toyota recommends regular oil changes every 5,000 to 10,000 miles, depending on driving conditions. Use high-quality synthetic oil if your model supports it. Also, rotate your tires every 5,000 miles and check fluid levels monthly.
Keep Records
Maintain a log of all services, including oil changes, tire rotations, and brake inspections. This helps track when the next service is due and can increase your car’s resale value.
Use Genuine or OEM Parts
While aftermarket parts are cheaper, OEM (Original Equipment Manufacturer) parts are designed specifically for your RAV4 and often last longer.
Don’t Ignore Small Issues
A squeaky brake or unusual noise might seem minor, but it could signal a bigger problem. Address issues early to avoid costly repairs later.
Drive Smart
Avoid aggressive driving, excessive idling, and overloading your RAV4. Smooth acceleration and braking reduce wear on the engine, transmission, and brakes.
Conclusion
Resetting the maintenance required light on your Toyota RAV4 is a simple yet essential task that every owner should know how to do. It takes less than two minutes, requires no special tools, and helps keep your vehicle’s maintenance schedule accurate. Whether you drive a classic 2003 RAV4 or a brand-new 2024 hybrid, the process is straightforward once you know the right steps for your model year.
By following the instructions in this guide, you can confidently reset that pesky light after every oil change or service. No more guessing, no more trips to the dealership. Just a clean dashboard and the peace of mind that comes from knowing your RAV4 is well cared for.
Remember, the maintenance light is there to help you—not hassle you. Reset it regularly, stay on top of your service schedule, and your RAV4 will reward you with years of reliable performance. So the next time that light pops up, don’t stress. Grab your keys, follow the steps, and get back to enjoying the ride.
Frequently Asked Questions
How often should I reset the maintenance required light on my Toyota RAV4?
You should reset the light after every oil change or scheduled maintenance, typically every 5,000 to 10,000 miles. This ensures the reminder system stays accurate and doesn’t falsely alert you.
Can I reset the maintenance light without an oil change?
Technically, yes—but it’s not recommended. The light is meant to track service intervals, so resetting it without performing maintenance defeats its purpose and could lead to missed oil changes.
Why won’t my maintenance light turn off after resetting?
This usually happens due to incorrect timing or not holding the button long enough. Try repeating the process, ensuring you hold the trip button for the full duration (usually 5–15 seconds depending on the model).
Do I need a scan tool to reset the maintenance light on a Toyota RAV4?
No. Unlike some vehicles, the RAV4 allows manual reset using the trip meter button or dashboard menu—no scan tool or dealership visit required.
Is the reset process the same for RAV4 Hybrid models?
Mostly, but 2019+ hybrid models often require using the digital menu via steering wheel controls. The button method may not work on all hybrid trims.
What if my RAV4 doesn’t have a trip meter button?
Some base models or older trims may lack a physical button. In that case, check your owner’s manual or try disconnecting the battery for 10 minutes as a last resort—though this may reset other settings.